Install Ubuntu Server 18.04.4 on encrypted disks with RAID 1, GRUB, and legacy BIOS
14 Apr 2020 - Help improve this postIn this guide I explain how to install Ubuntu Server 18.04.4 on a (bare metal) server with two disk in RAID 1 mode. You will loose all data on your server if you follow this guide. I will use a full disk encryption with dm-crypt. My hosting provider does not support EUFI so I used legacy BIOS to run the server. This means you can’t use disks larger than x TB. We will not use LUKS as it’s another layer of complexity to the server.
Disclaimer: I’m not a server expert. I installed a few bare metal servers in my life. The biggest reason for this guide is to use it myself for my next server install. I couldn’t find a good guide on installing Ubuntu Server with encrypted disks in RAID mode so I grabbed information from all around the internet. Please be careful when using this guide yourself.
Before you start it’s wise to check if our requirements align. In this guide we encrypt the disks as much as possible. This means that you need to enter a password on boot. You can use tools like Mandos, a system for allowing servers with encrypted root file systems to reboot unattended and/or remotely. I prefer Dropbear, a very small SSH program, that you can run via the initial ramdisk (initramfs). This means we are able to allow external connections via SSH before you need to enter your encryption password. By following this guide you will delete all data on your server. We also use legacy BIOS, change the steps I took (eg. BIOS boot partition) for legacy BIOS into something else if needed.
Download the correct ISO image
To install a new OS on a (bare metal) server you need to mount an image to the server. Most providers allow you to mount an image via their customer portal or a IPMI (Intelligent Platform Management Interface) such as DRAC for Dell, iLO for HP.
Once you have access to your server via that interface you can mount an image to it. If you install Ubuntu Server you’ll need the cdimage (not the live version). Sometimes this installer is called the “Alternative Ubuntu Server installer” or “Alternative installer”.
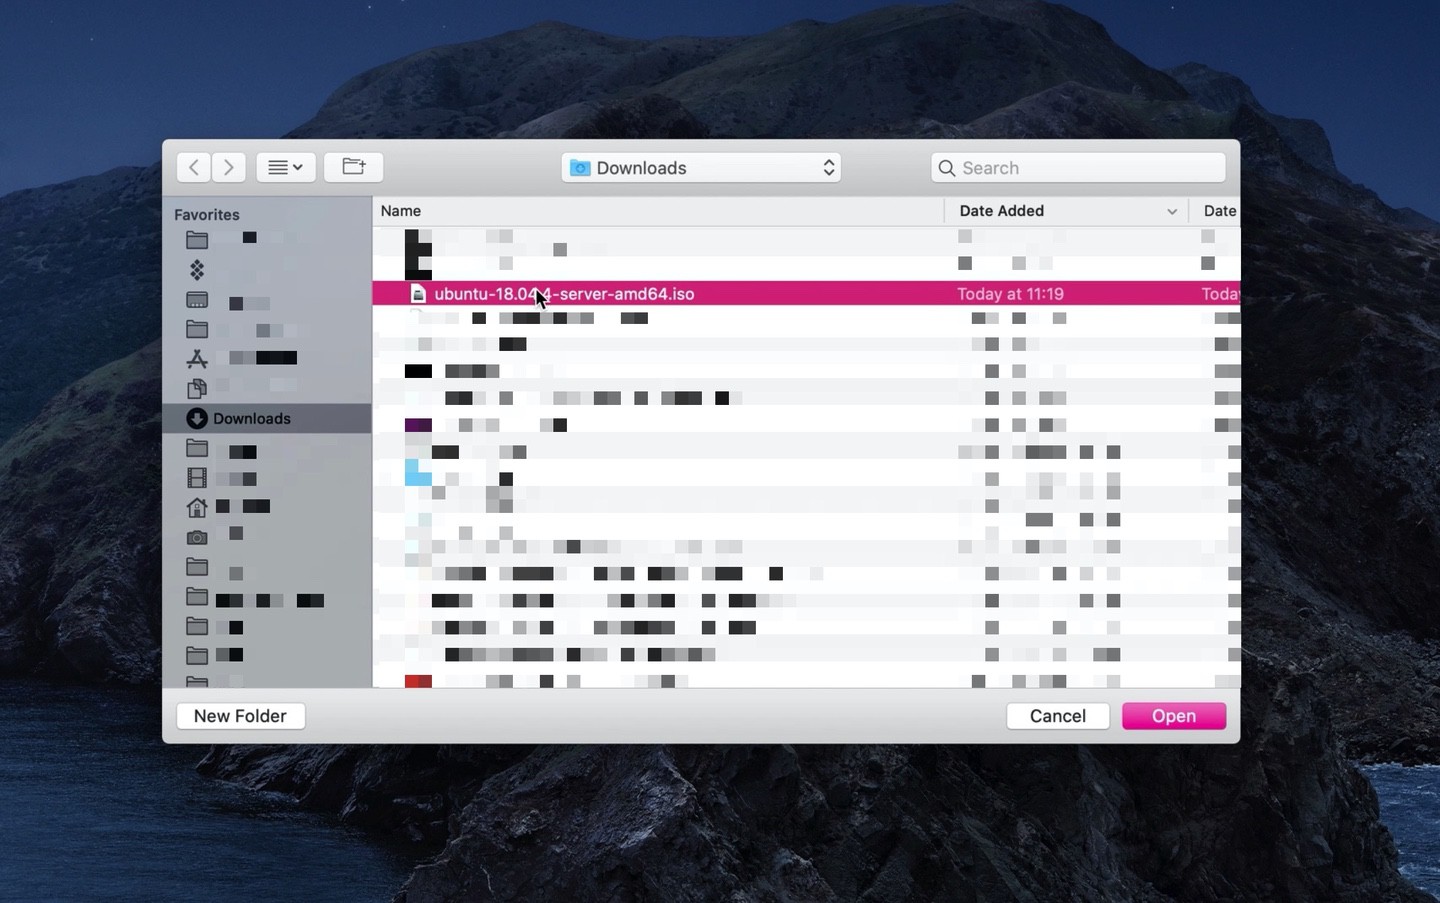
Pick a version from http://cdimage.ubuntu.com/releases/. At the time of writing I picked http://cdimage.ubuntu.com/releases/18.04/release/ubuntu-18.04.4-server-amd64.iso. Link the ISO to your server via the control panel or the IPMI.
Mount the ISO image to your server
In my example I’m using the iLO Integrated Remote Console. This looks likely different for you depending on your hosting provider, but you get the gist:
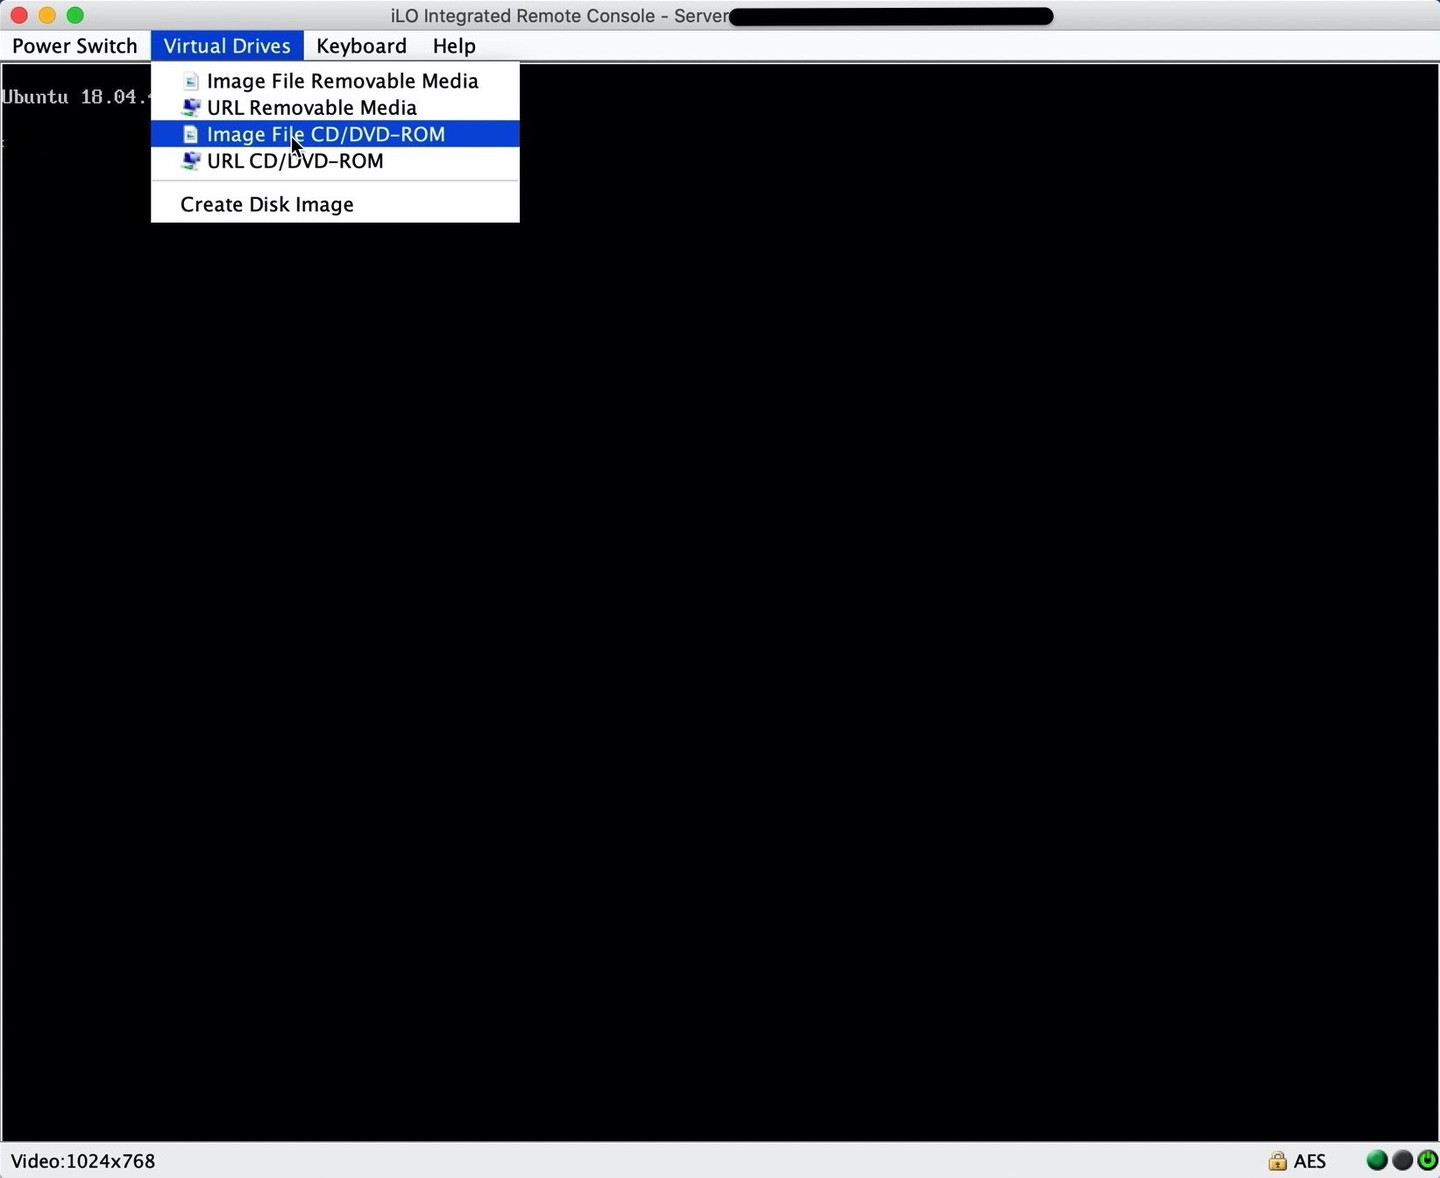
Select the ISO you downloaded as Image File for CD/DVD-ROM:
Legacy BIOS
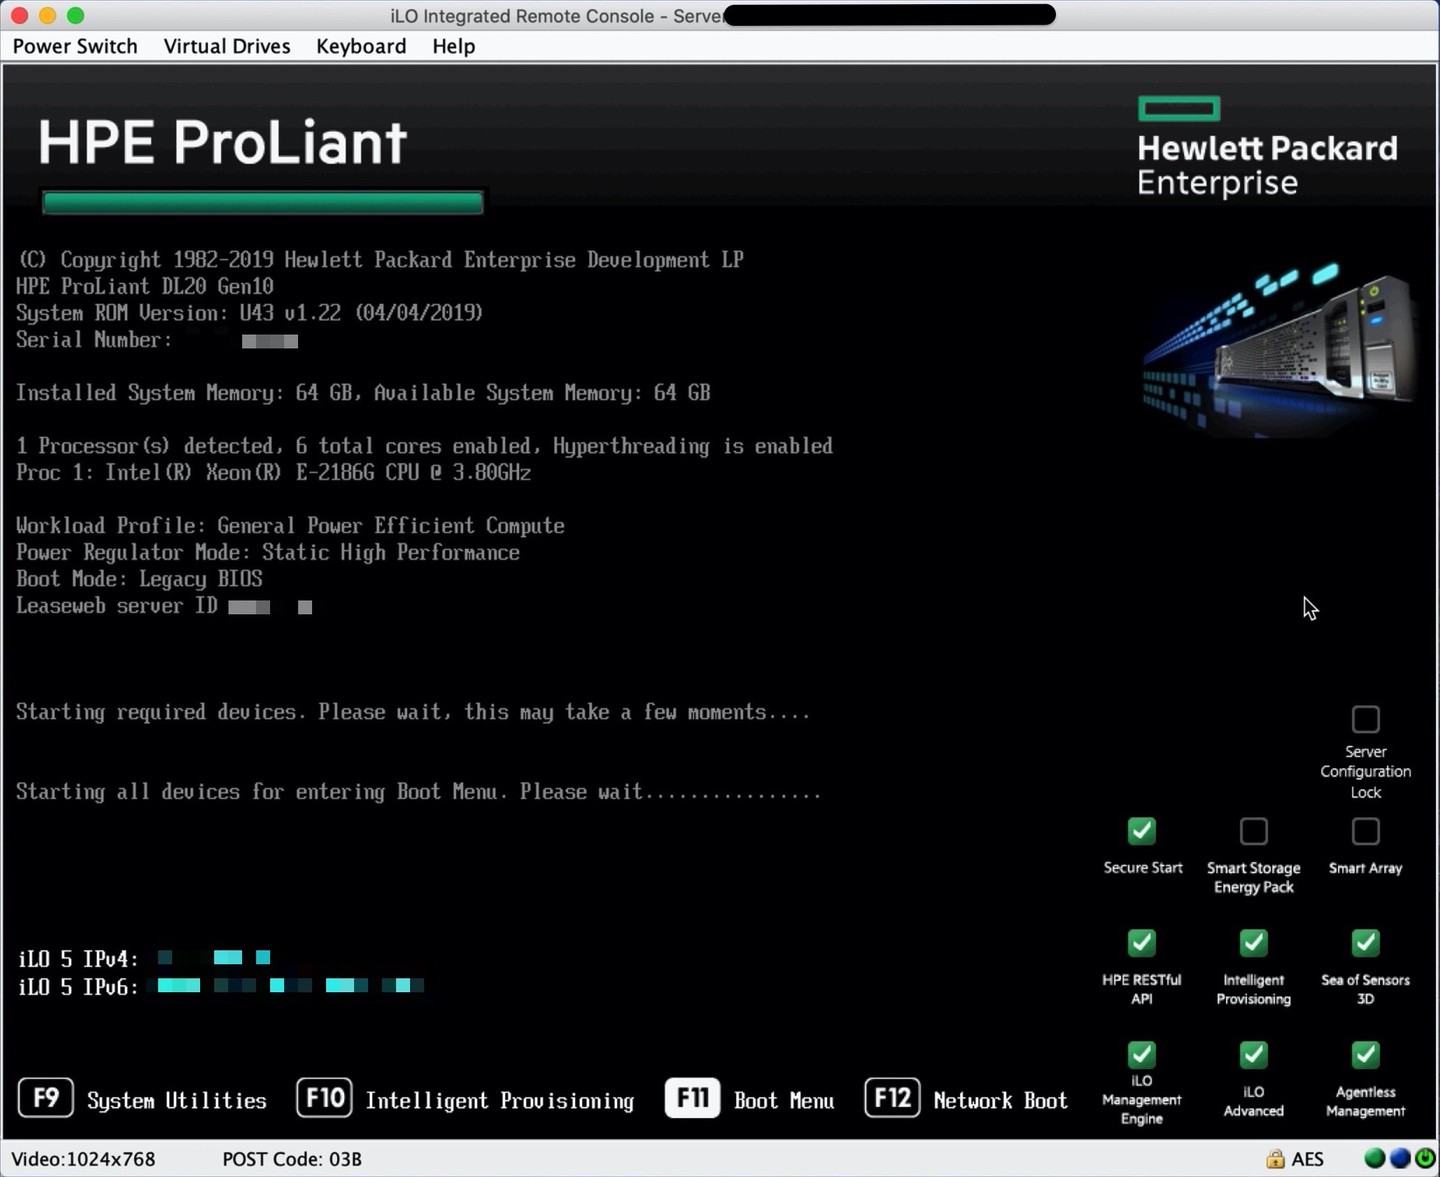
I had to change the boot method to legacy BIOS because my hosting provider didn’t support EUFI at the time. Note that other steps in this guide like partitioning is written for Legacy BIOS, not EUFI. You can do this on boot when you hit one of the keyboard keys to enter boot setup. In case of this screen it would have been F9:
Boot from ISO/CD
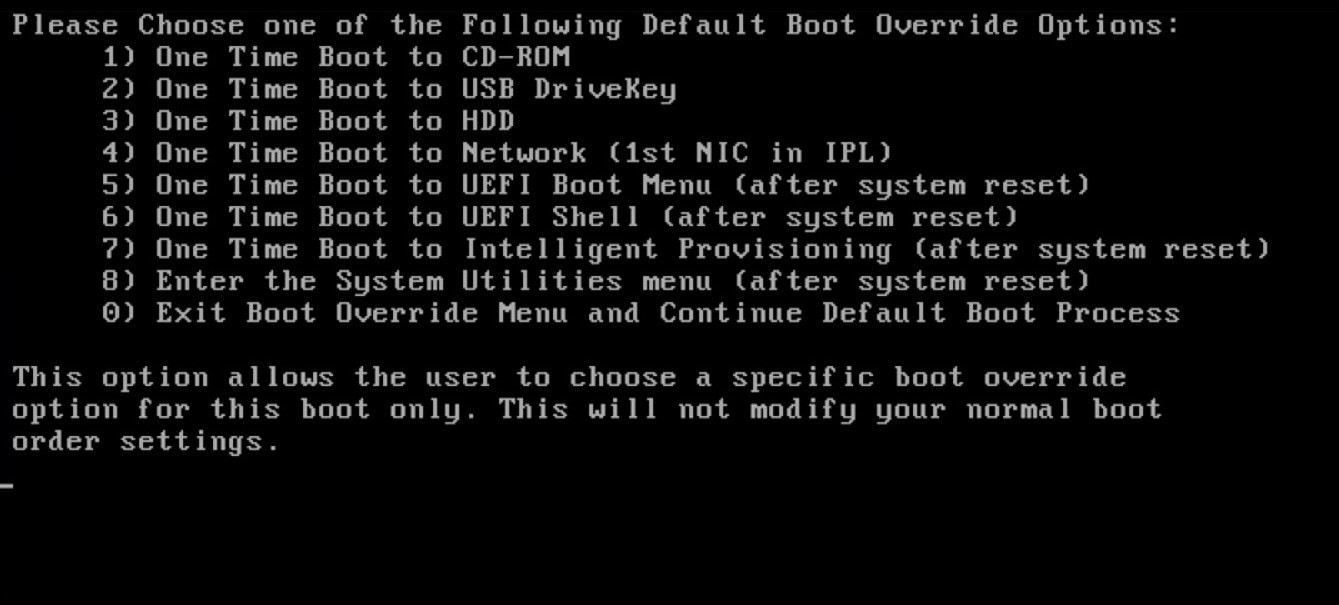
Make sure you boot from the CD. The ways you can boot into your machine is different for some manufacturers. In my case I hit F11 for the boot menu:
Then I get a option to boot from the CD. In my case I need to press 1:
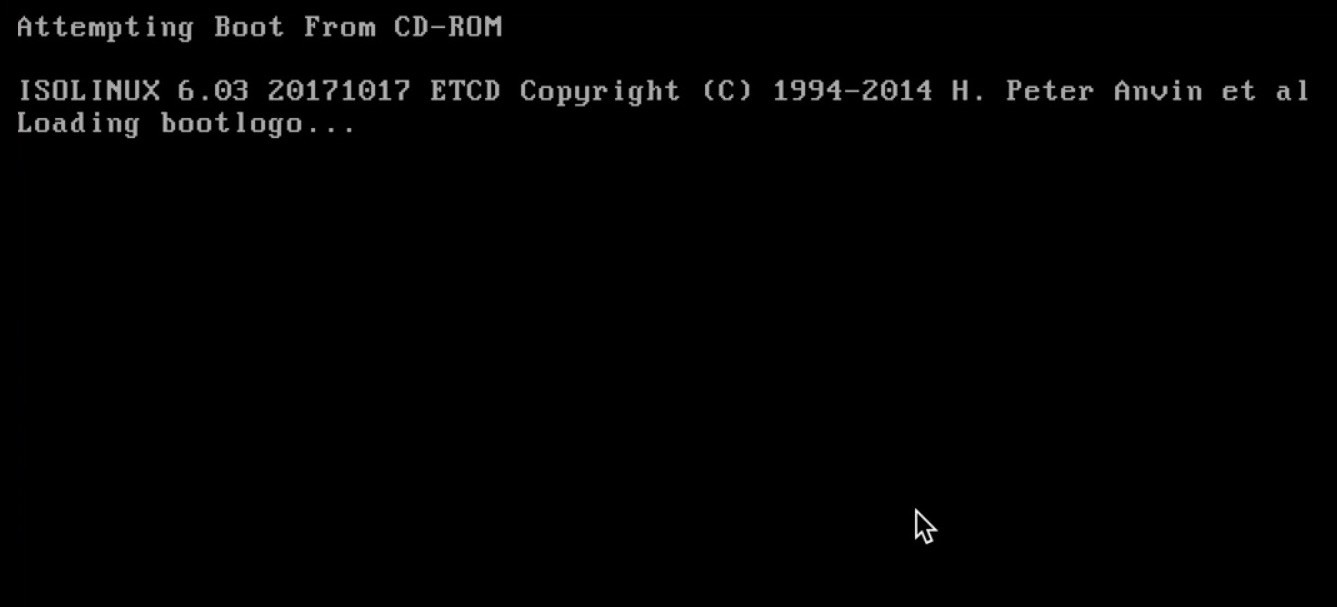
It starts booting from the CD, yea!
Install Ubuntu via the installer
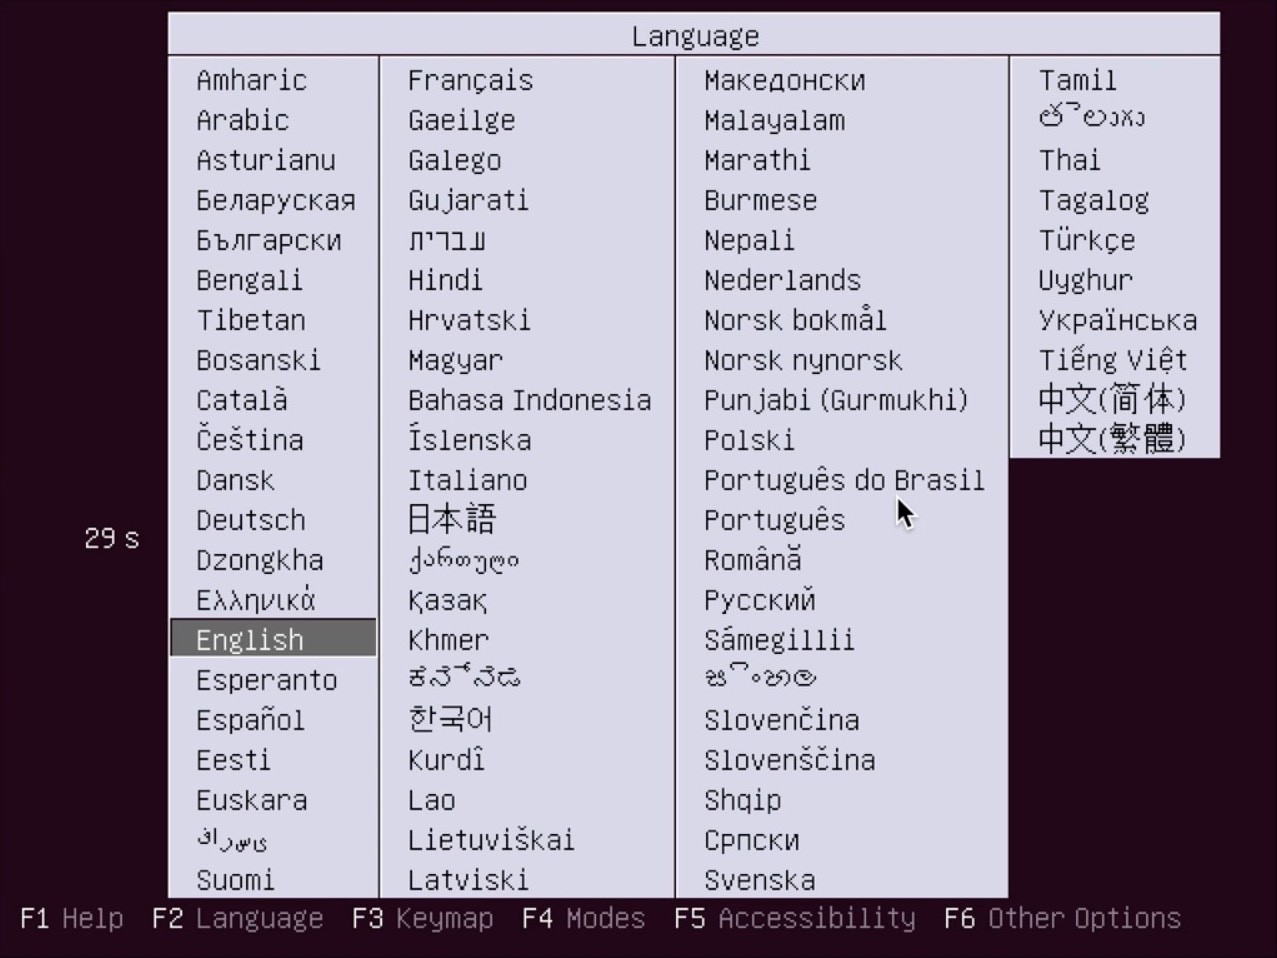
Select your language and hit Enter:
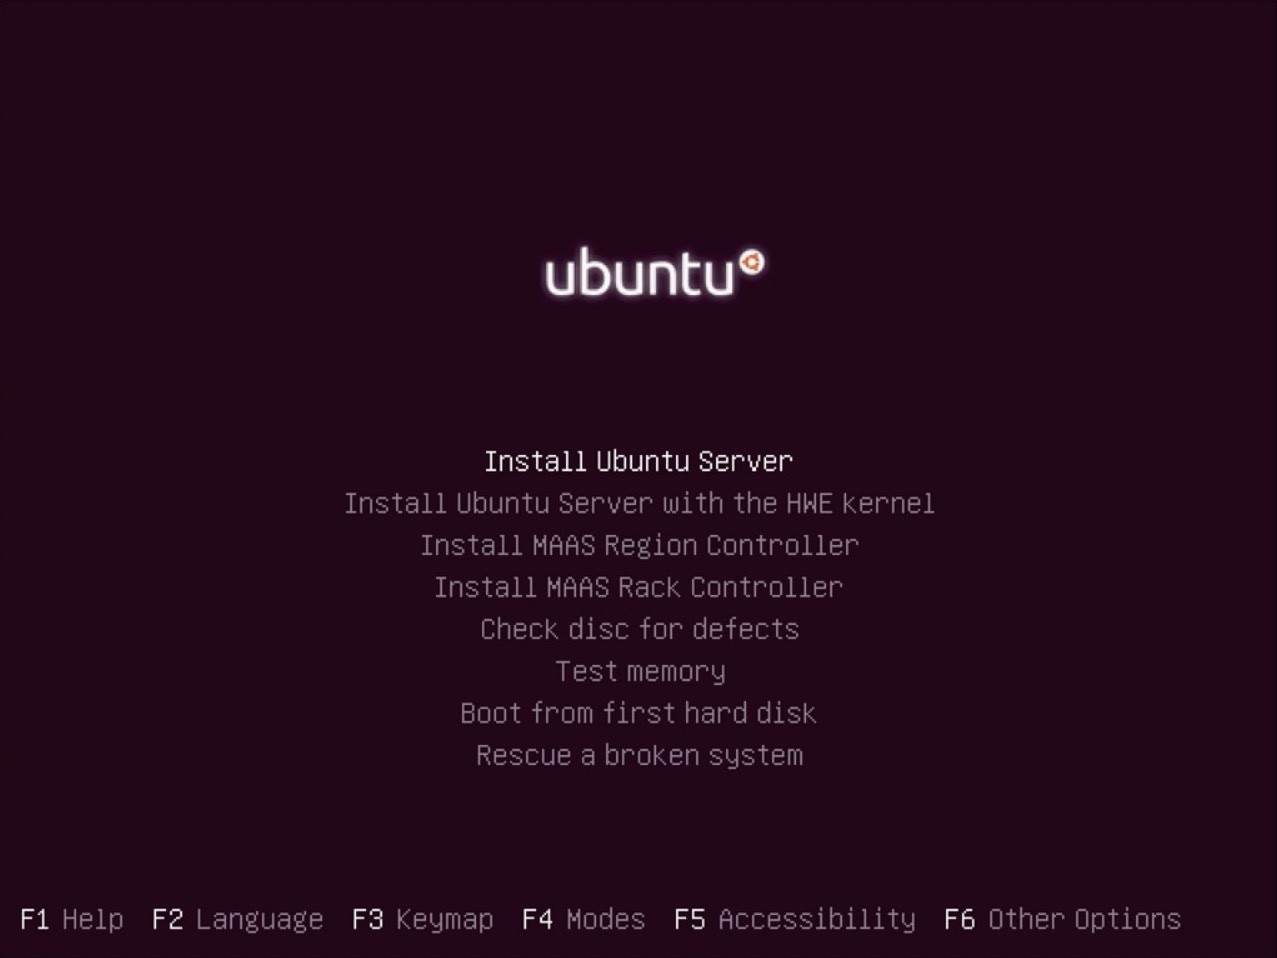
Select “Install Ubuntu Server” by hitting Enter:
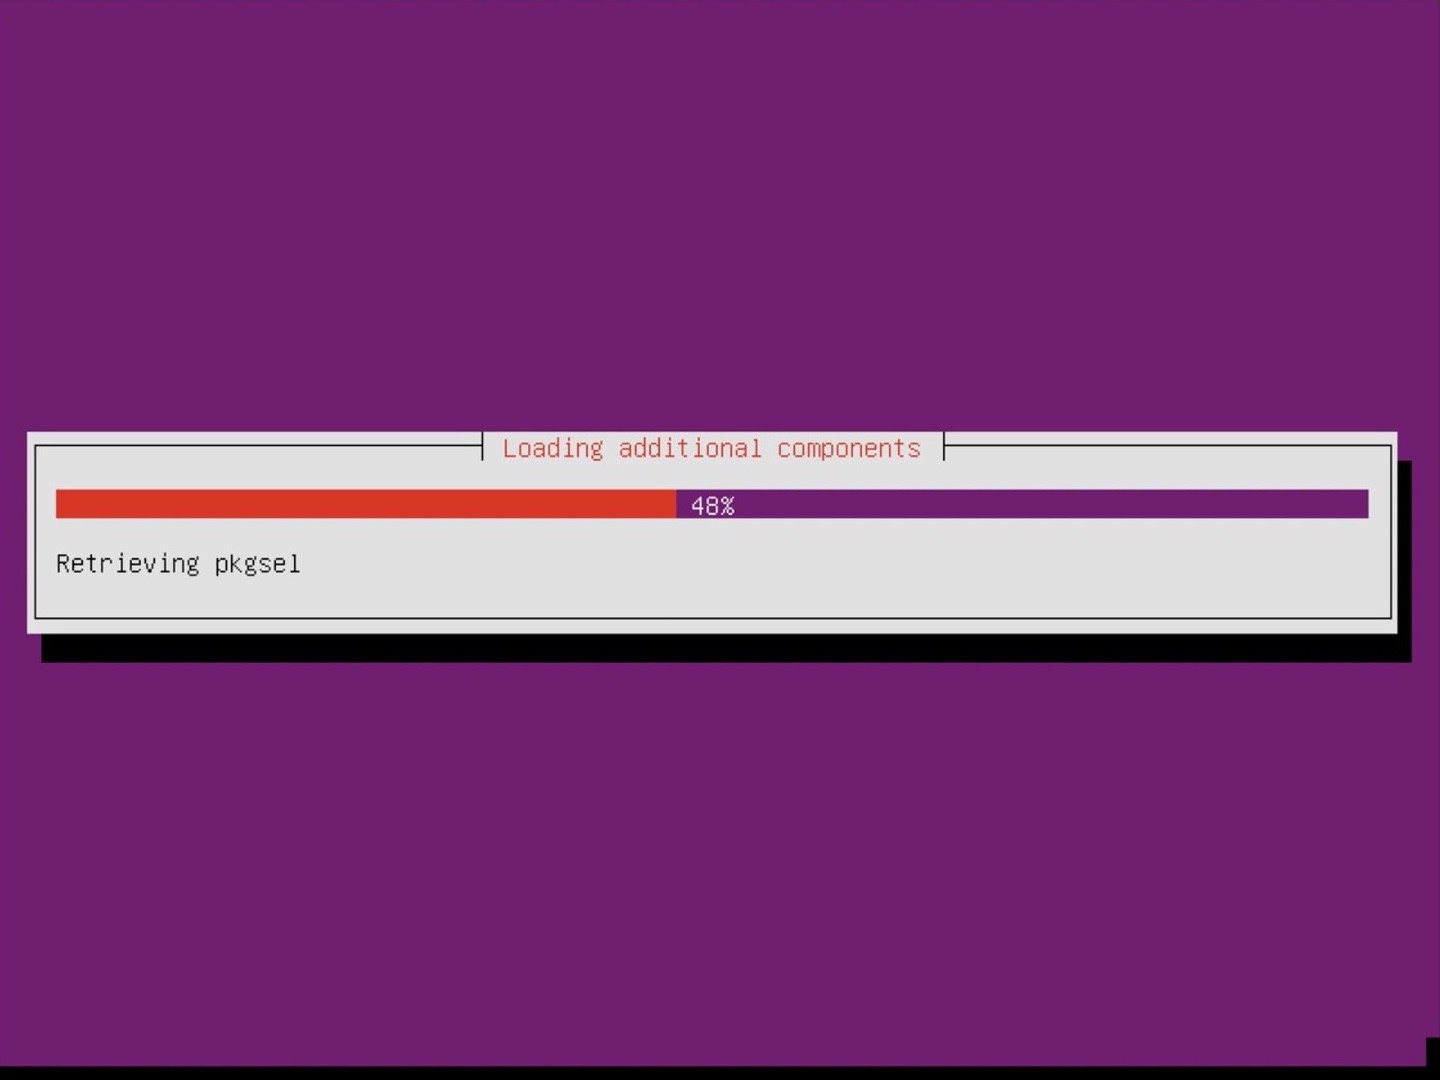
In the next few screens you can select your language, keyword, and time zone. I omitted these screens because you probably have seen them already a few times. Just follow your gut. After these settings are done you see the installer loading:
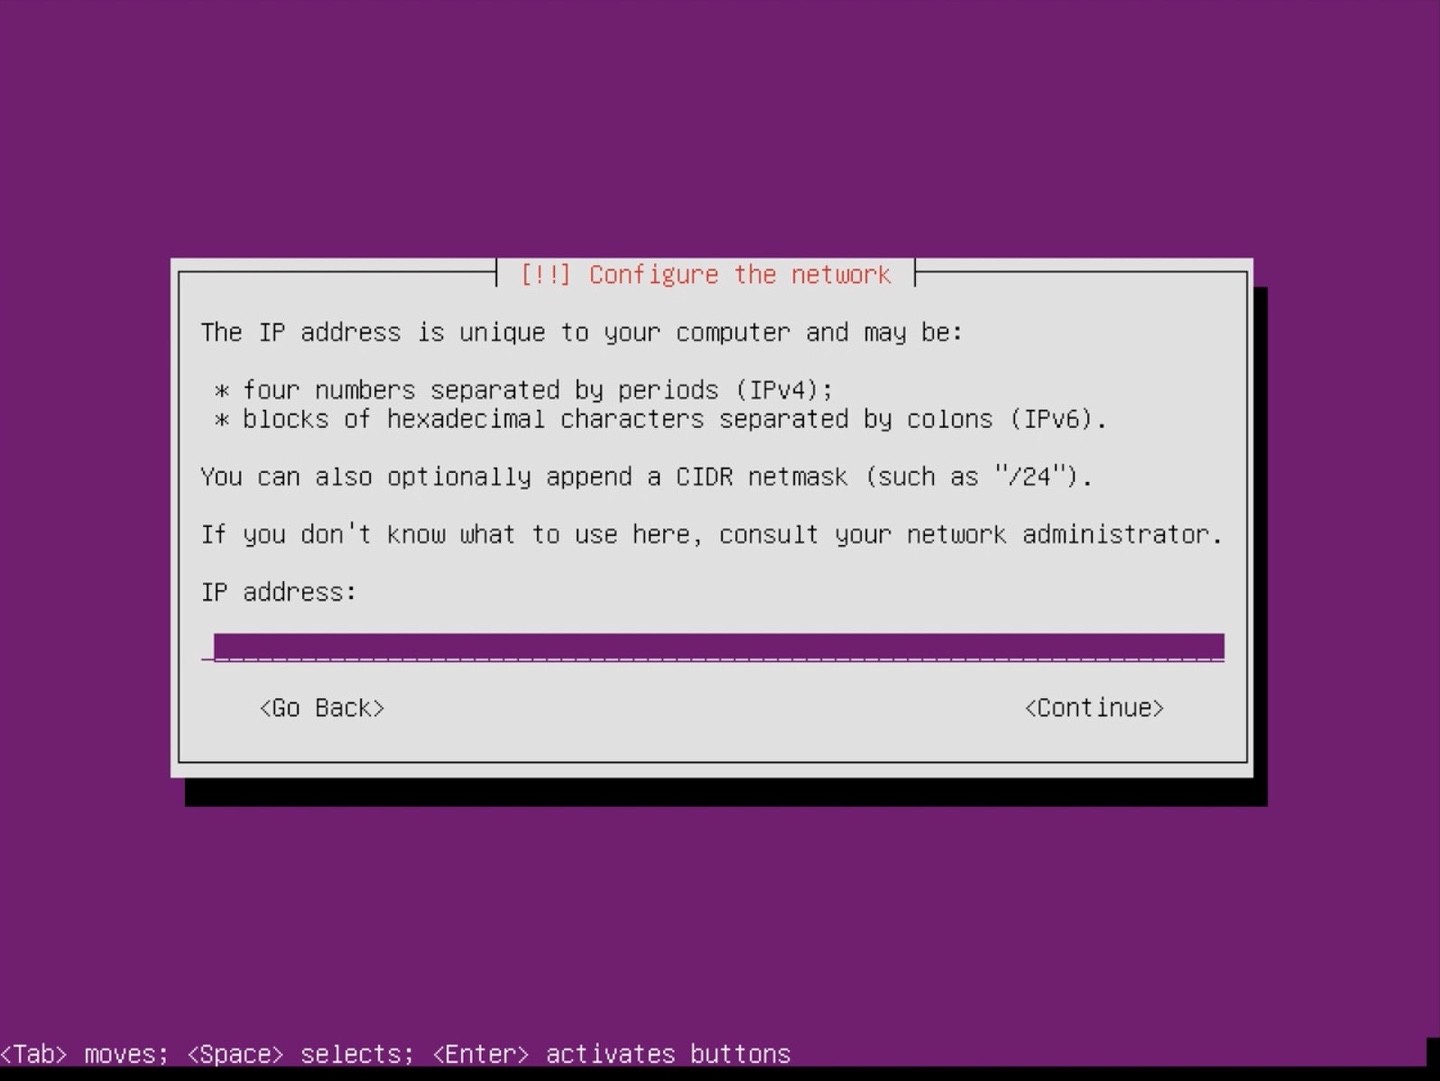
After loading it asked me to configure the network. You will need a get the IP address from your hosting provider. It’s probably in the written somewhere in the dashboard. You might add an CIDR netmask like /24 to it. Ask your hosting provider or just try it without:
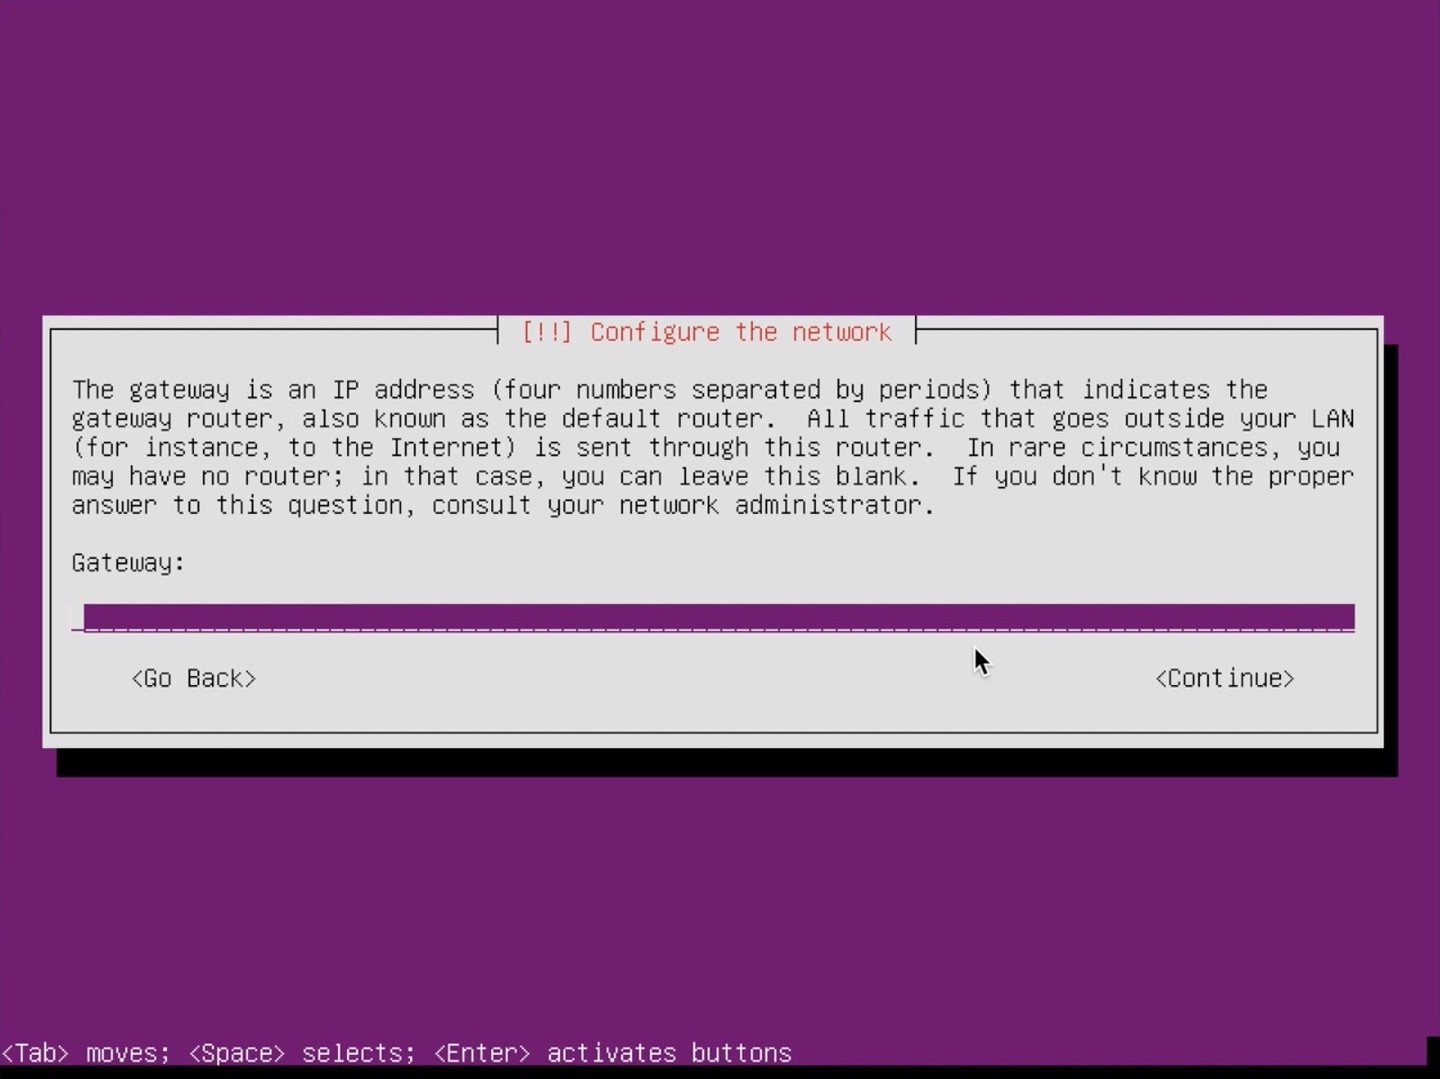
Enter the gateway of your network, this is something your provider should offer you:
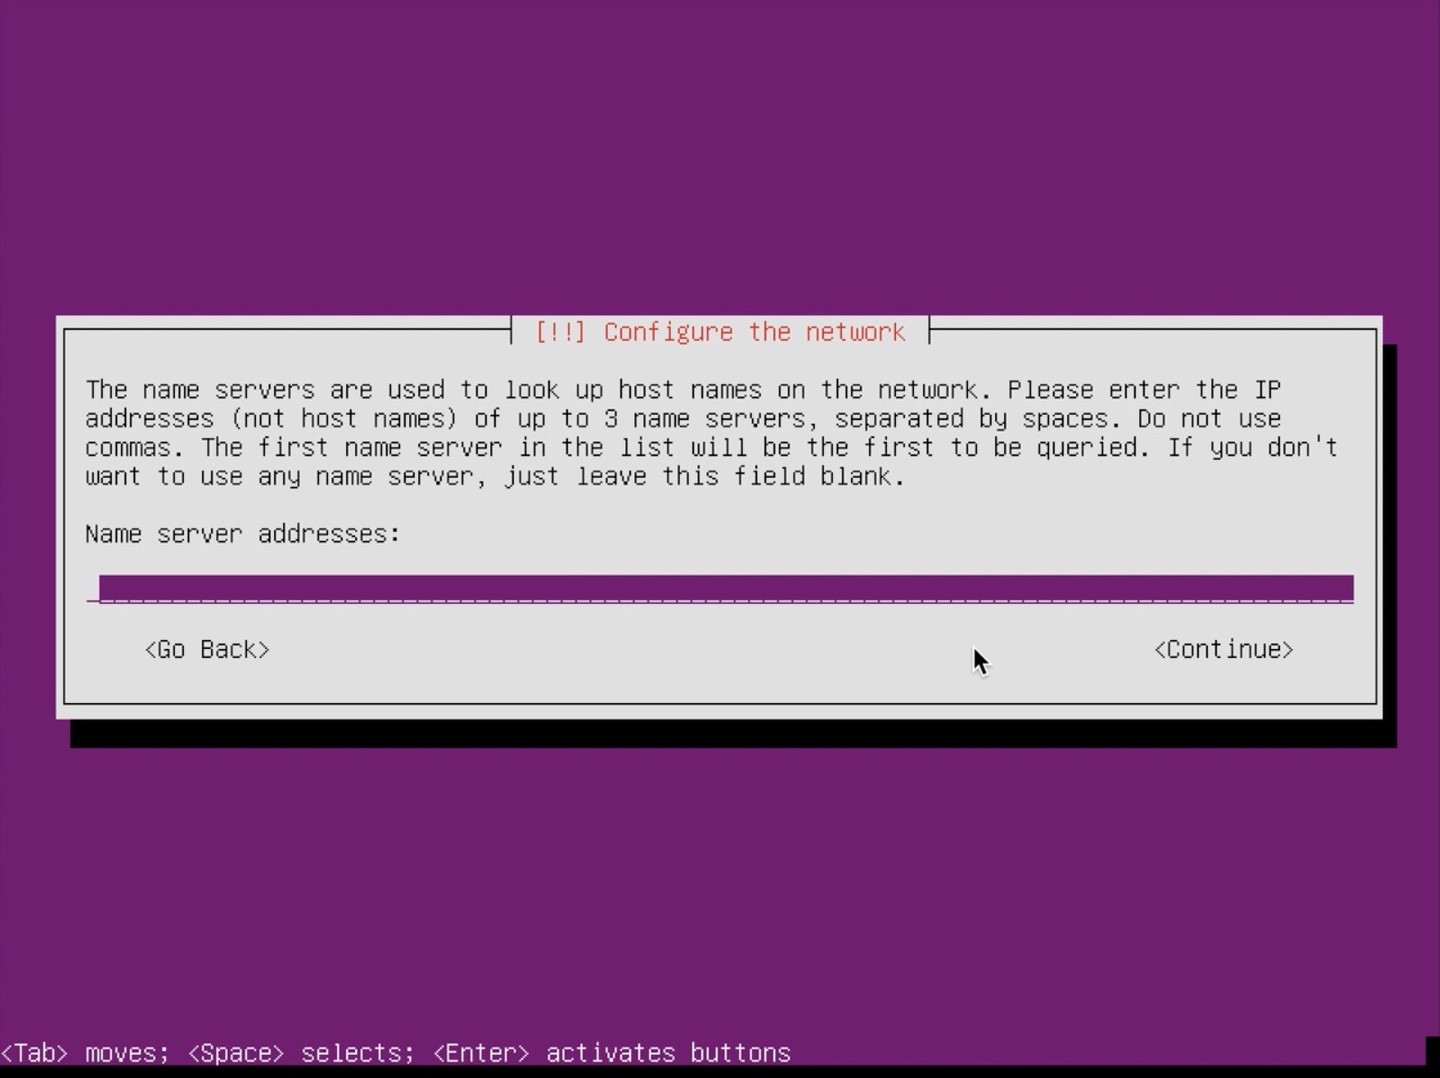
Enter a name server. If you don’t know what to use or your hosting provider doesn’t have any you could use a public one like the privacy friendly one from CloudFlare: 1.1.1.1 1.0.0.1 (separated by a space, not comma!) If you need to connect to local servers on the local network, it’s probably better to use the name servers of your hosting provider.
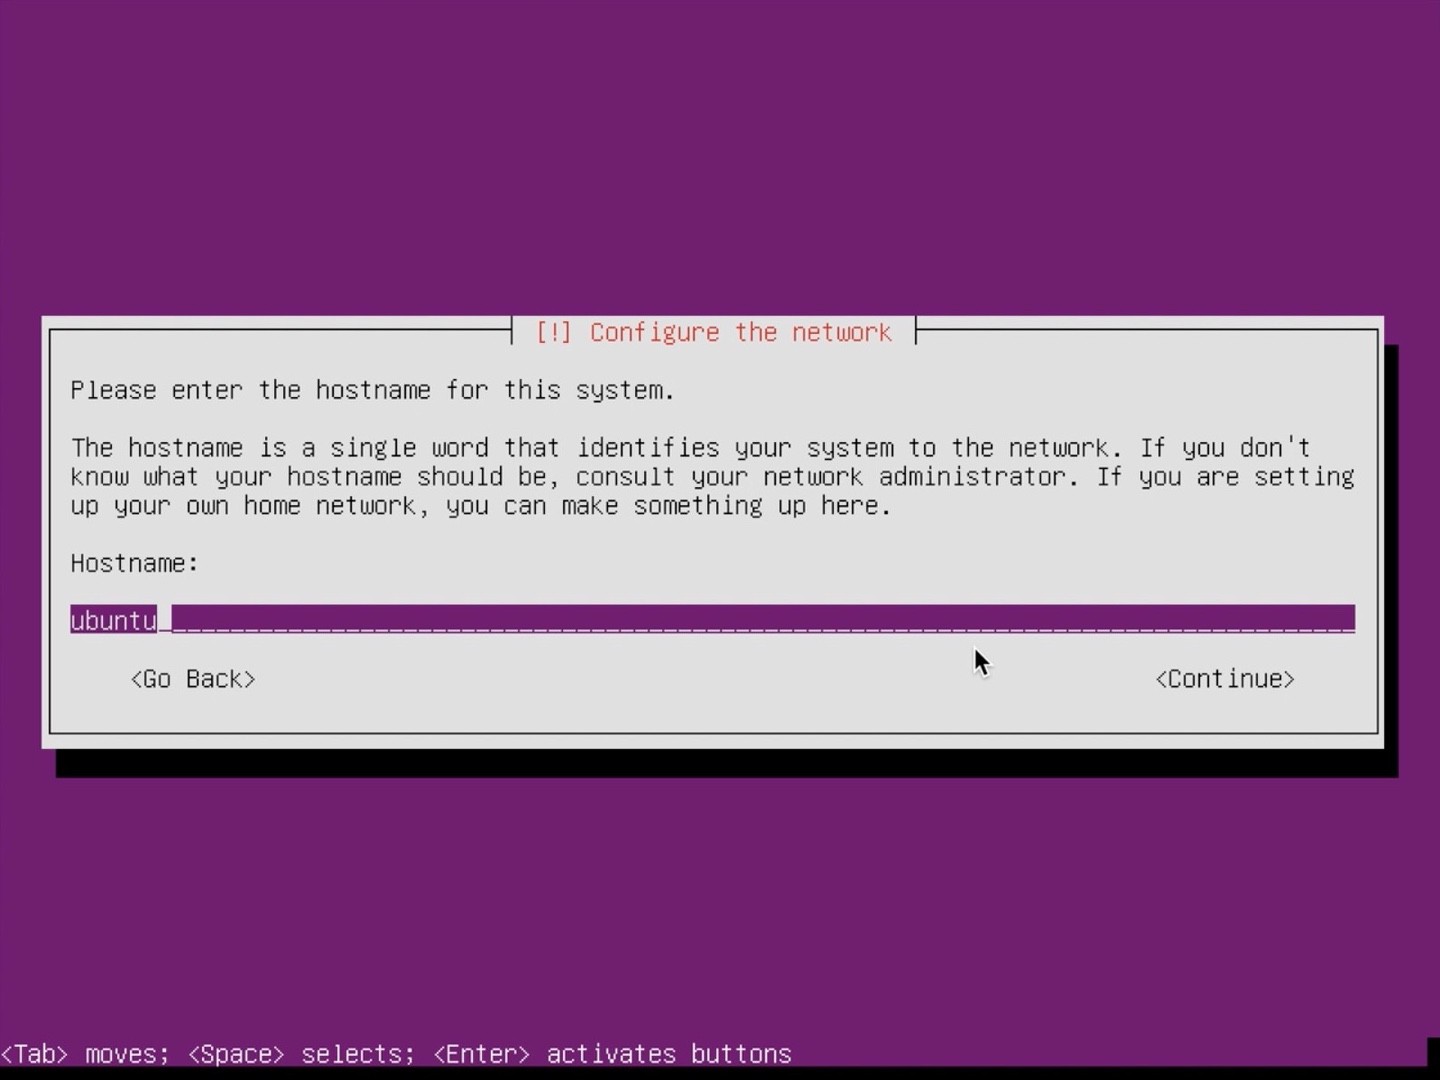
Enter a hostname. This is the name of your computer. You can change it later, but it’s a bit cumbersome, so better pick a good name now:
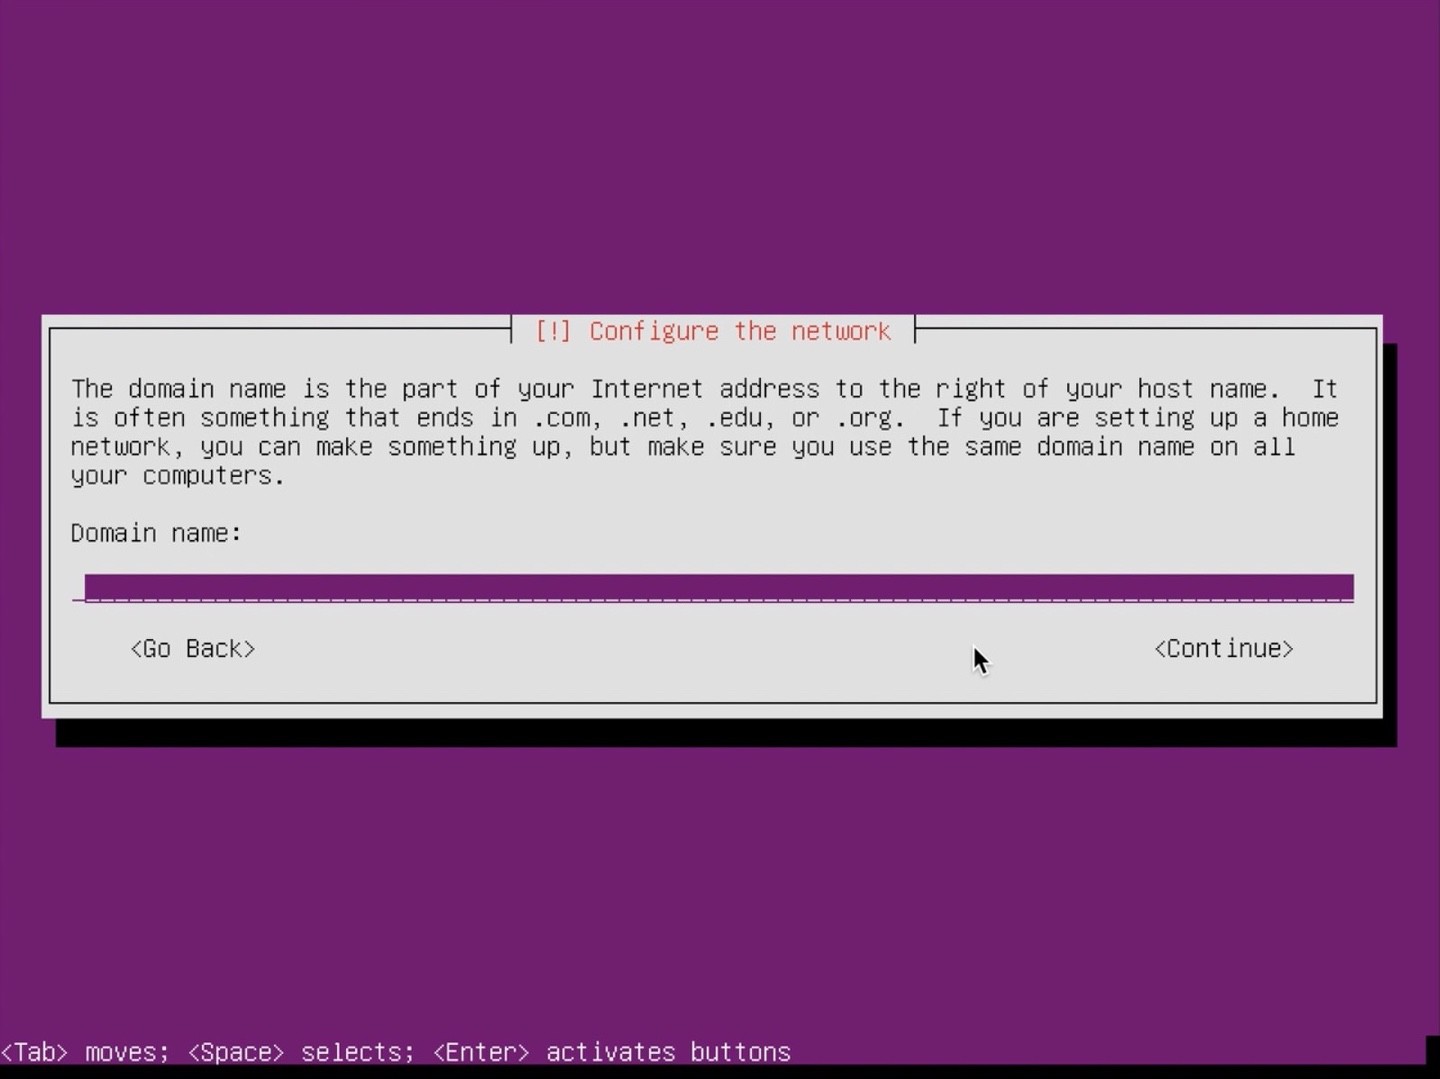
If your network requires a domain, you can enter it here (I usually leave it blank):
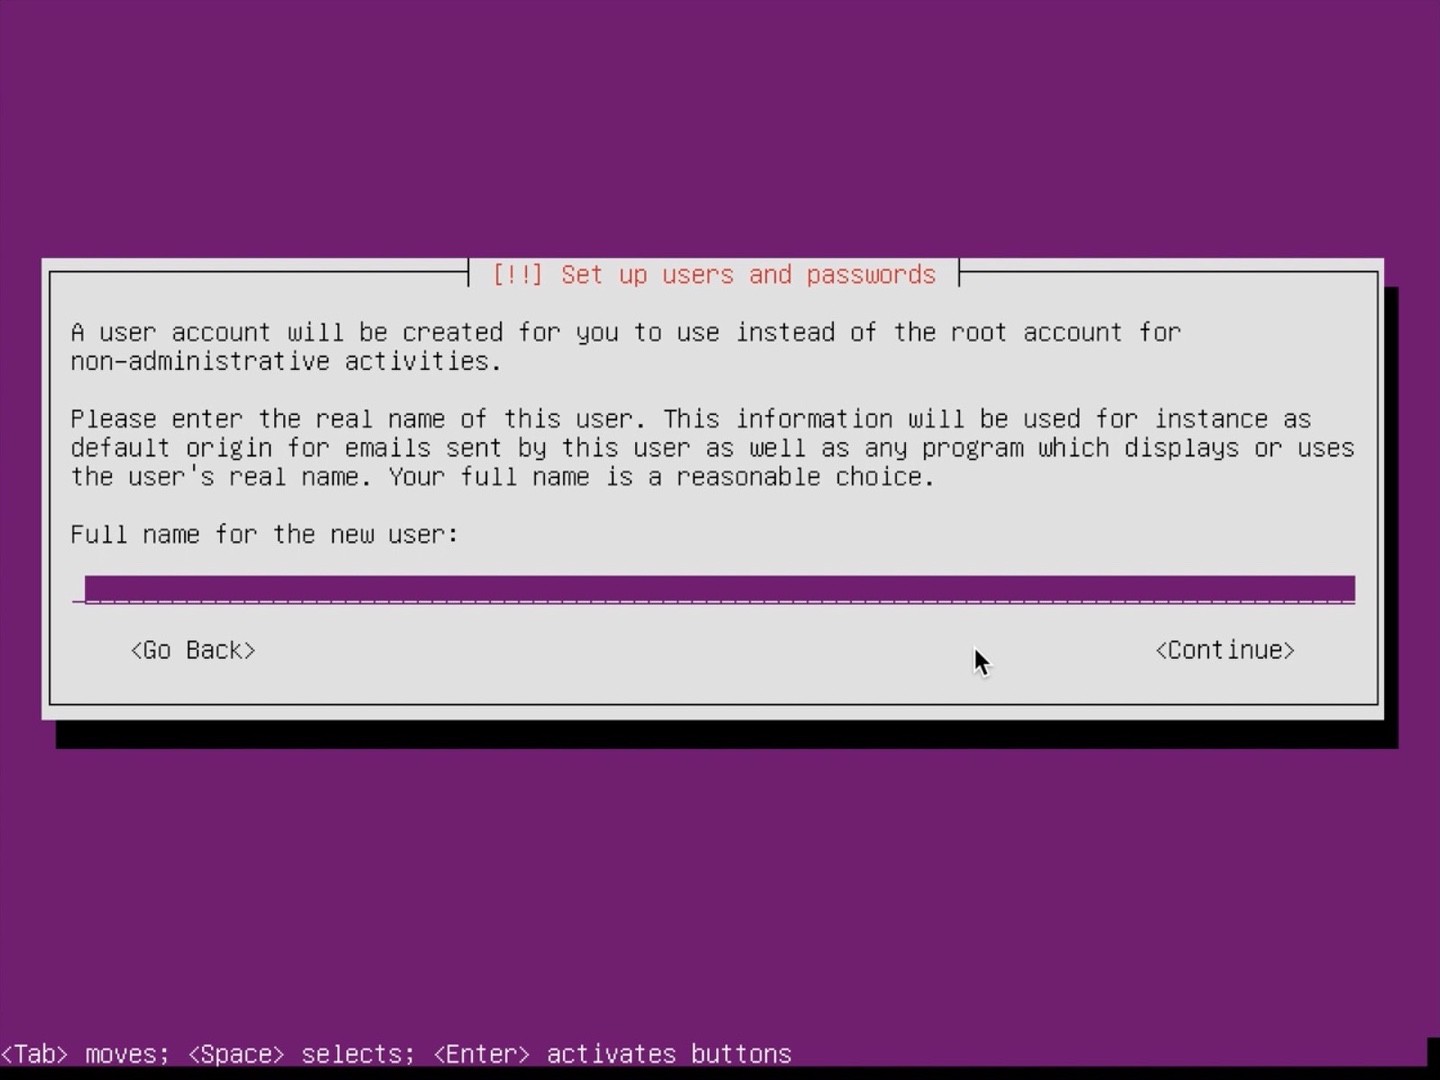
Enter a name for the user/server. This is likely the name where you remotely login with.
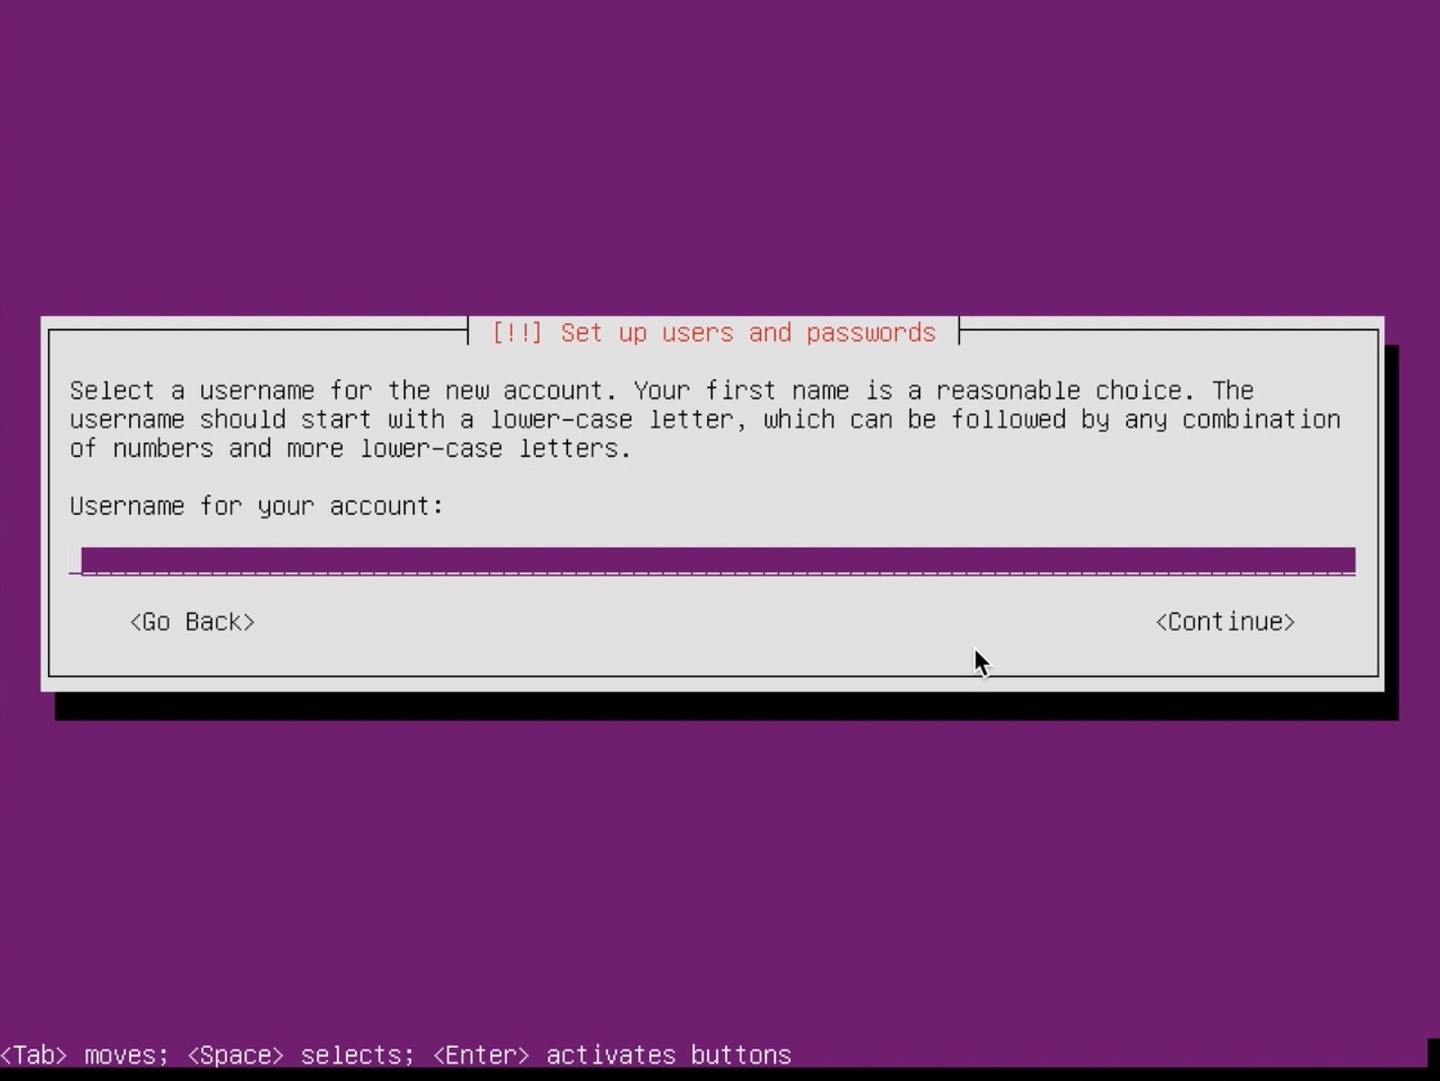
Enter a user name (the current input is based on what you filled in in the previous step):
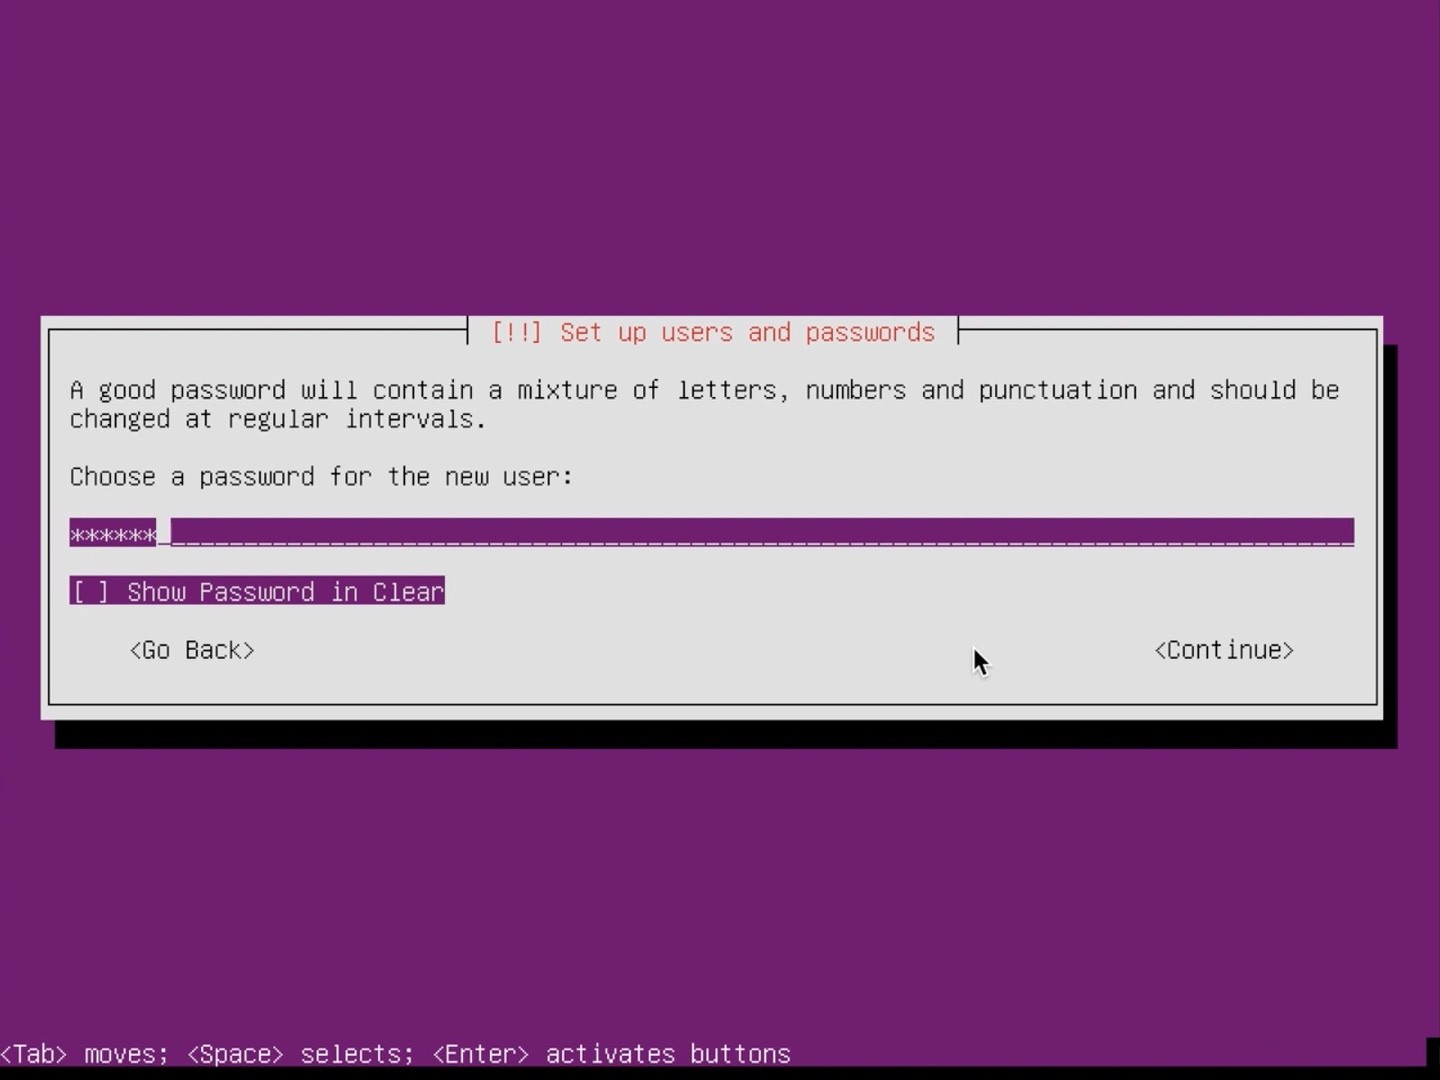
Enter a password, you can always change it later:
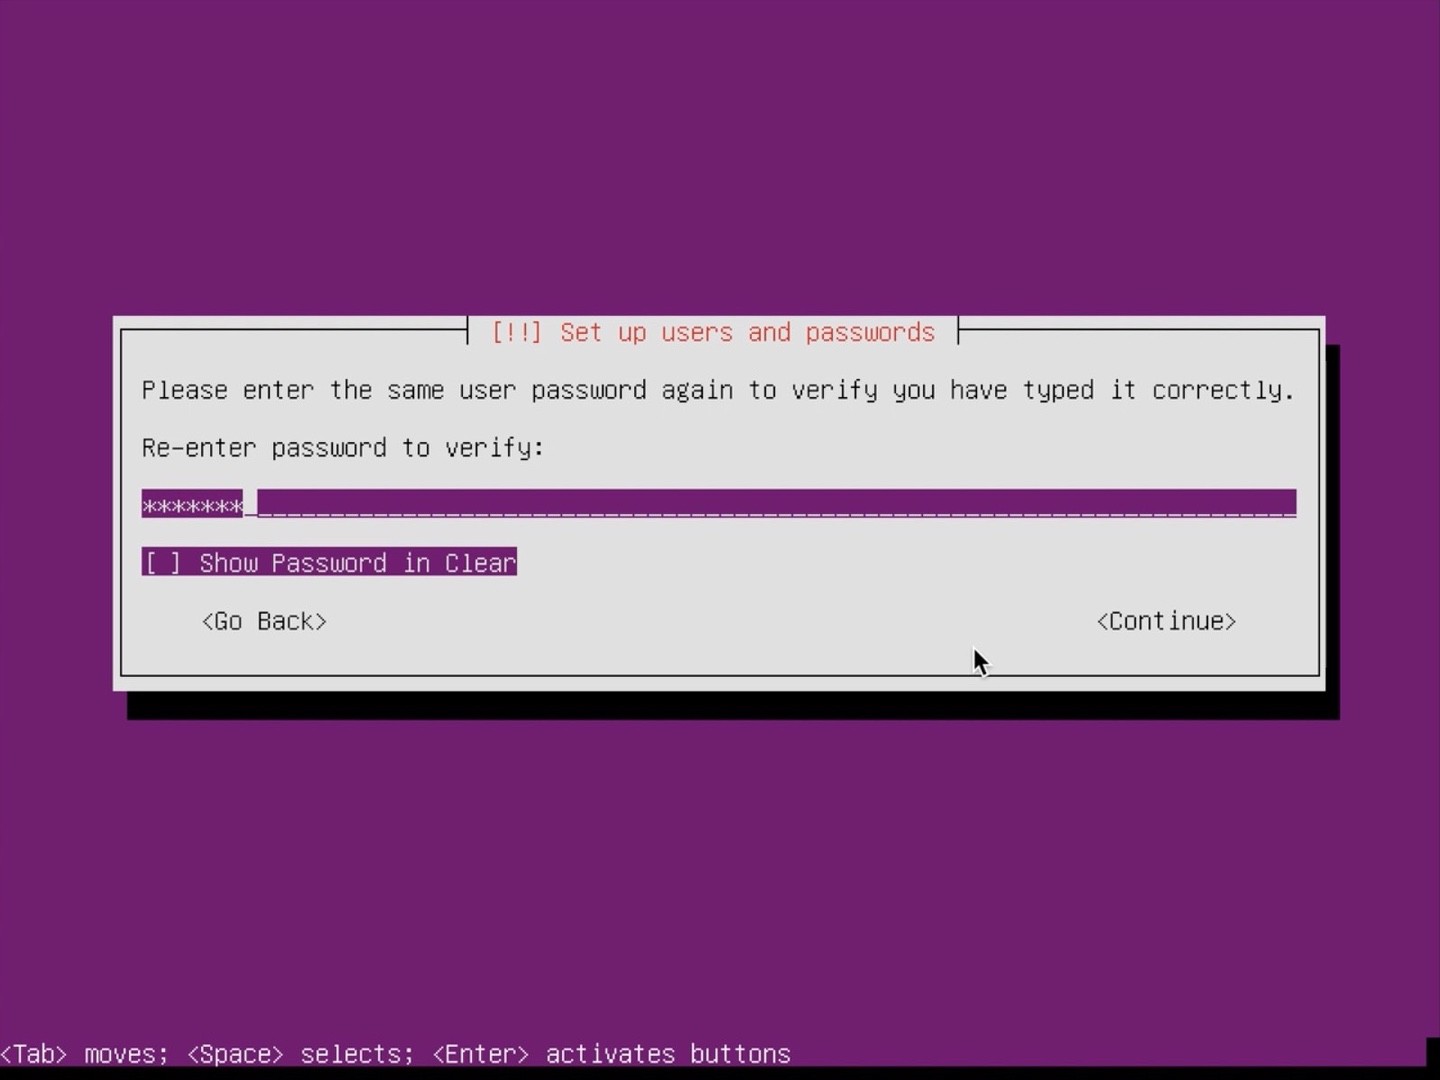
Just reenter the same password:
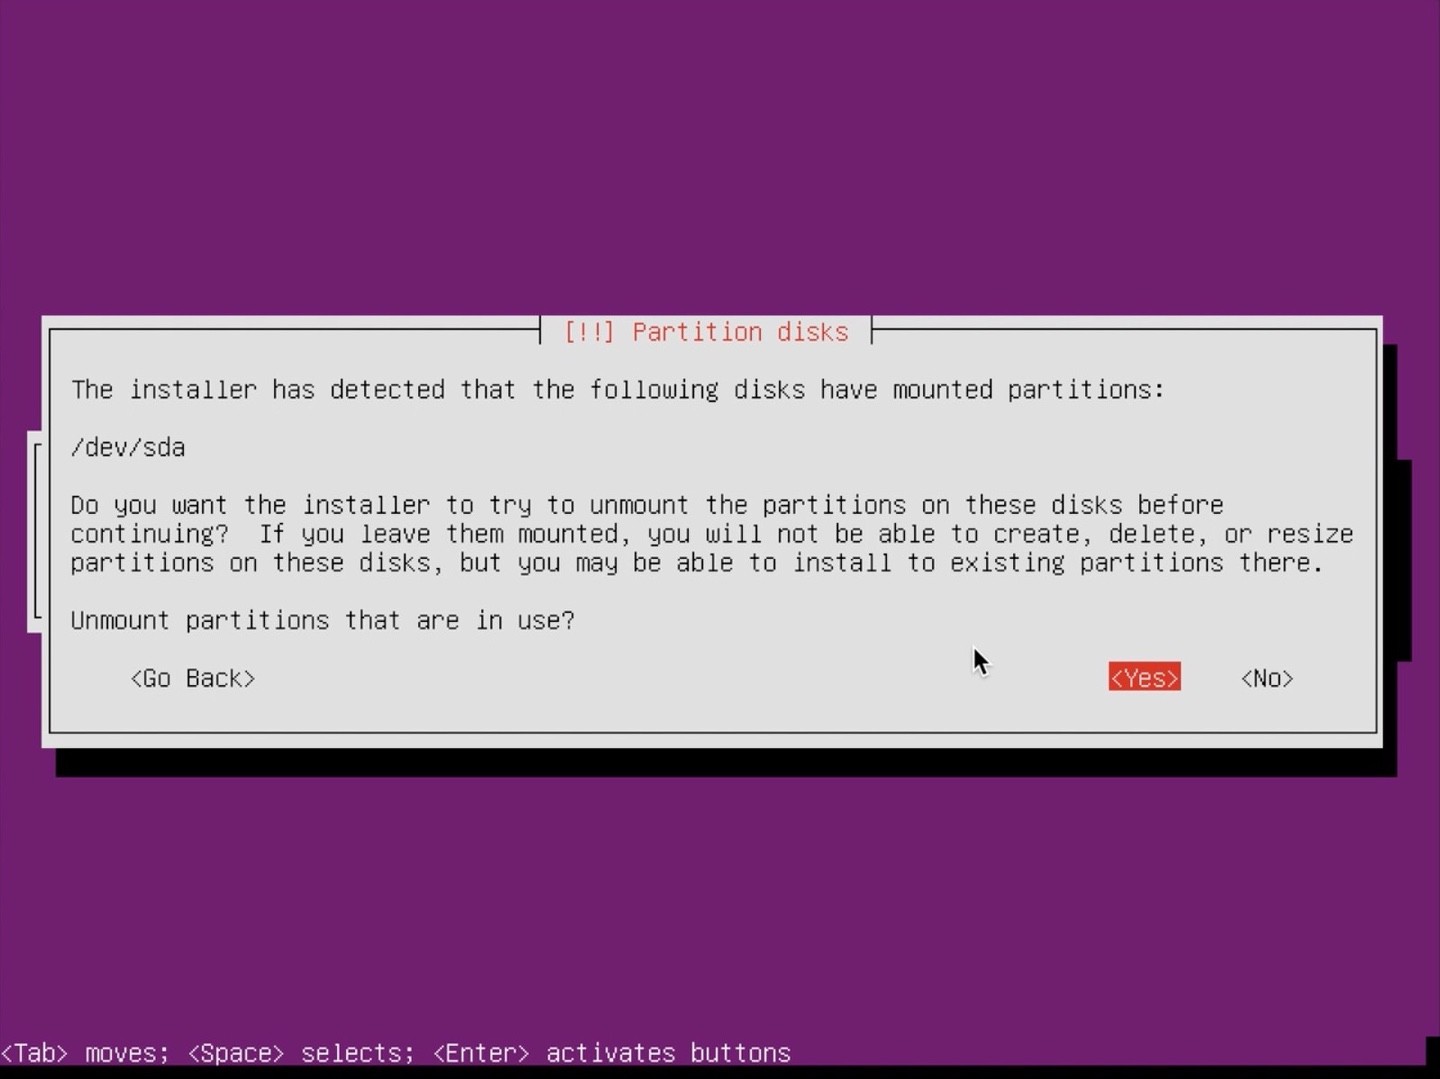
It can happen that the installer ask you to unmount partitions. This does not always happen. Unmount those partitions otherwise we can’t remove the existing partitions:
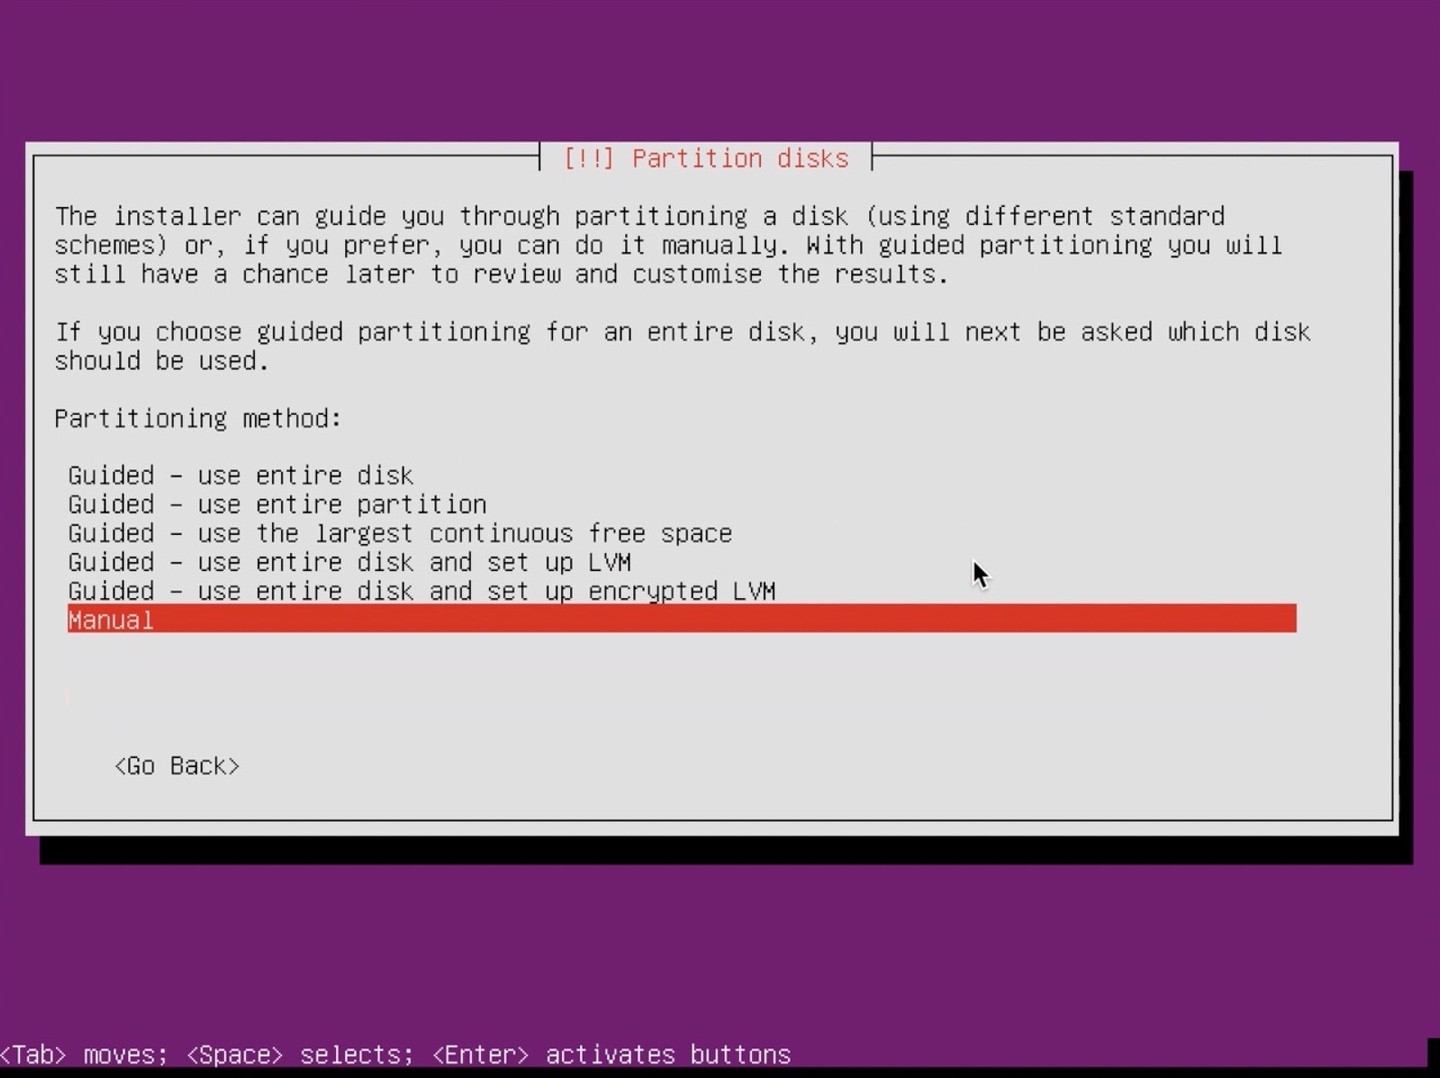
This screen can look a bit different based on this installation that you already have on your drives. Select “Manual” as partition method:
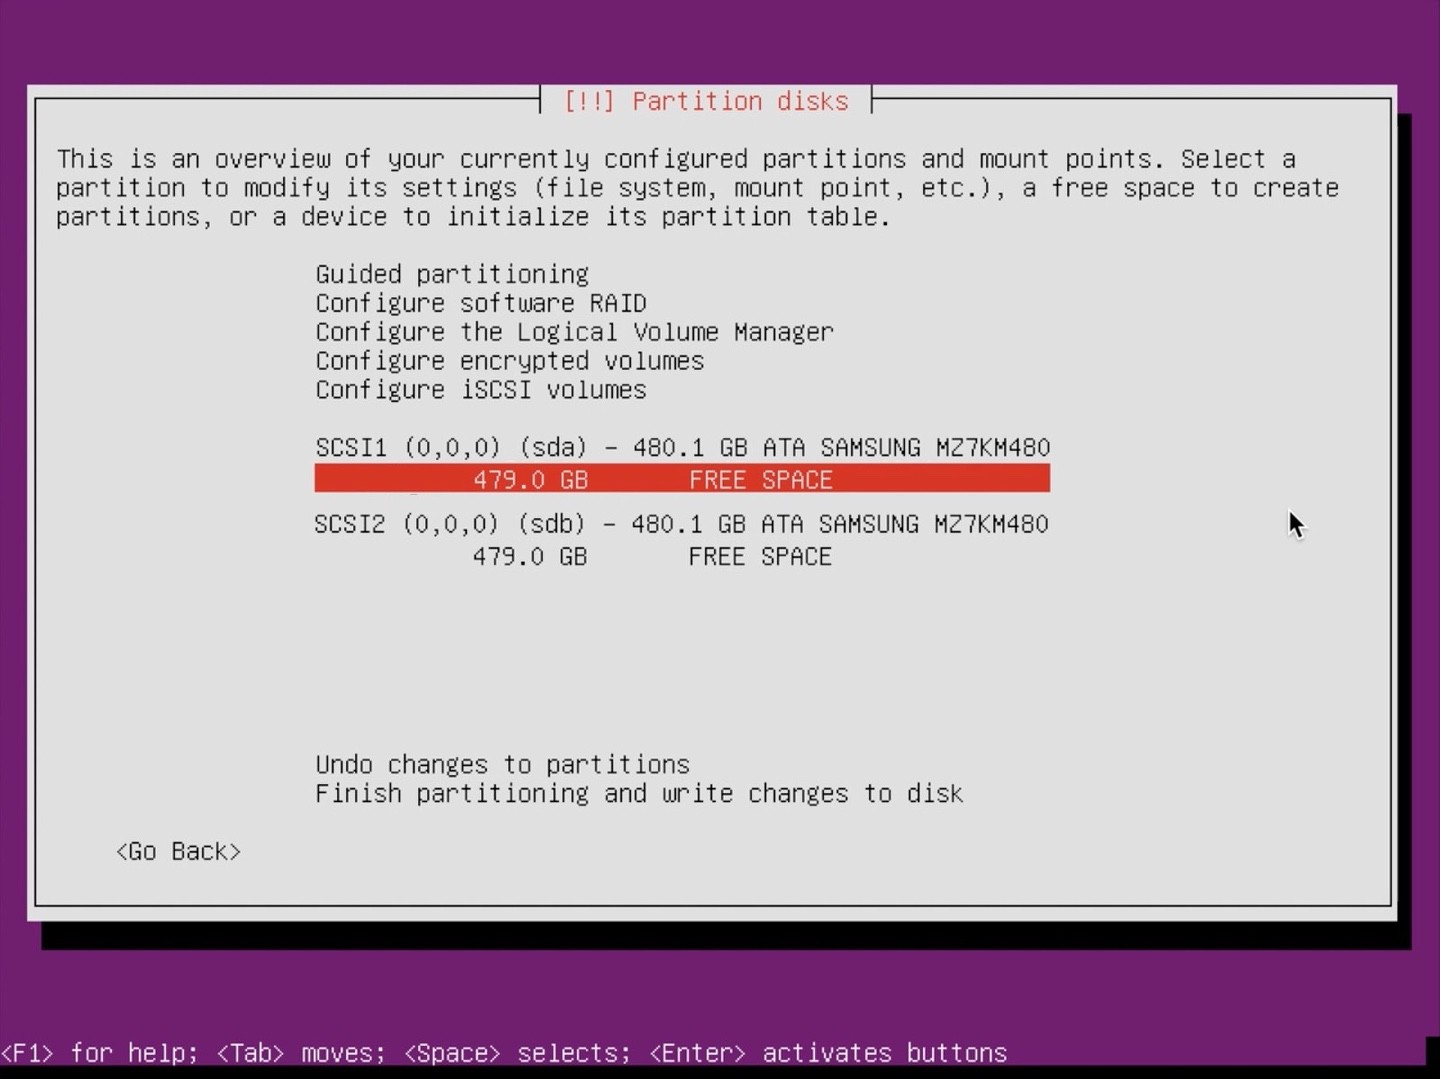
When you start with two disks you see them in the overview of partitions:
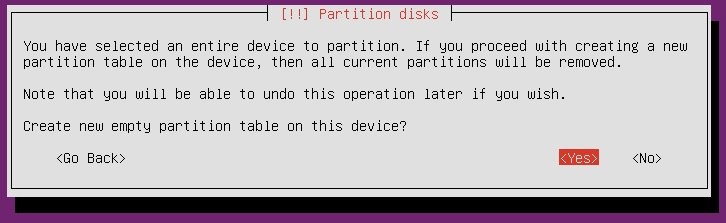
It could happen that the partitions do not show and when you select one of the disks it will as to create a new partition table on the drive. You can select “Yes”:
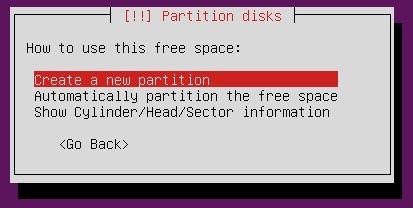
Hit the “FREE SPACE” and select “Create a new partition”.
It will ask you for the size of the partition. As this is a partition used for the GRUB boot loader it can be very tiny.
I didn’t figure out how to use the GRUB boot loader with a partition in RAID mode. So I followed this advise and created on all disks an 1MB partition for the GRUB boot loader.
According to the BIOS/GPT notes if the BIOS is setup to boot the disk in Legacy/mbr mode, installing GRUB2 on a GPT (GUID Partition Table) disk requires a dedicated BIOS boot partition with a recommended size of at least 1 MiB. This partition can be created via GParted or other partitioning tools, or via the command line. It must be identified with a bios_grub flag. The necessary GPT modules are automatically included during installation when GRUB 2 detects a GPT scheme - source.
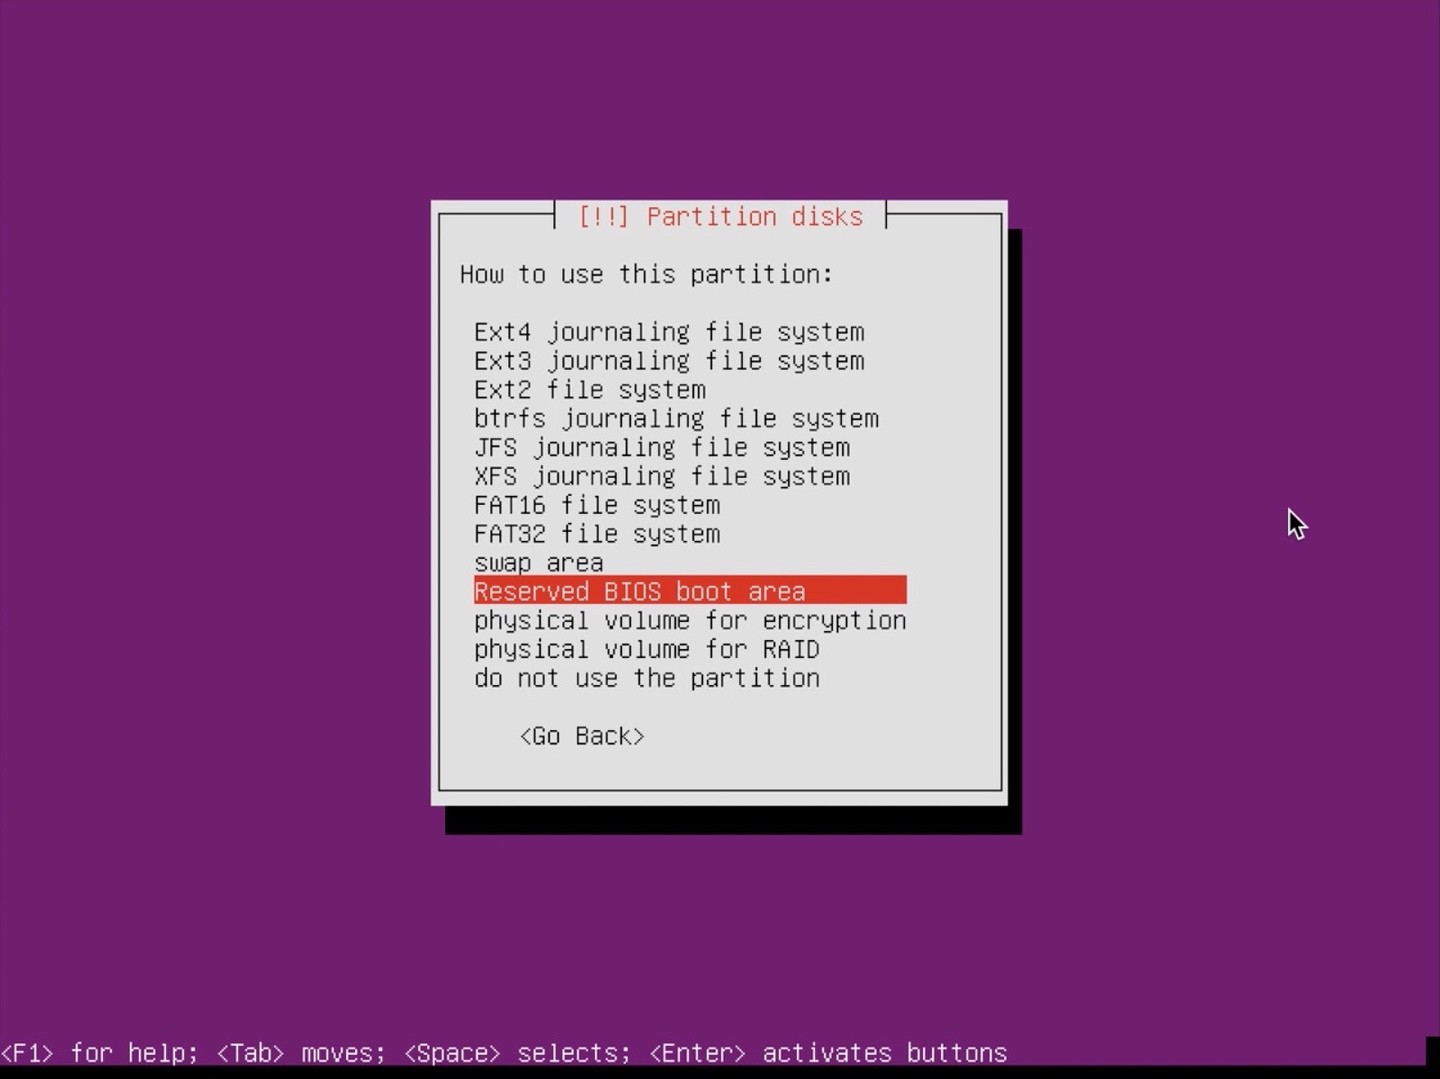
In the next screen select “Use as” and hit Enter. You will get a list of types on how to use this partition. Select “Reserved BIOS boot area” and hit Enter:
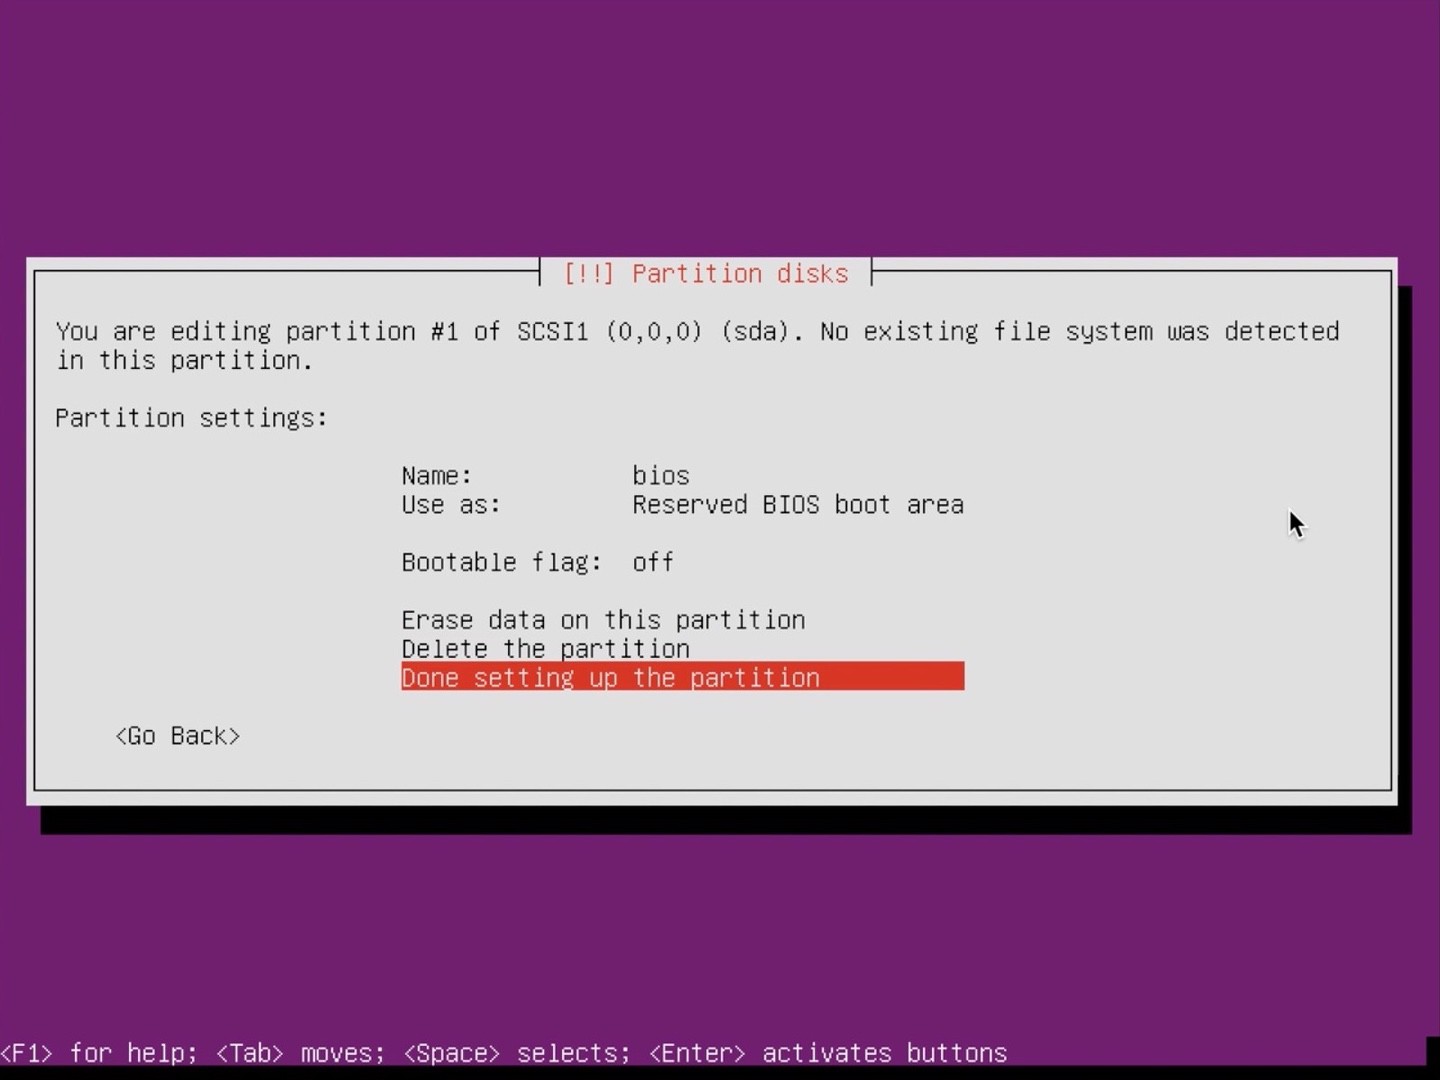
You can give the partition a name like “bios” or something. It’s not required. For me the bootable flag was impossible to change, so I kept it to “off”. It worked fine for me. Hit “Done setting up the partition”.
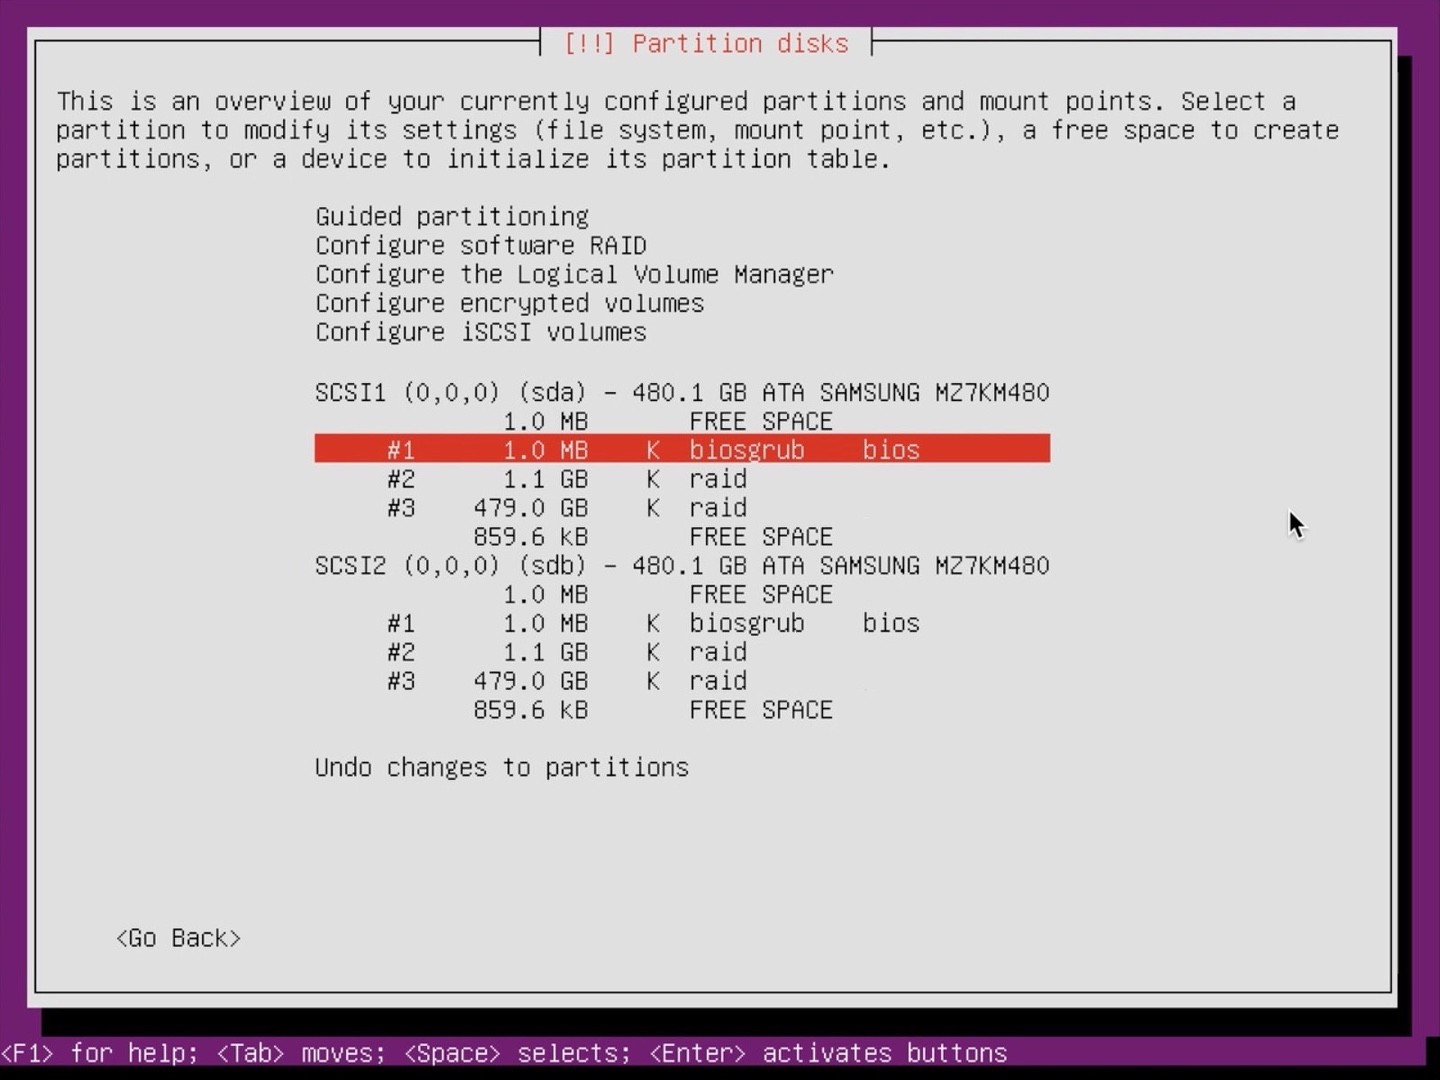
Also add this partition to the other drives. Once you are done add another partition to both drives. One partition with 1GB of data used as “physical volume for RAID” and one with the rest of data also as “physical volume for RAID”.
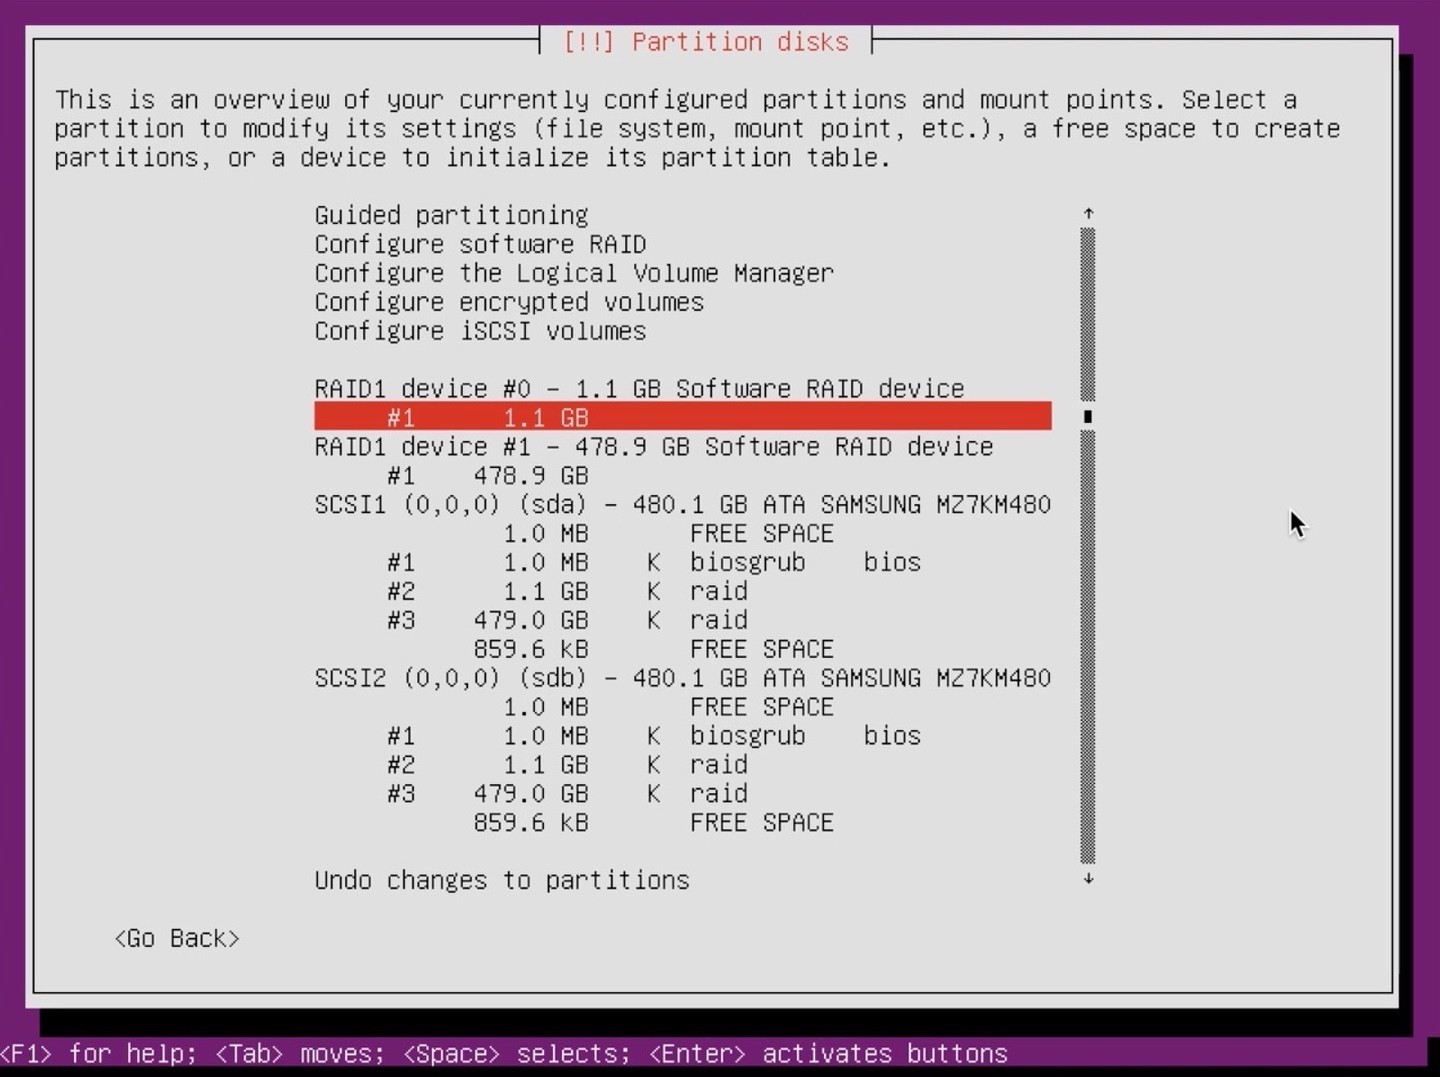
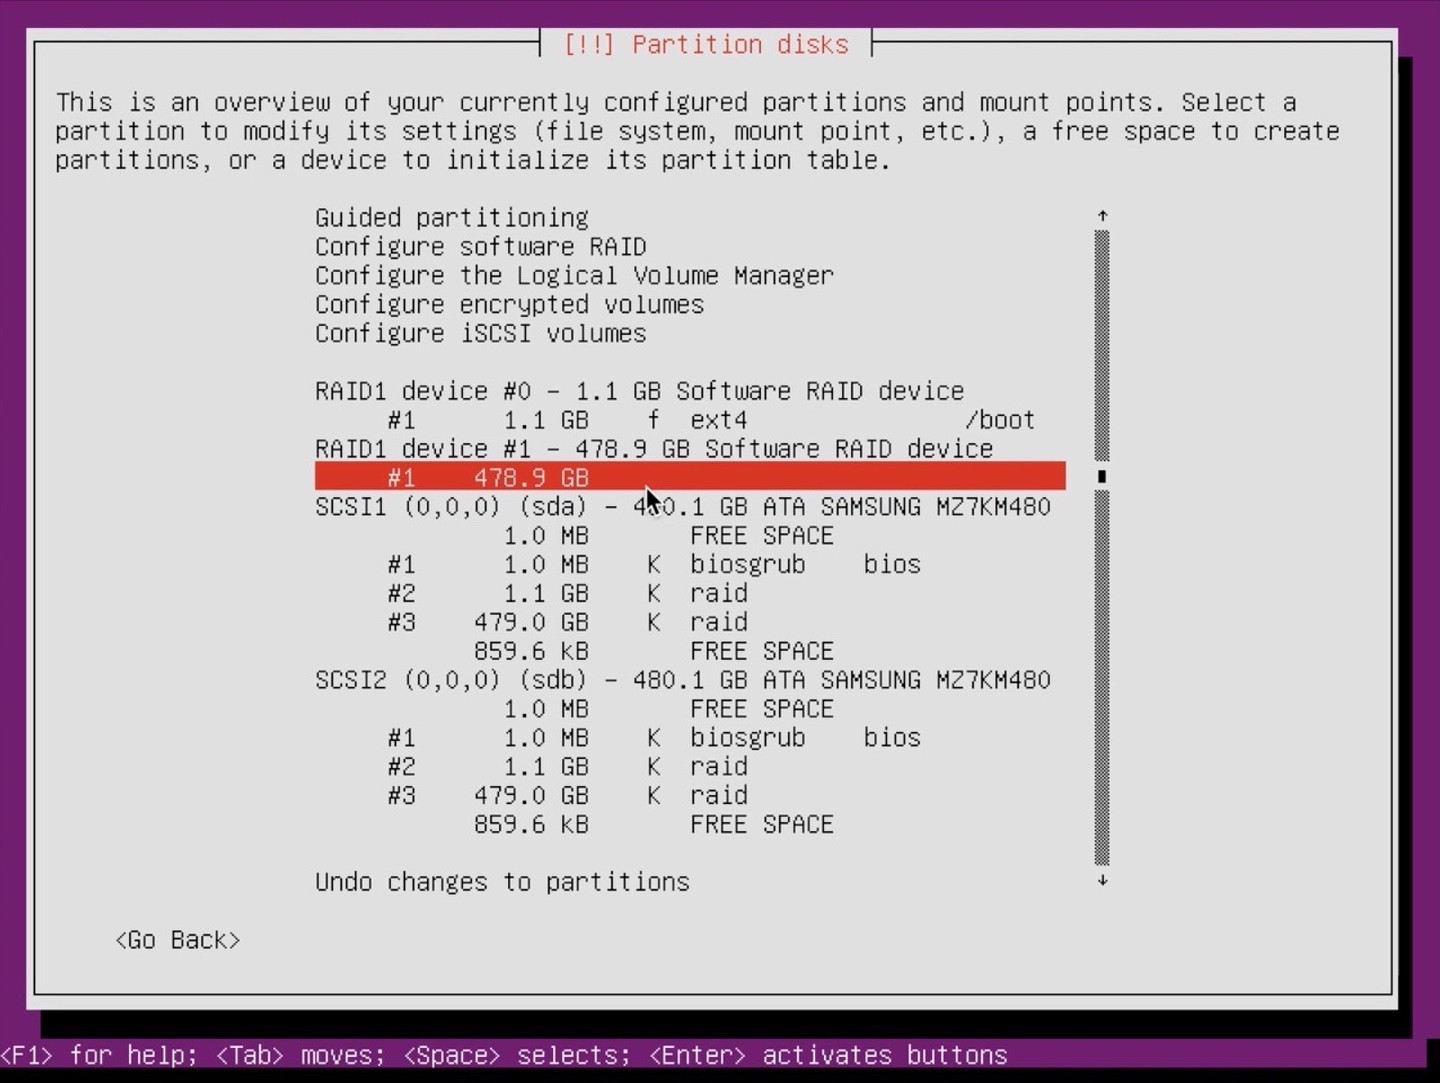
After these settings it will look more or less like this:
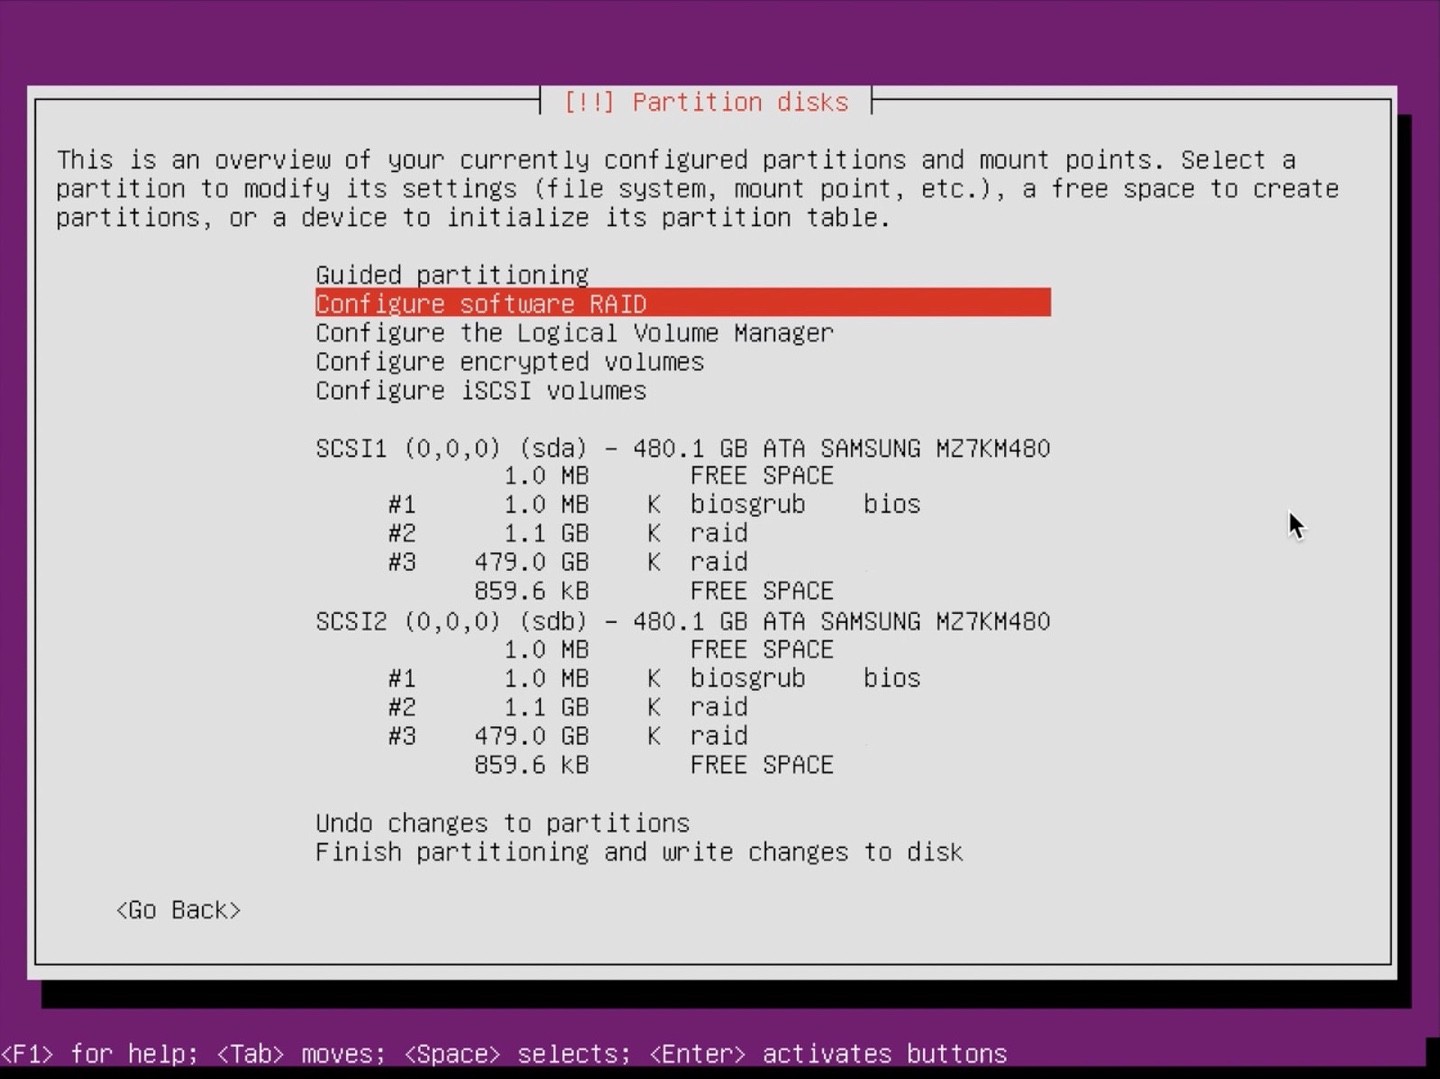
Select “Configure software RAID”:
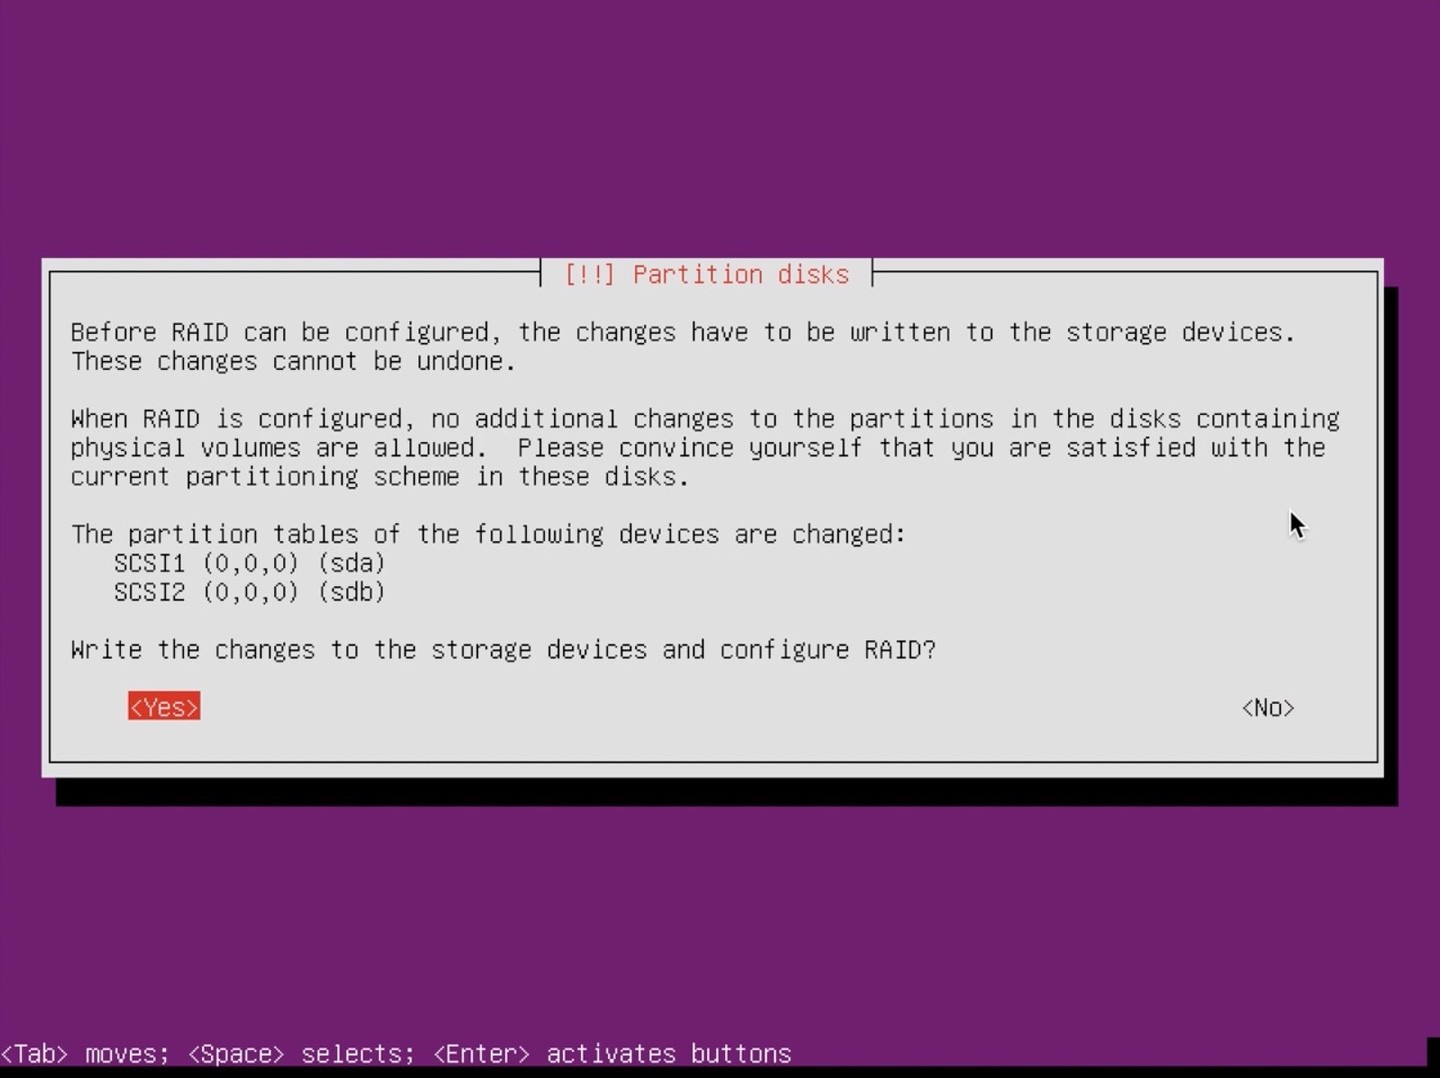
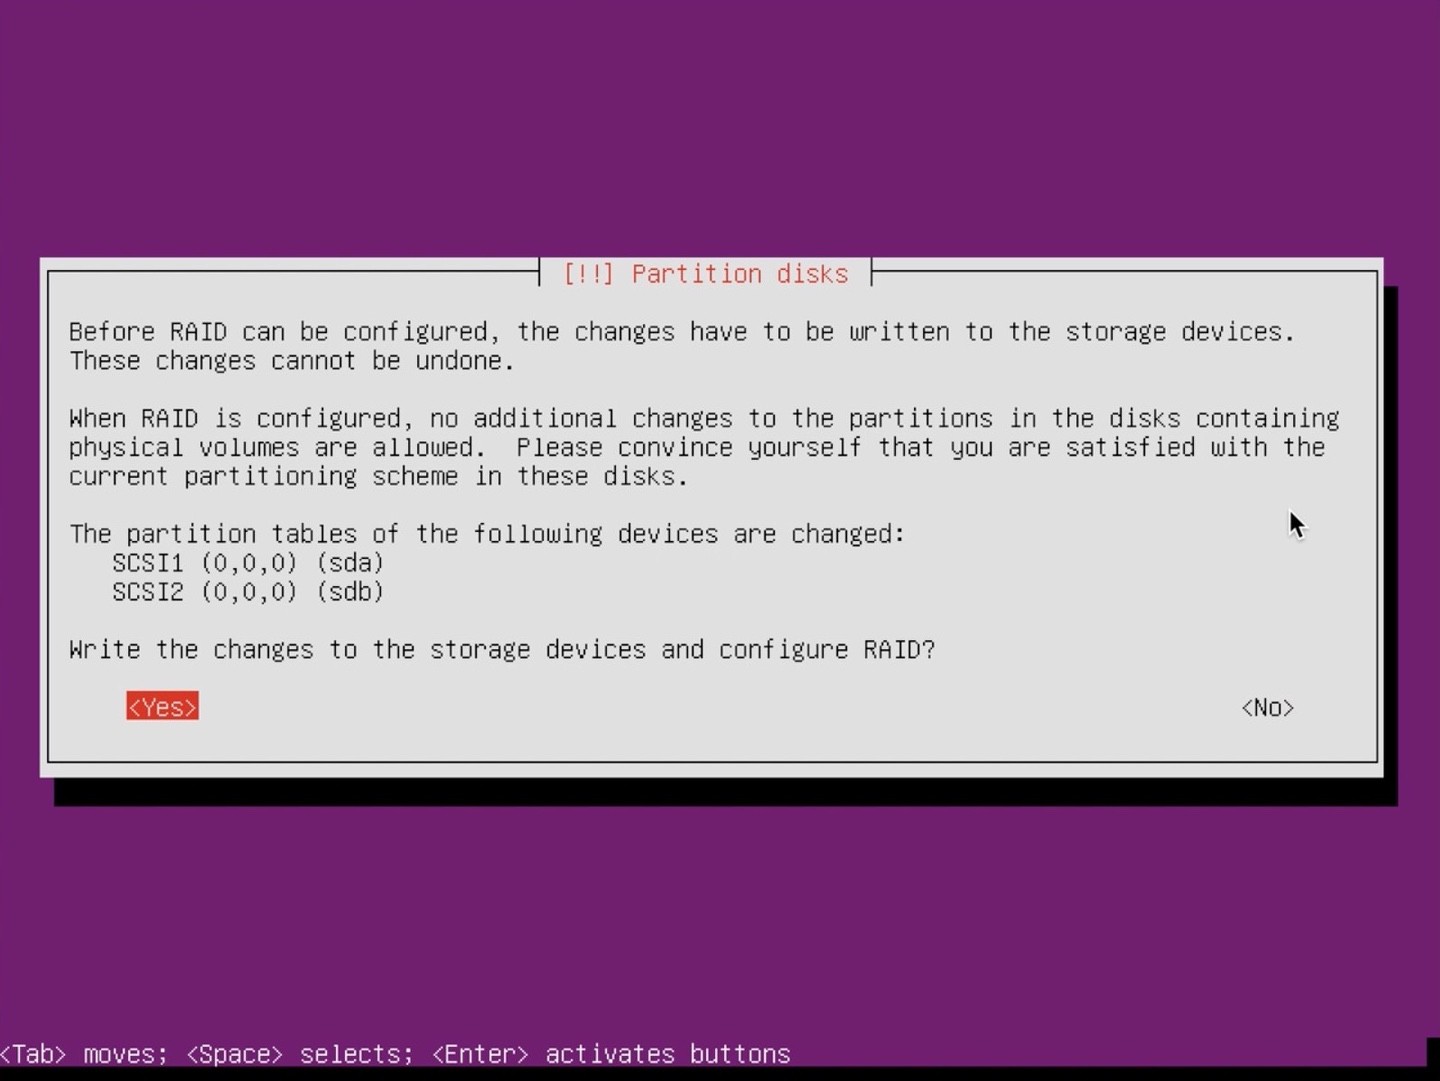
Write the changes to the storage devices and configure RAID by selecting “Yes”:
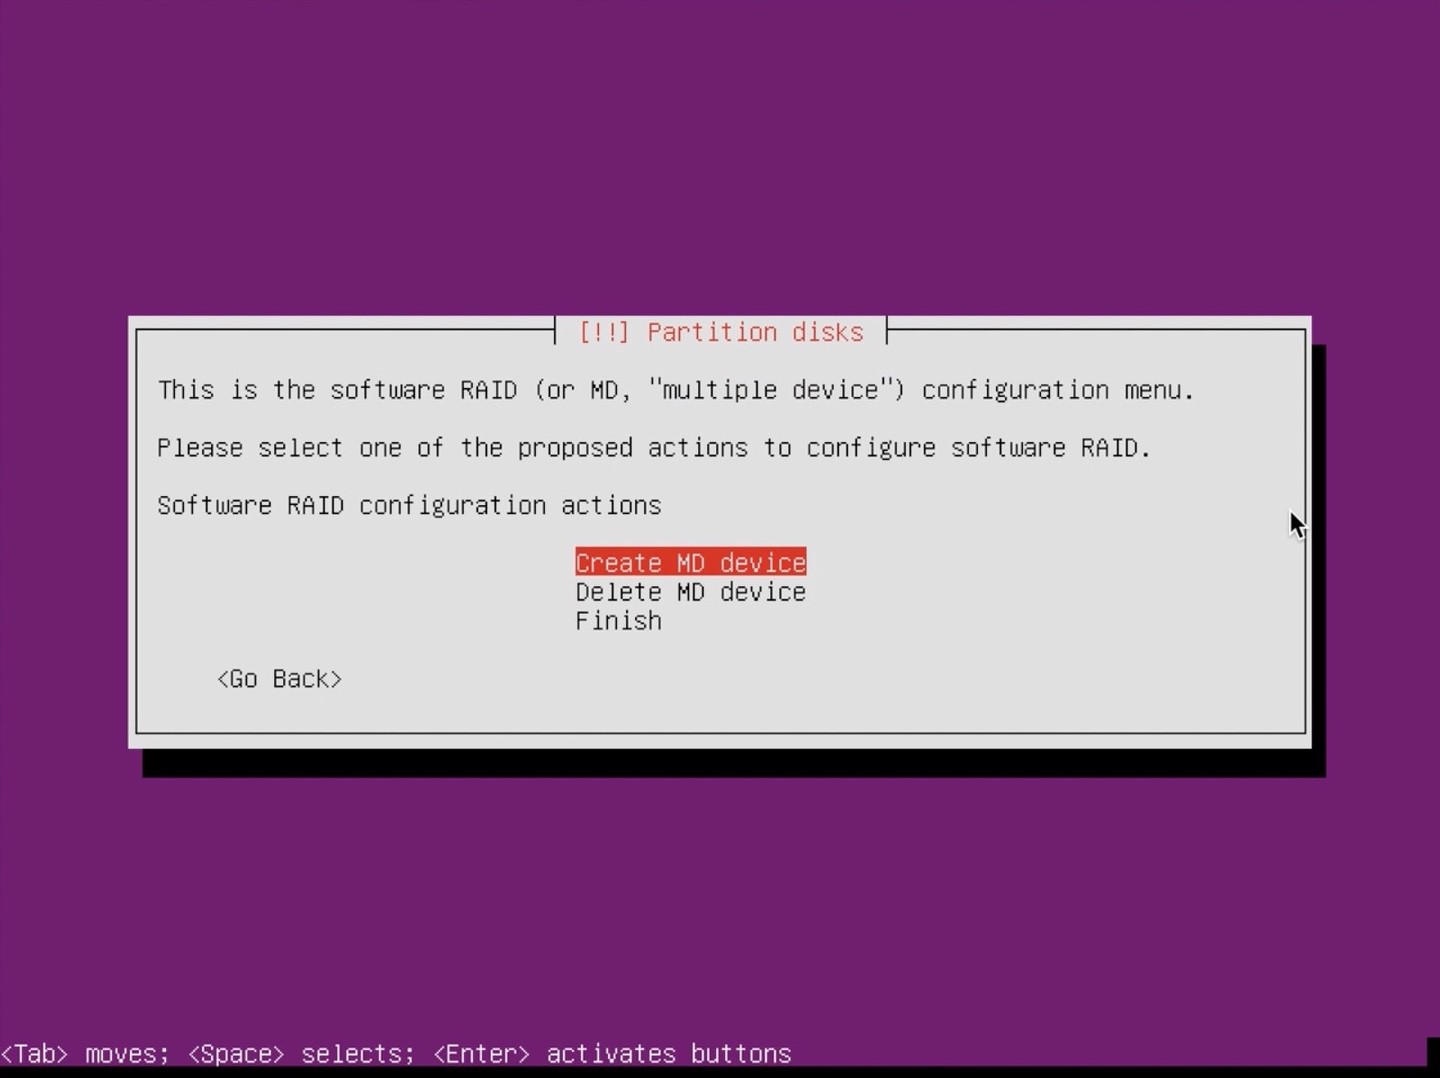
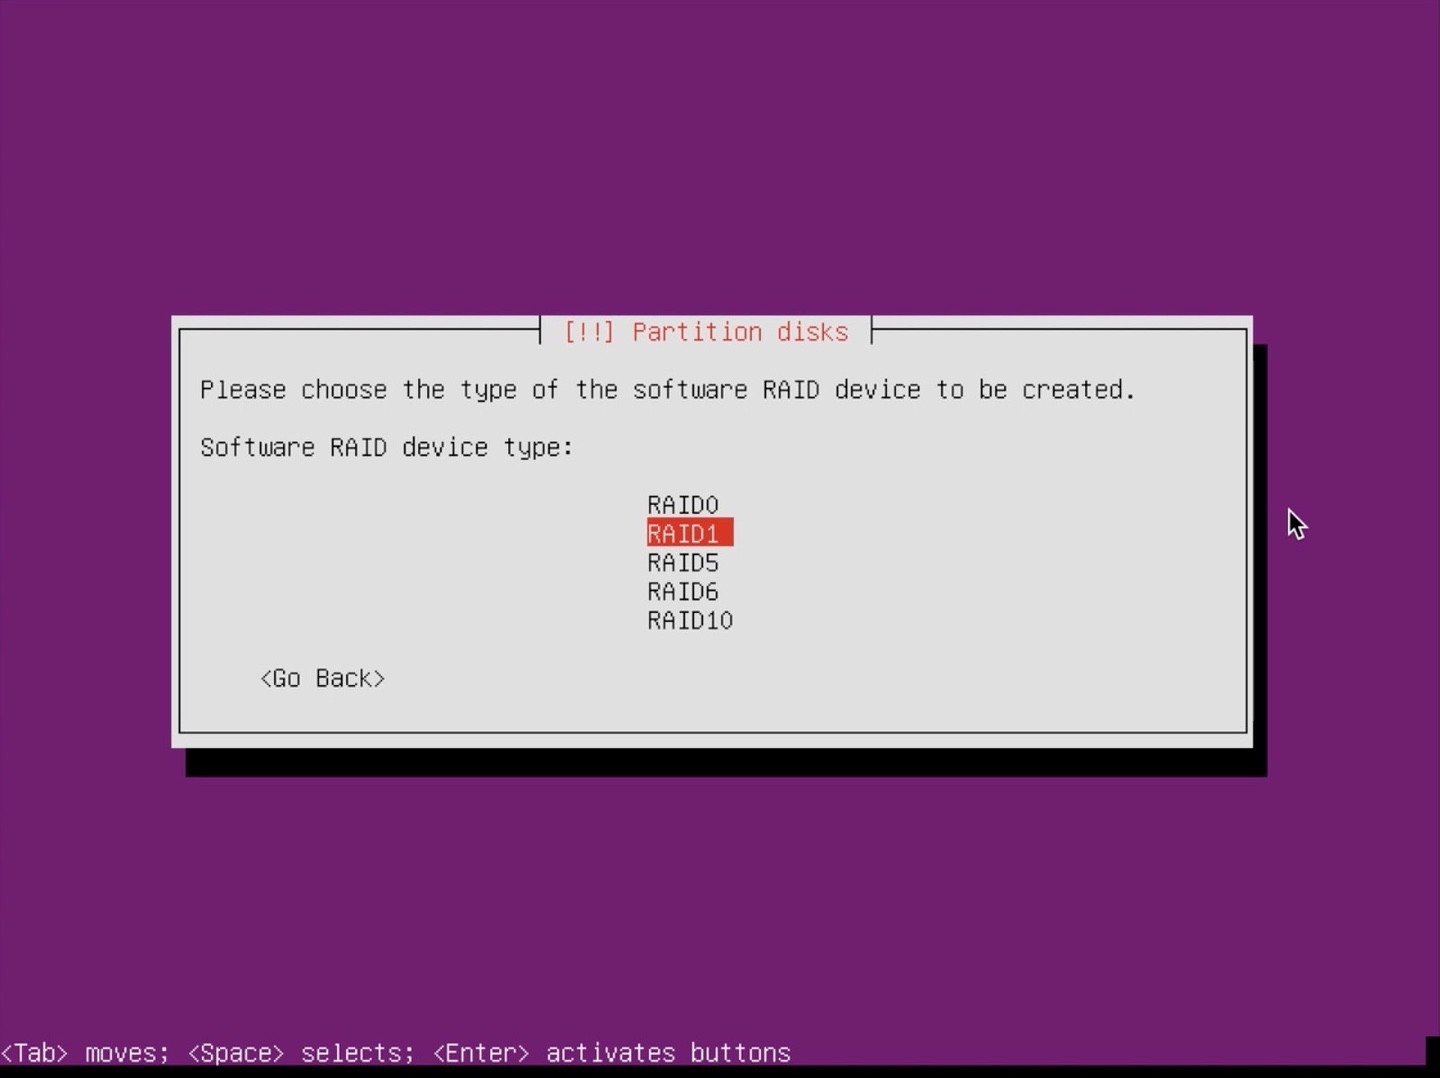
Select “Create MD device”:
Select “RAID1”:
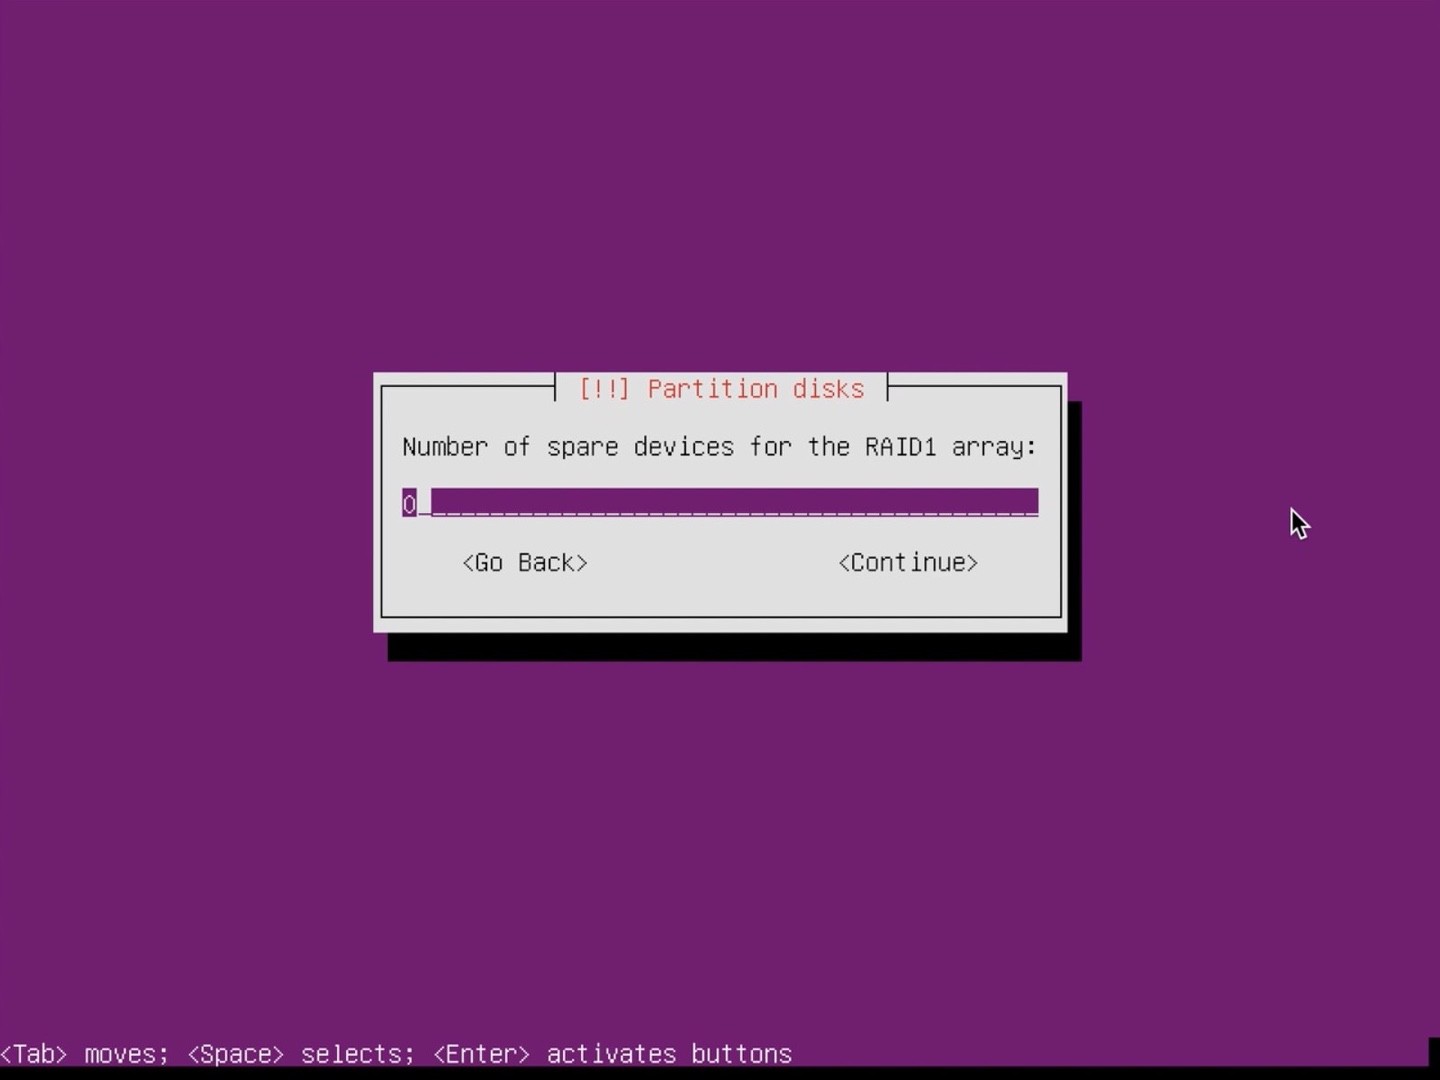
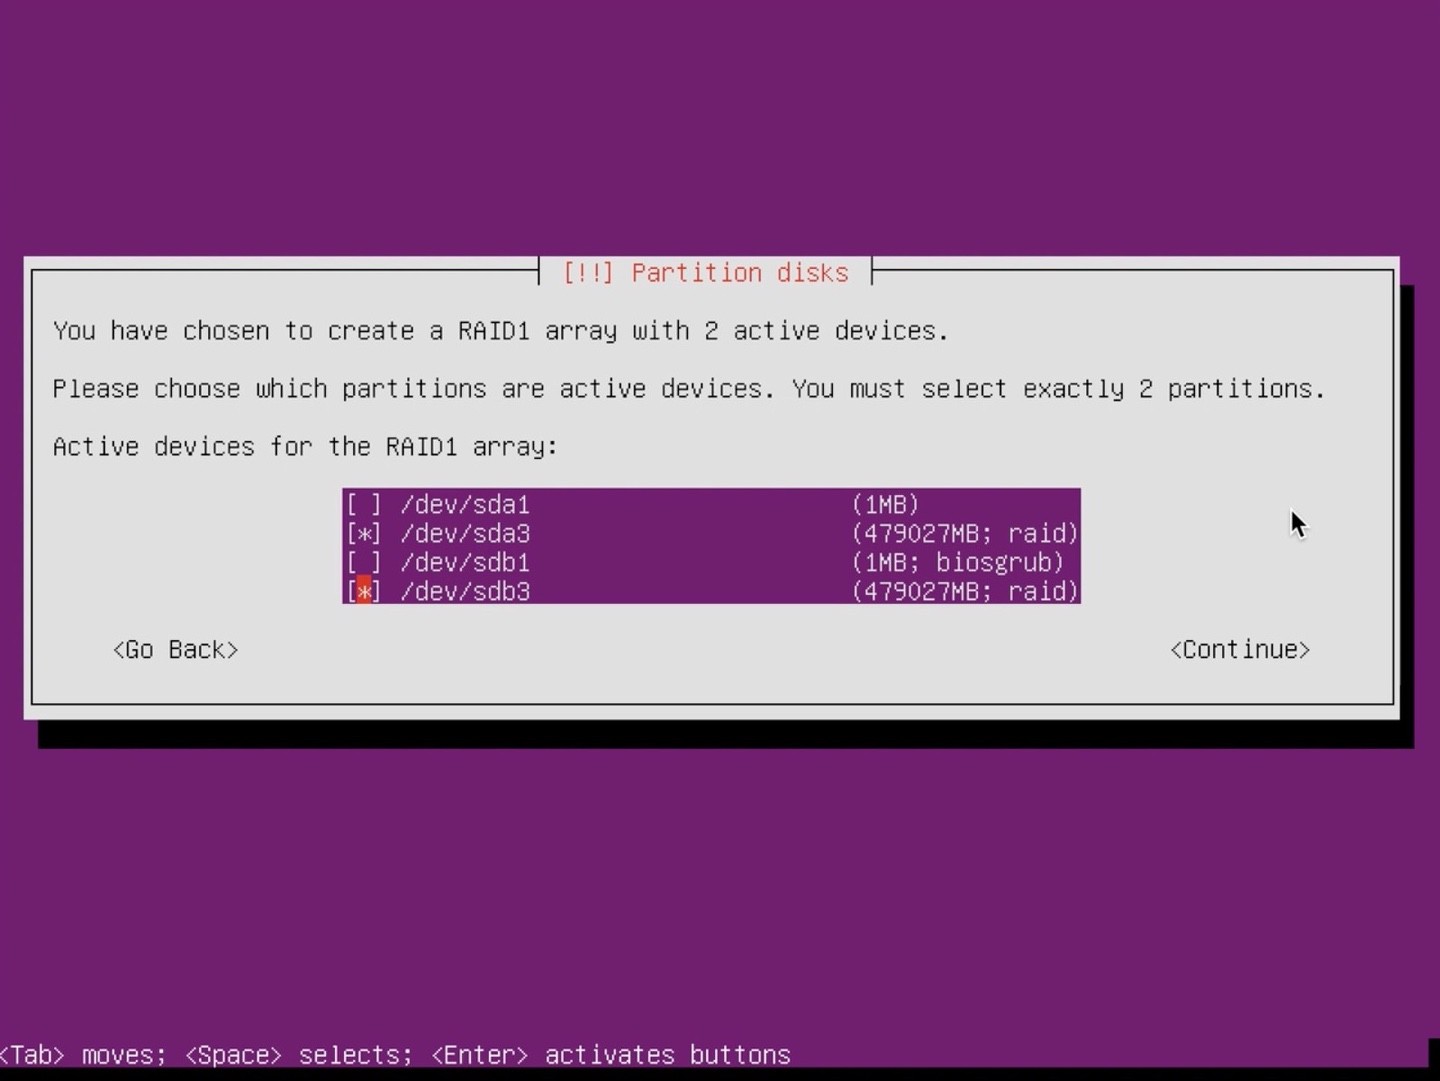
Enter the amount of active devices for the RAID array, for most people that’s 2:
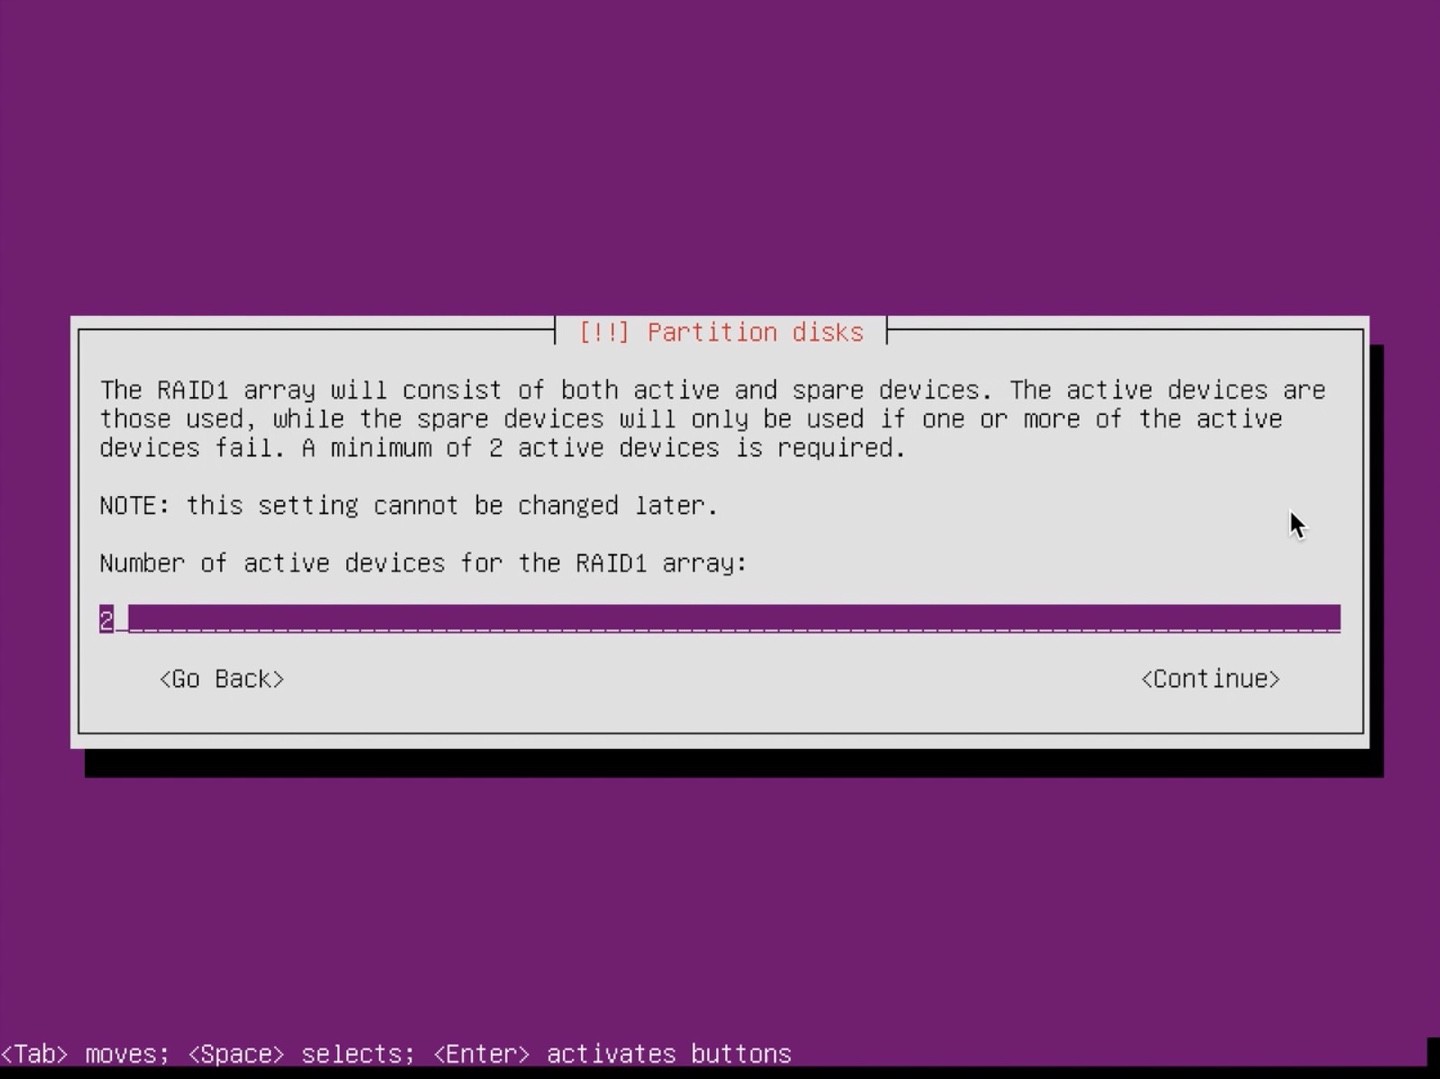
Enter the amount of spare devices for the RAID array, for most people that’s 0:
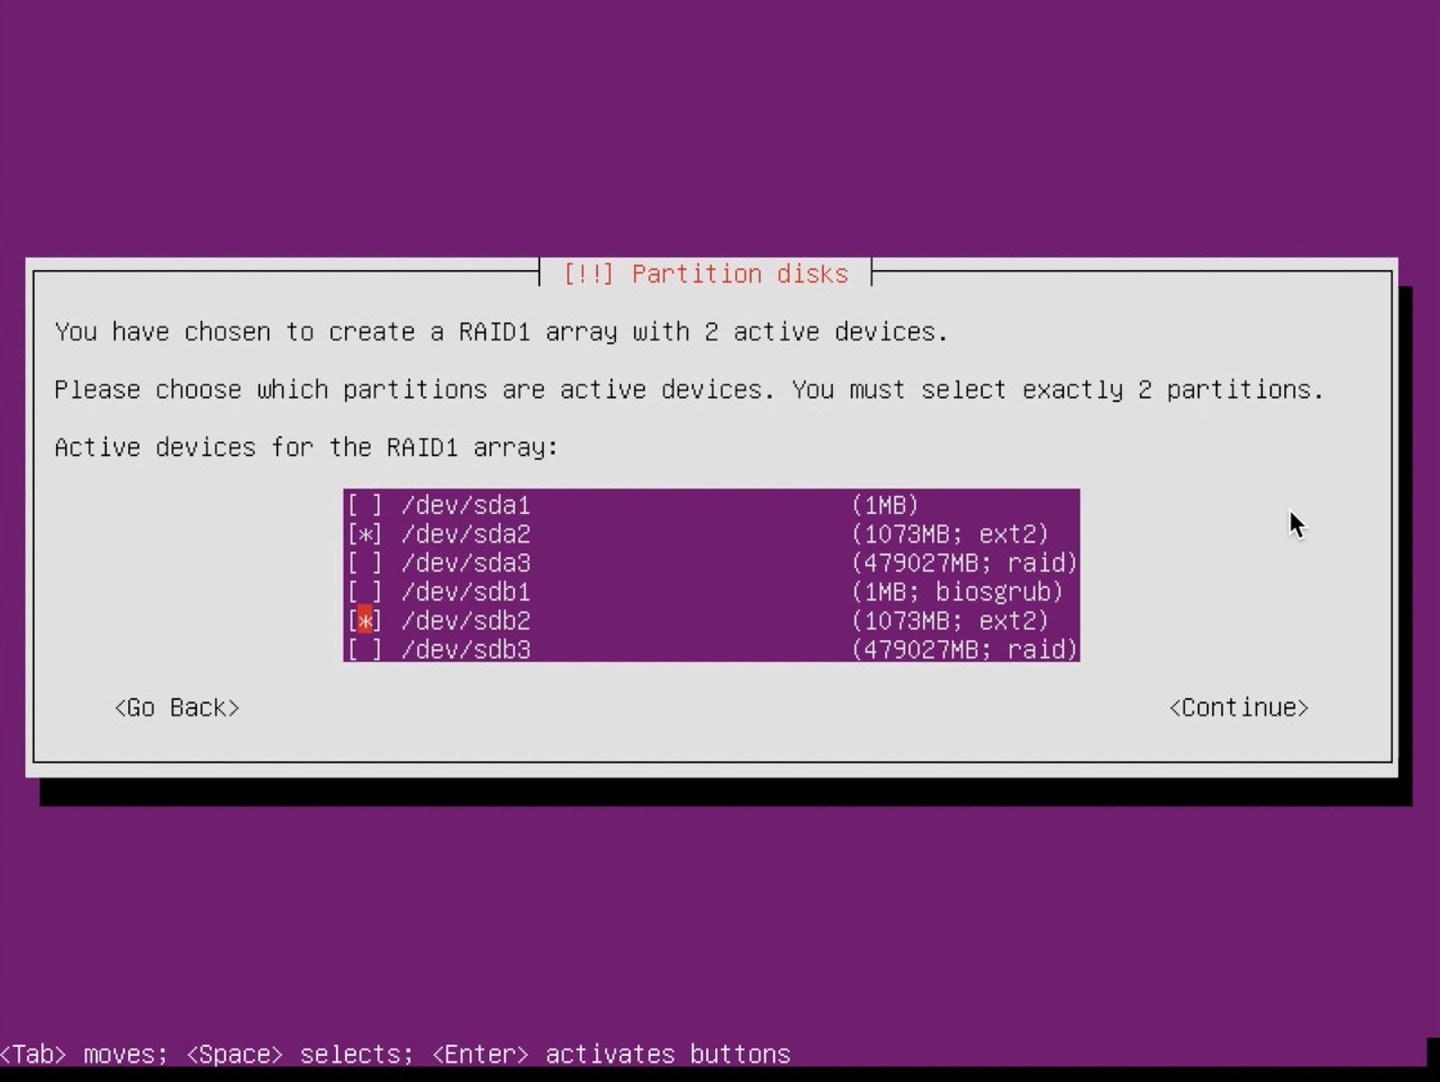
Select the more or less 1GB devices with your spacebar and hit enter when both are selected:
Confirm by selecting “Yes”:
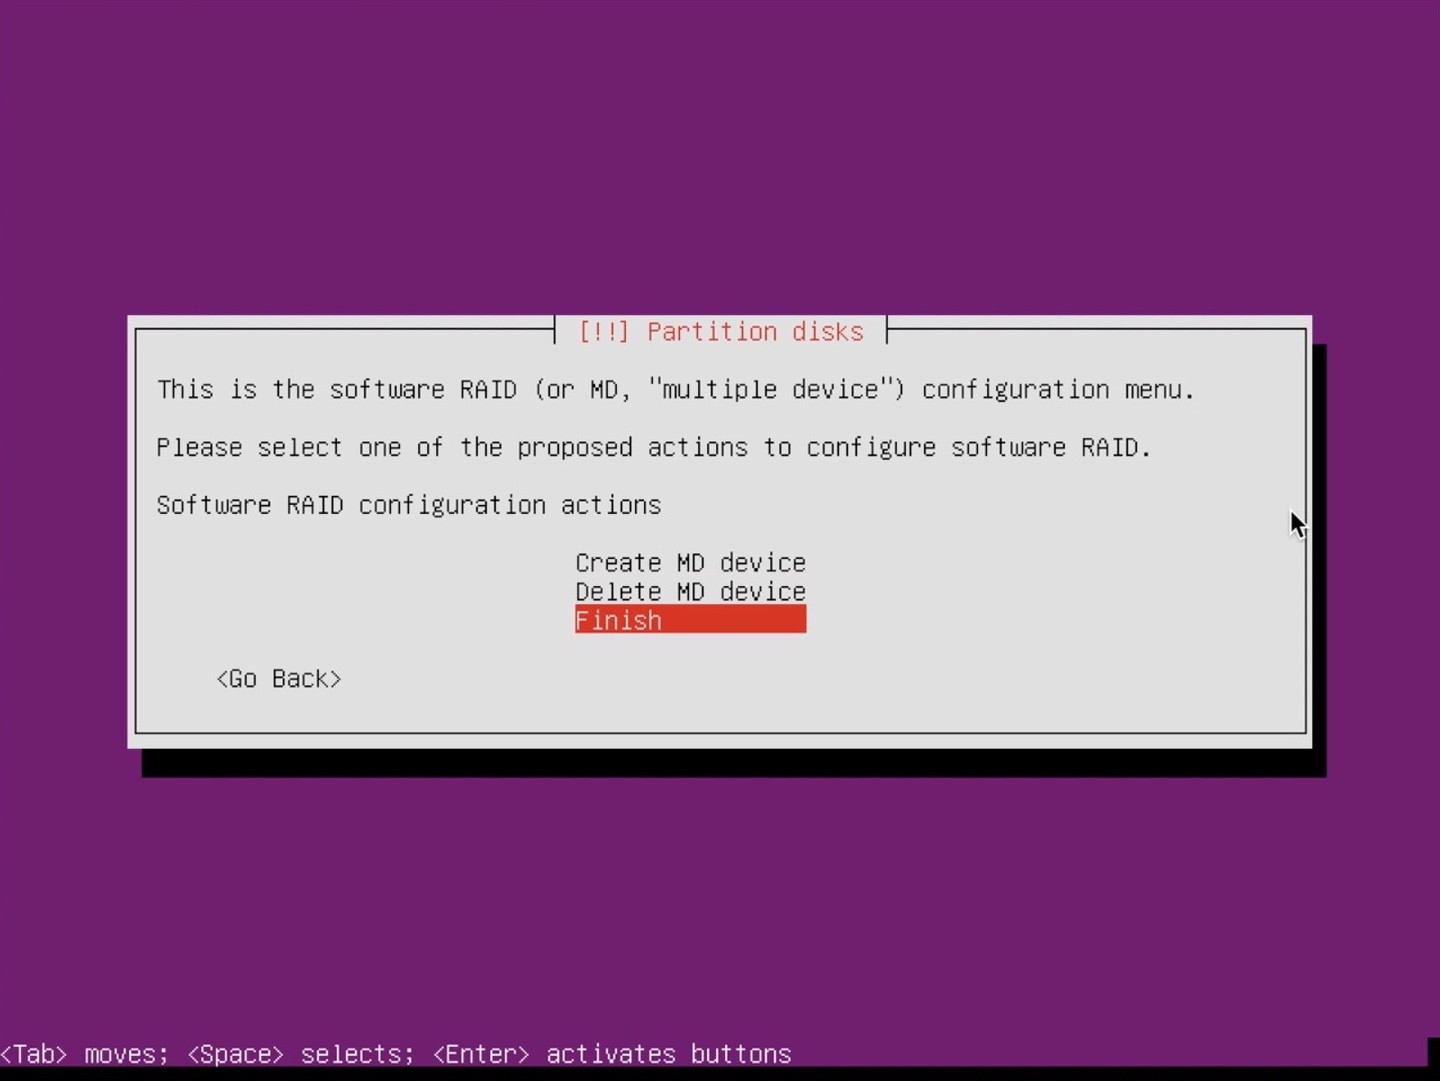
Do the same for the other partition (the biggest one), leave the 1MB for what it is:
Select “Finish”:
Select the first RAID device with 1GB:
Navigate to “Use as” and select it:
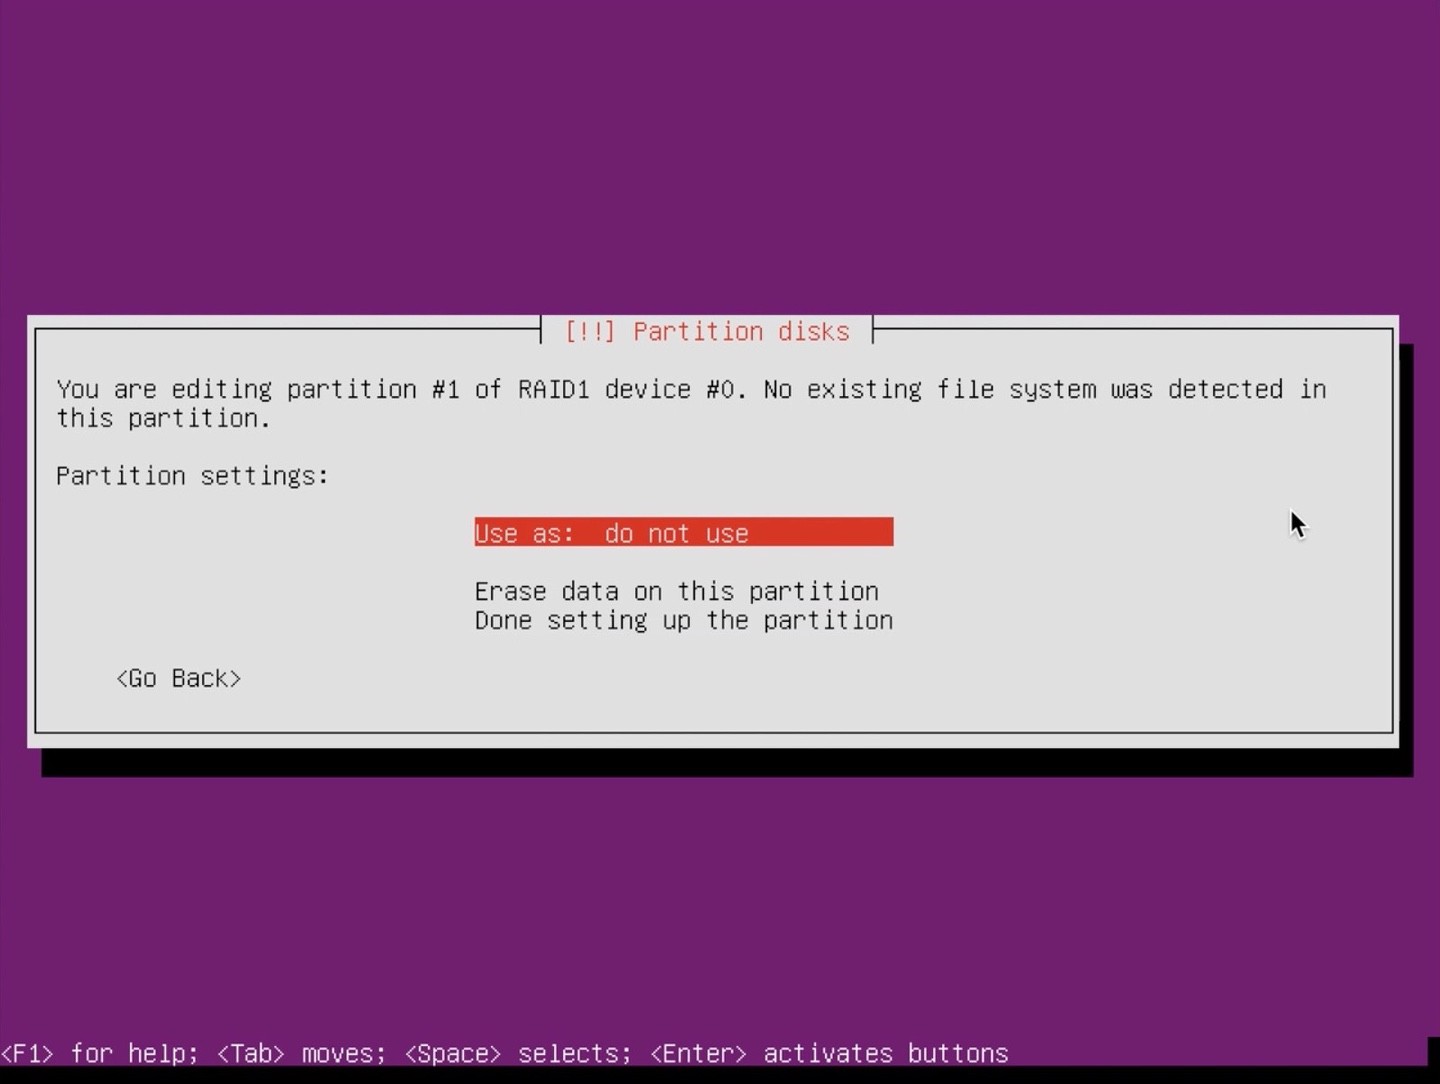
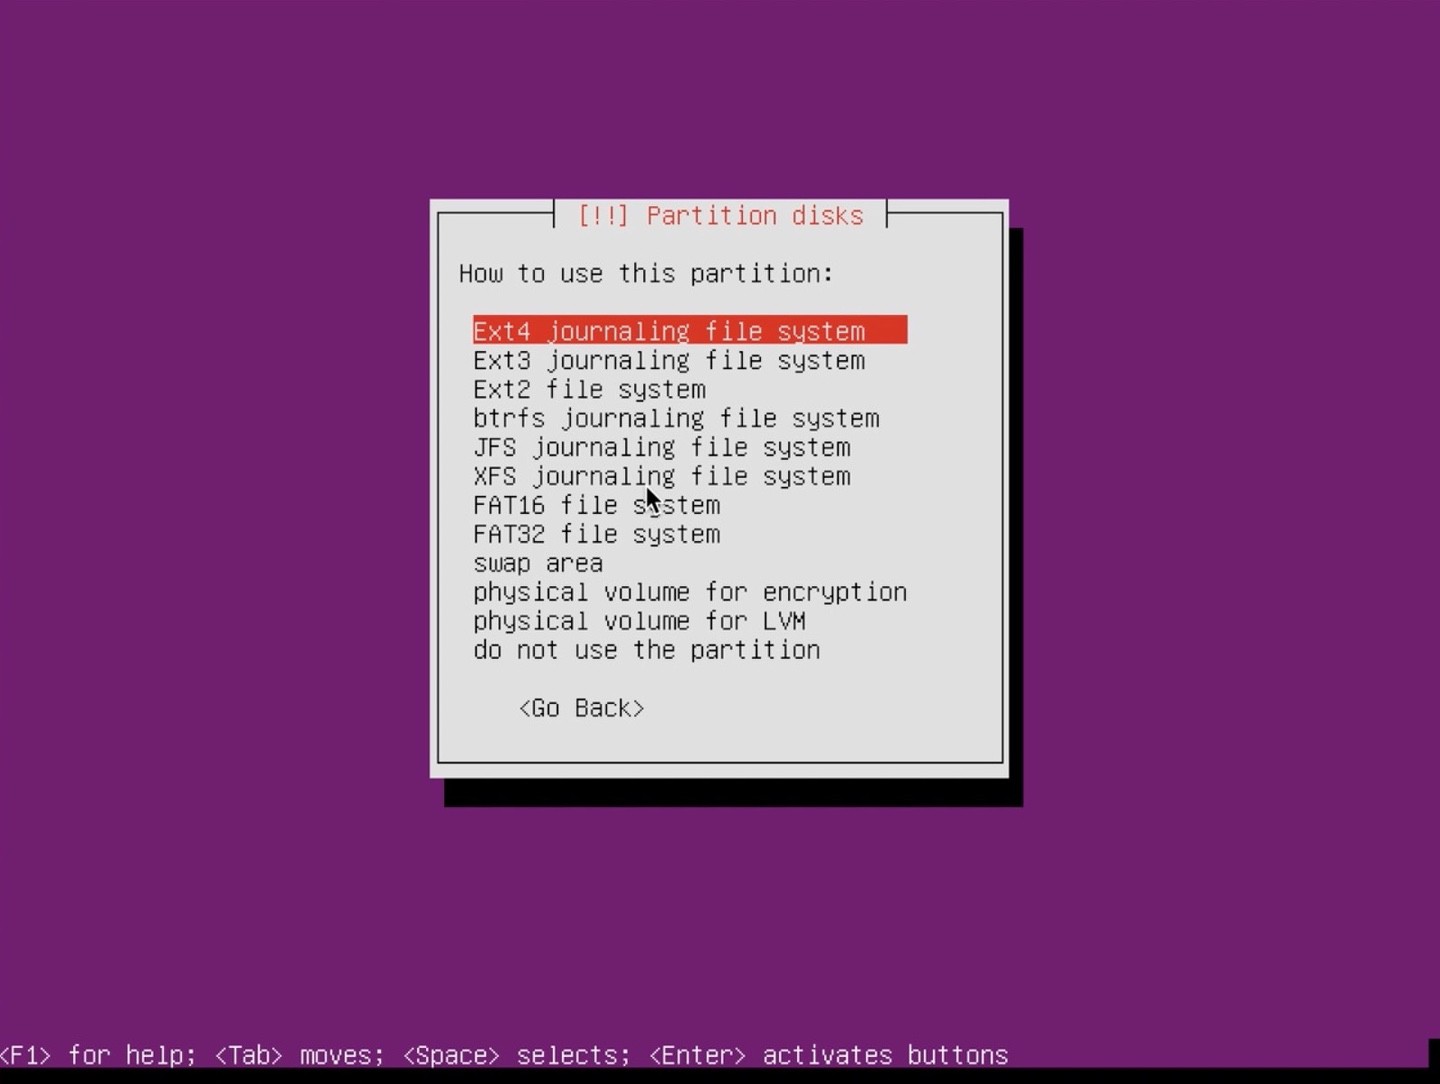
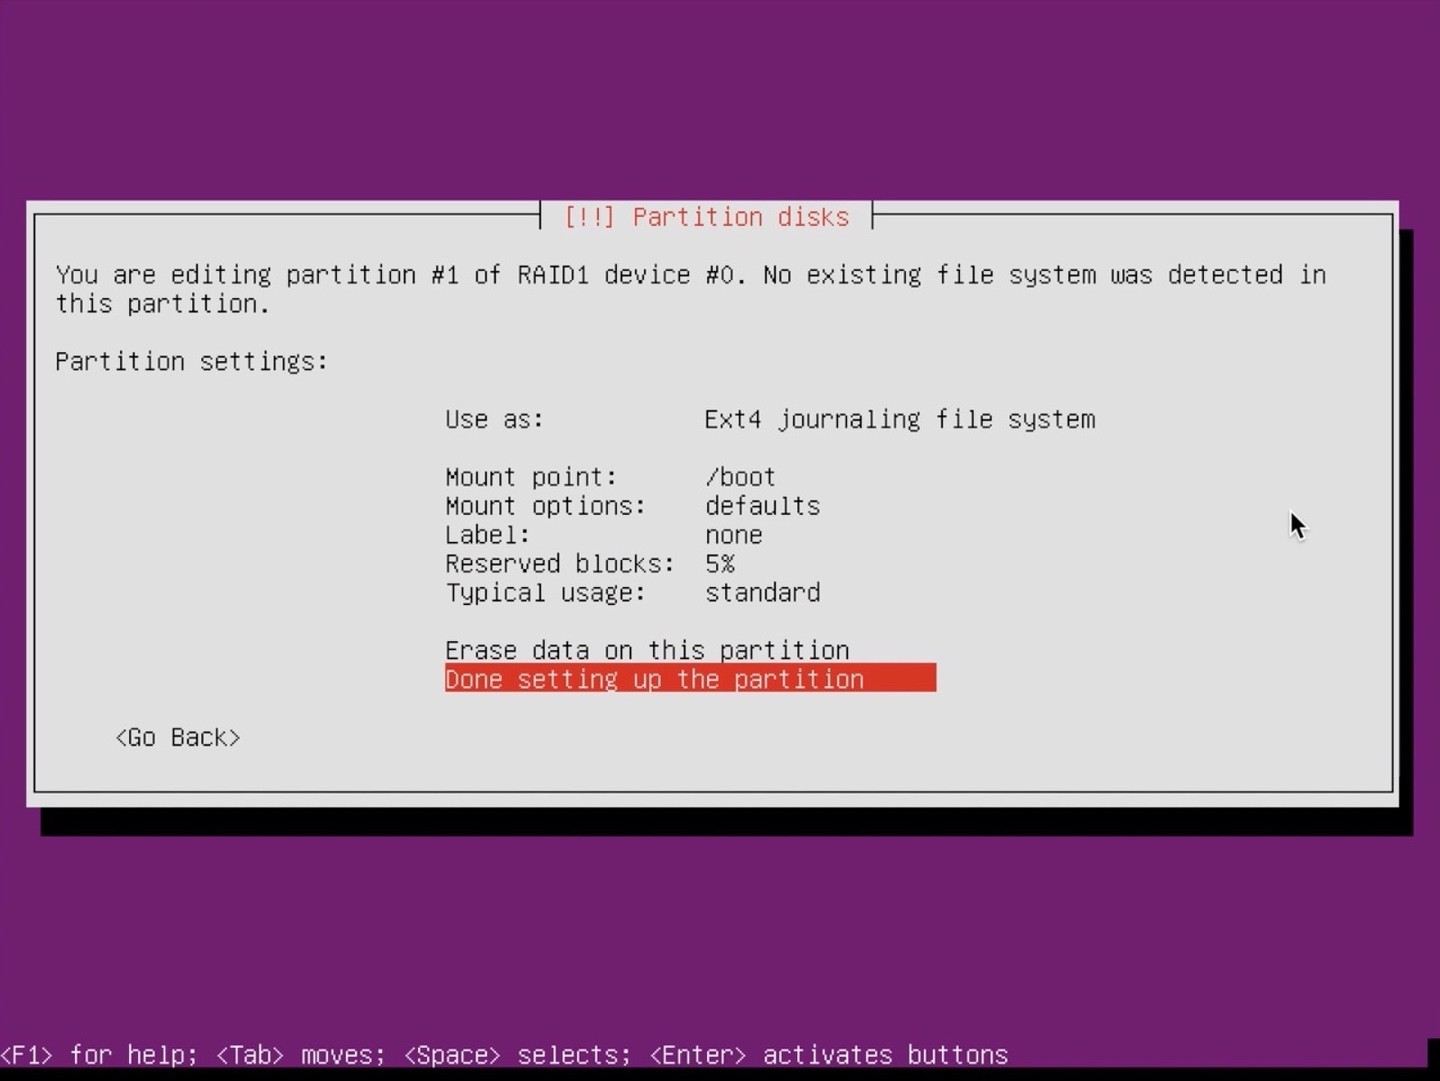
Select “Ext4 journaling file system” (it’s not super important which one you select, but Ext4 is common):
Navigate to “Mount point”:
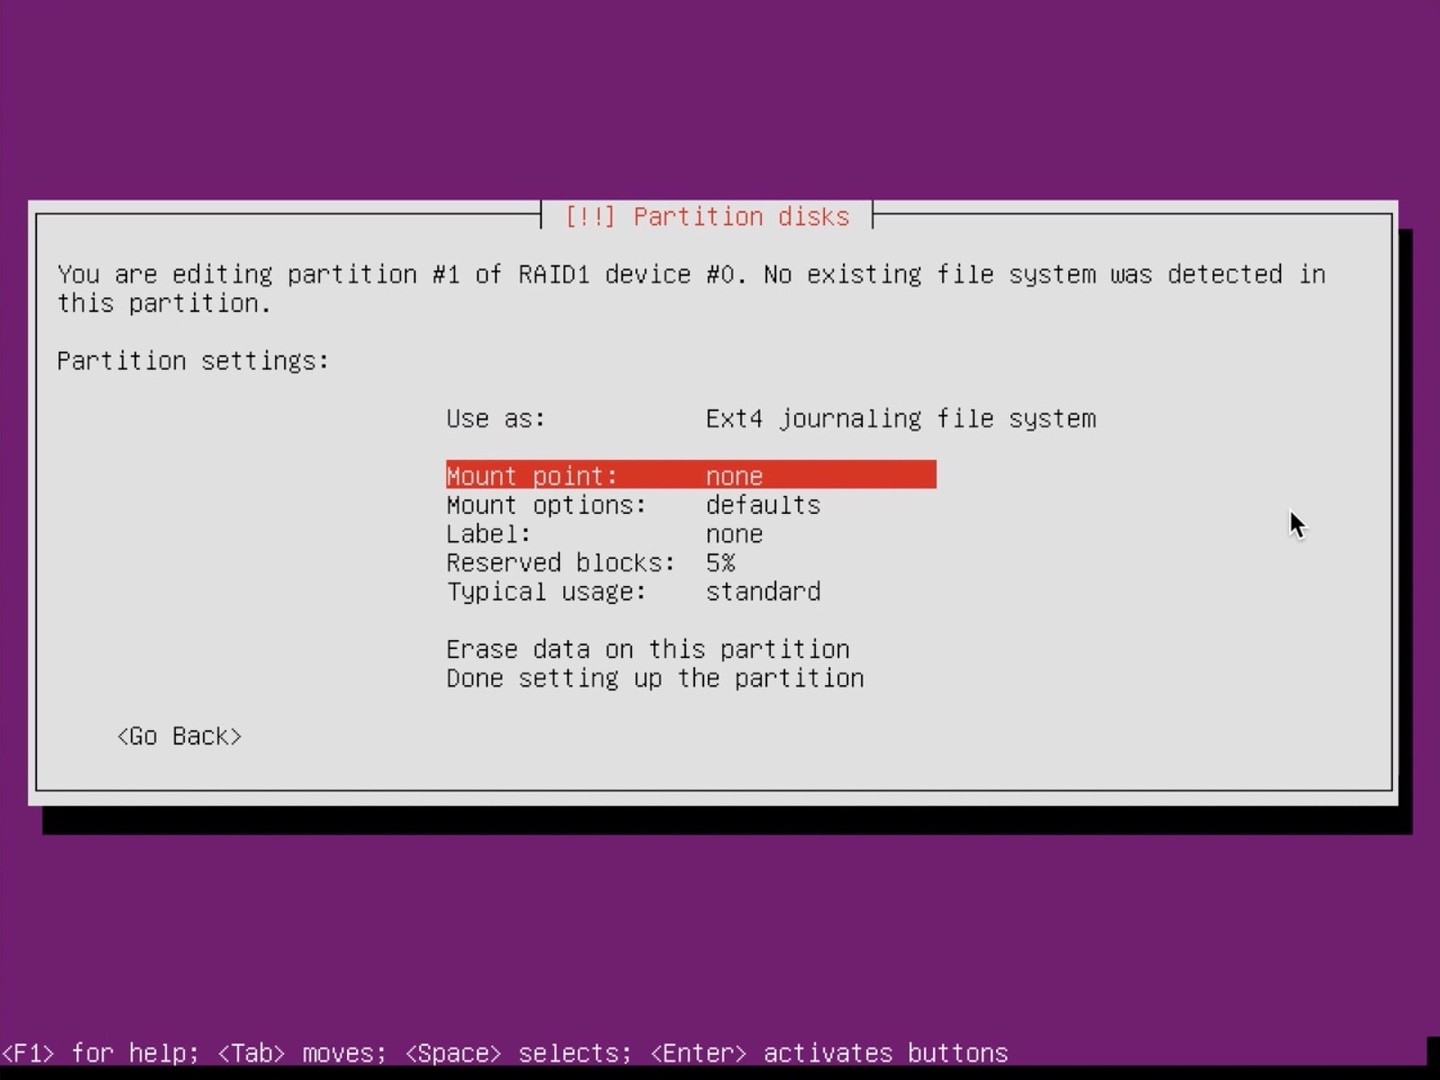
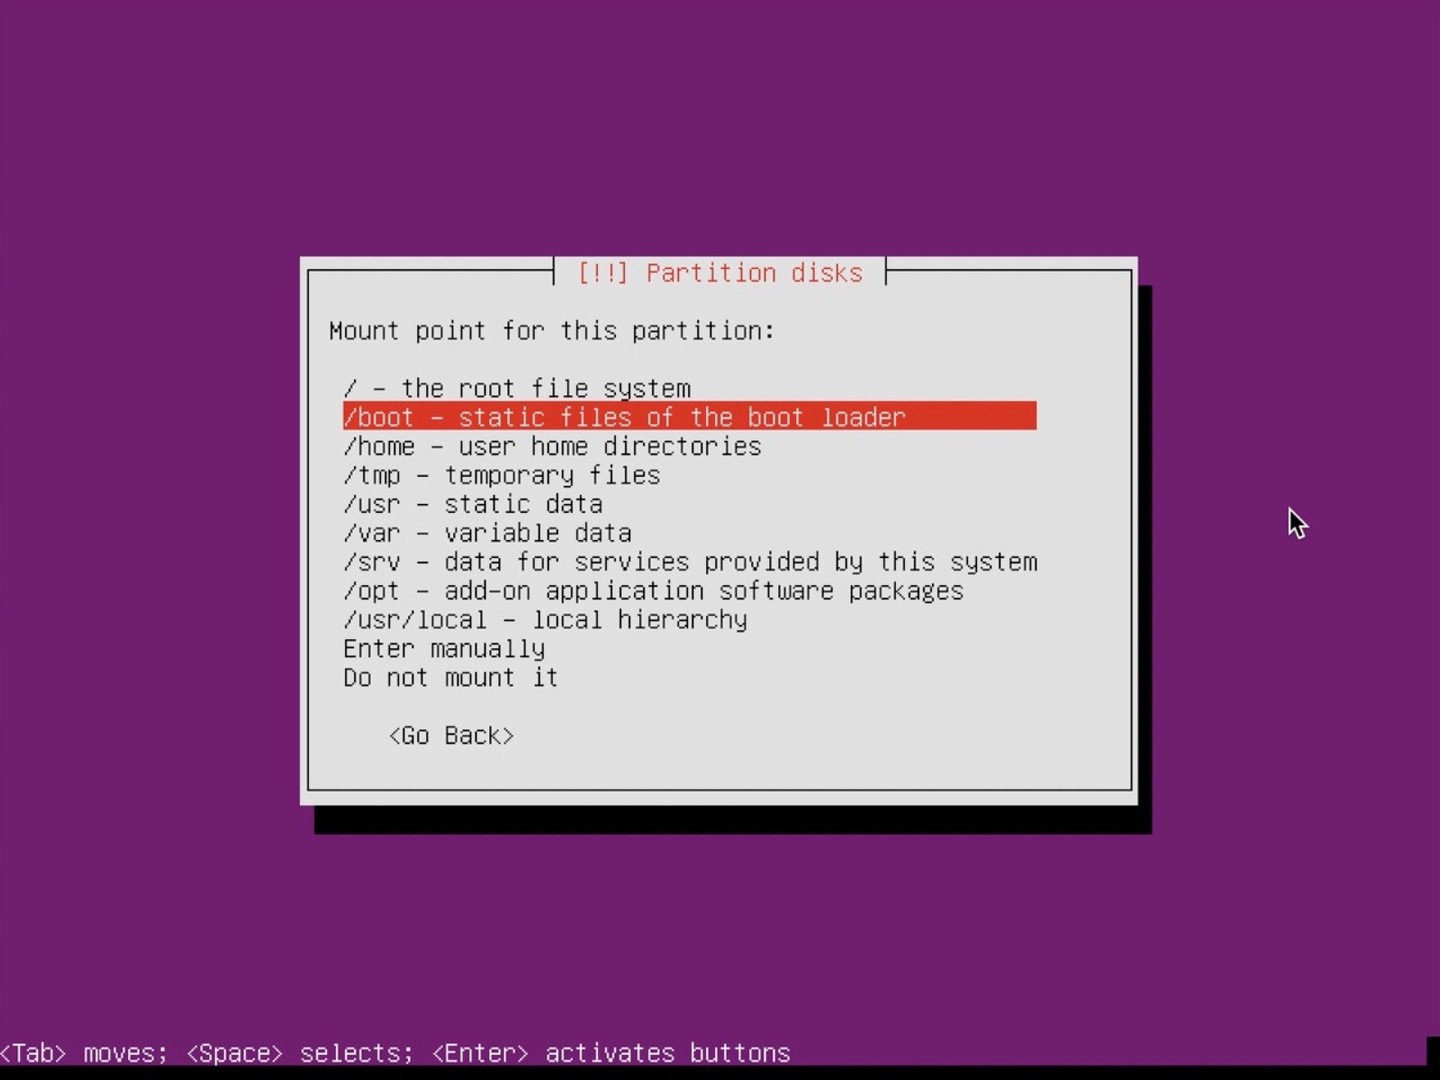
Set “Mount point” to “/boot - static files of the boot loader”:
Select “Done setting up the partition”:
Go to the other RAID device (the big one):
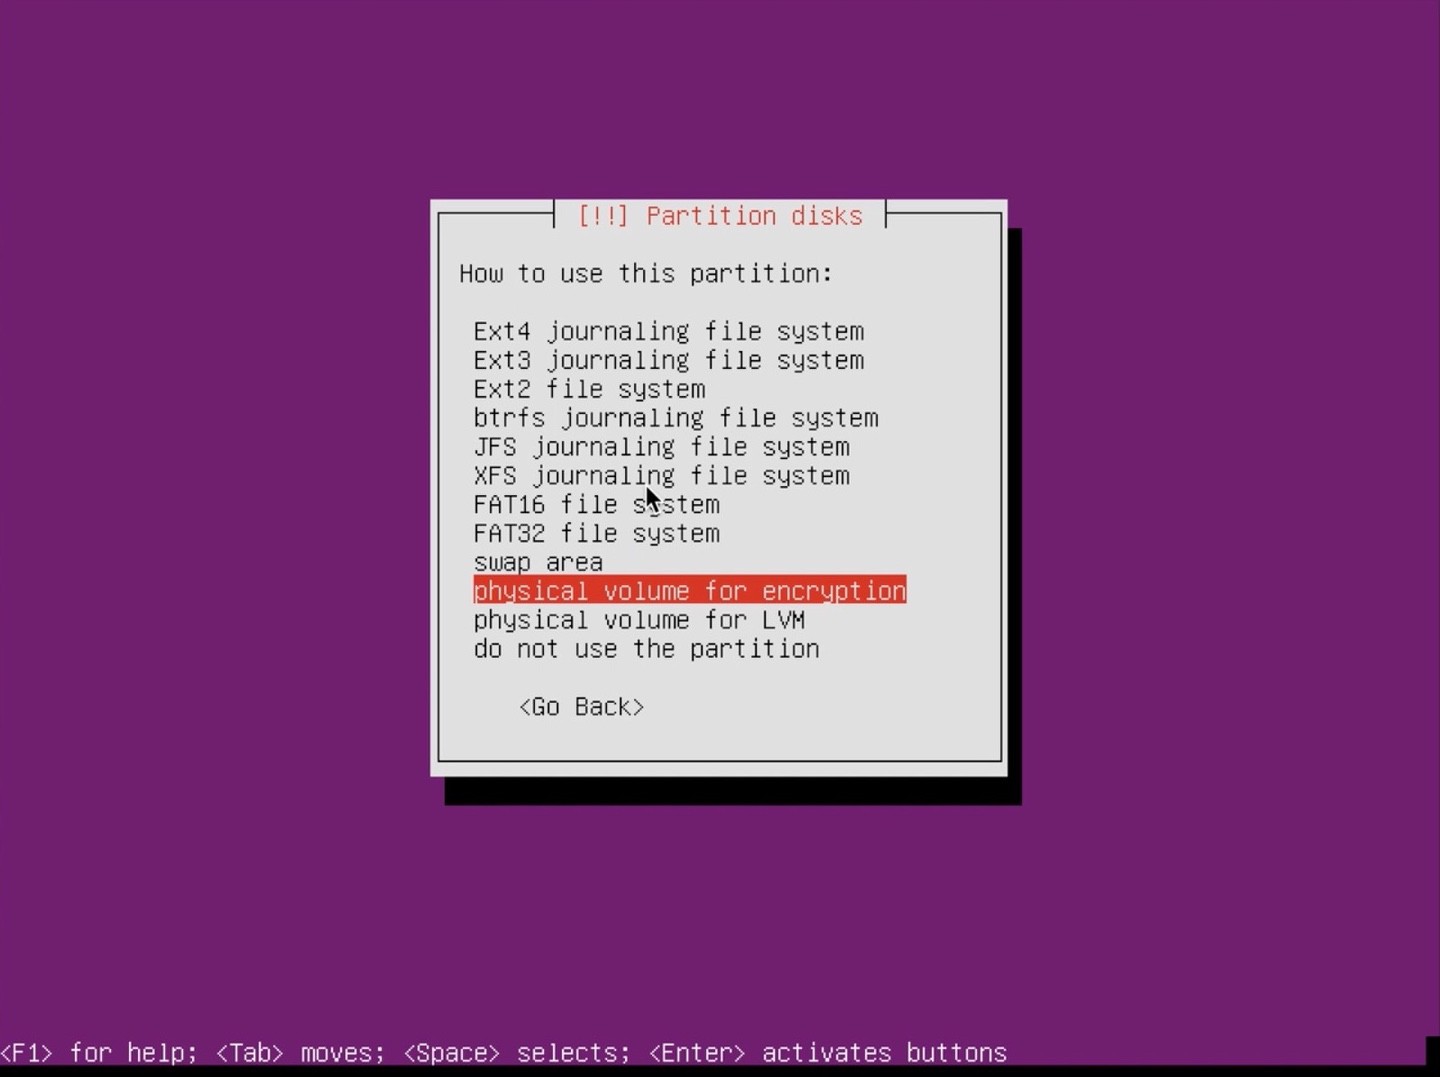
Navigate to “Use as” and select it:
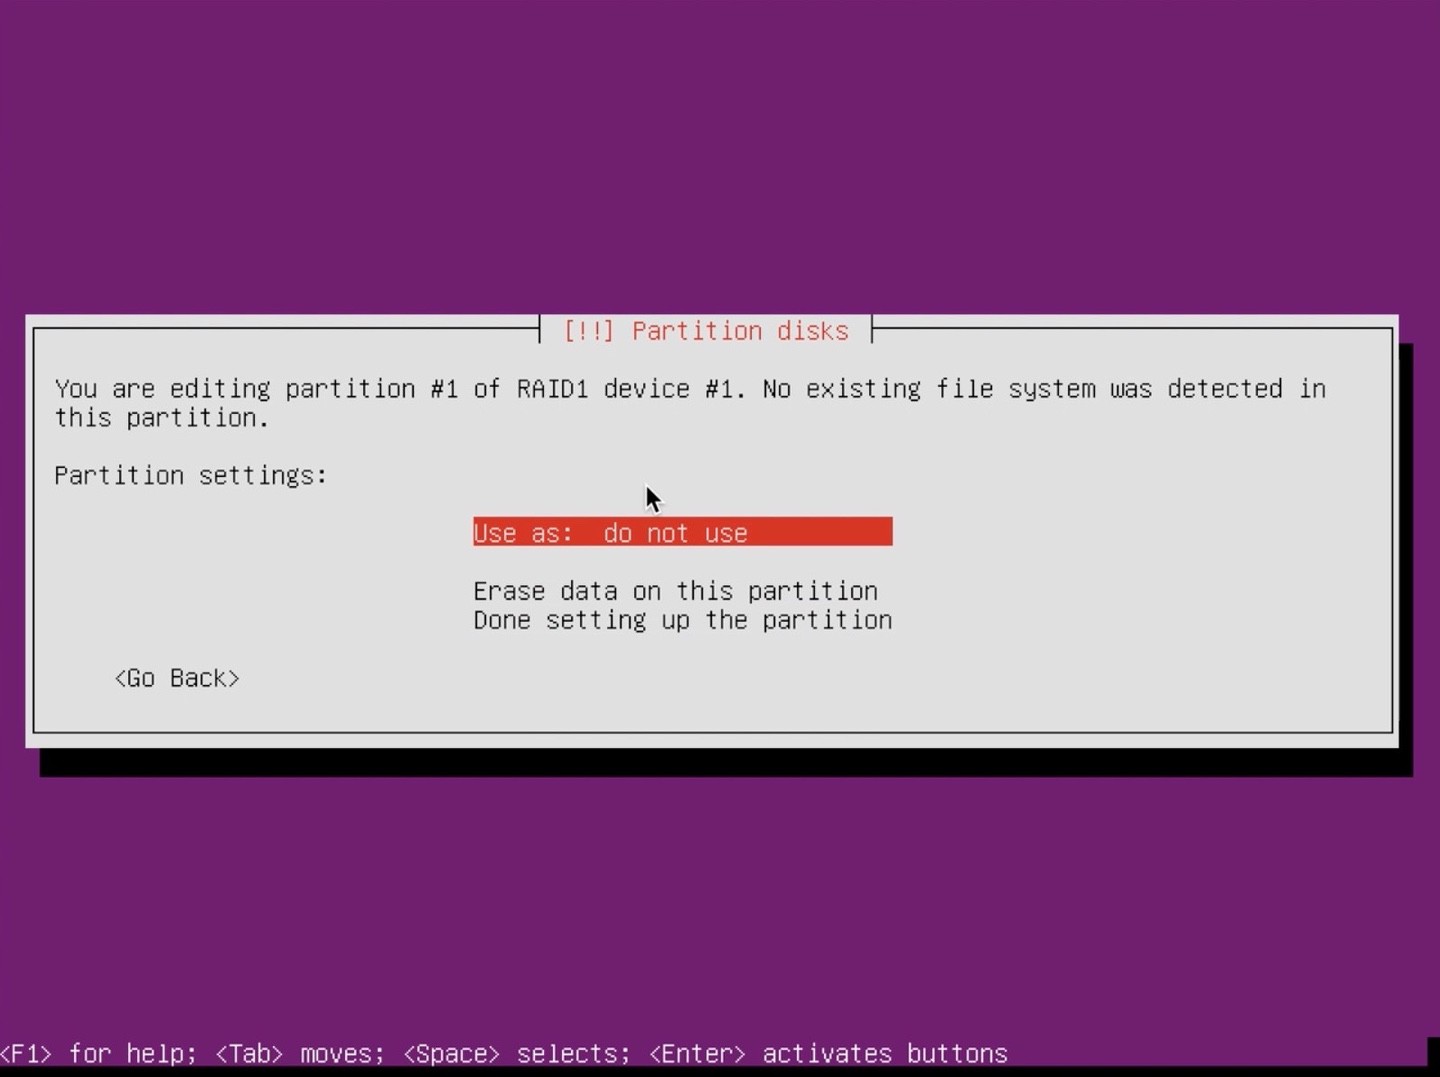
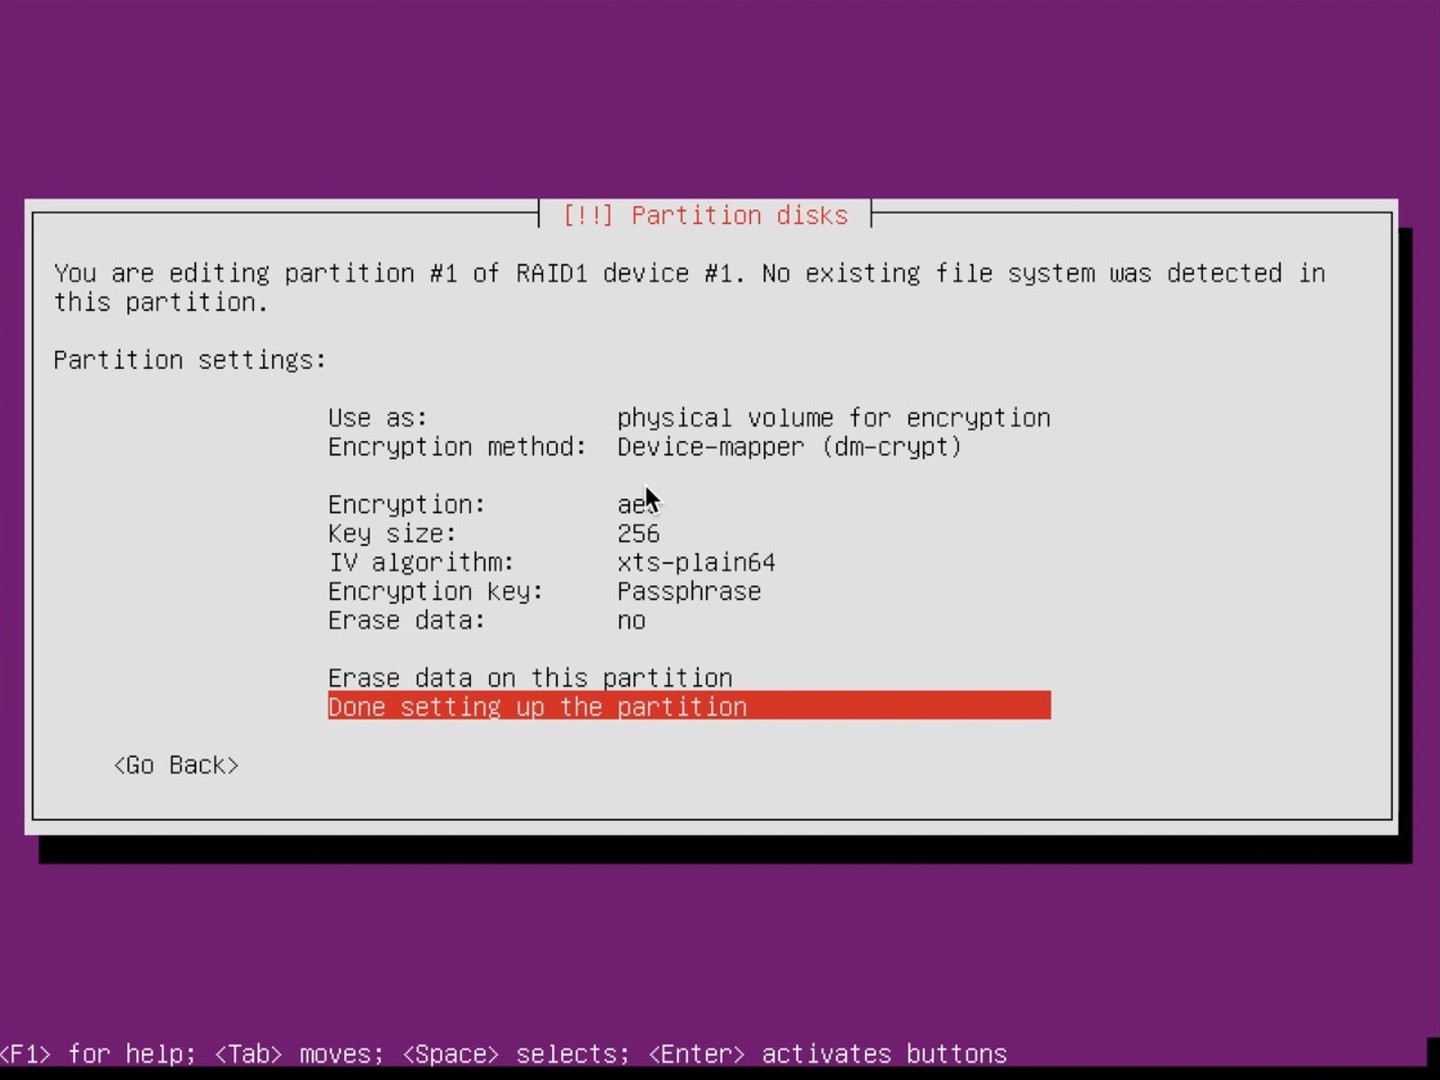
Select “physical volume for encryption (if you want encryption):
Select “Done setting up the partition”:
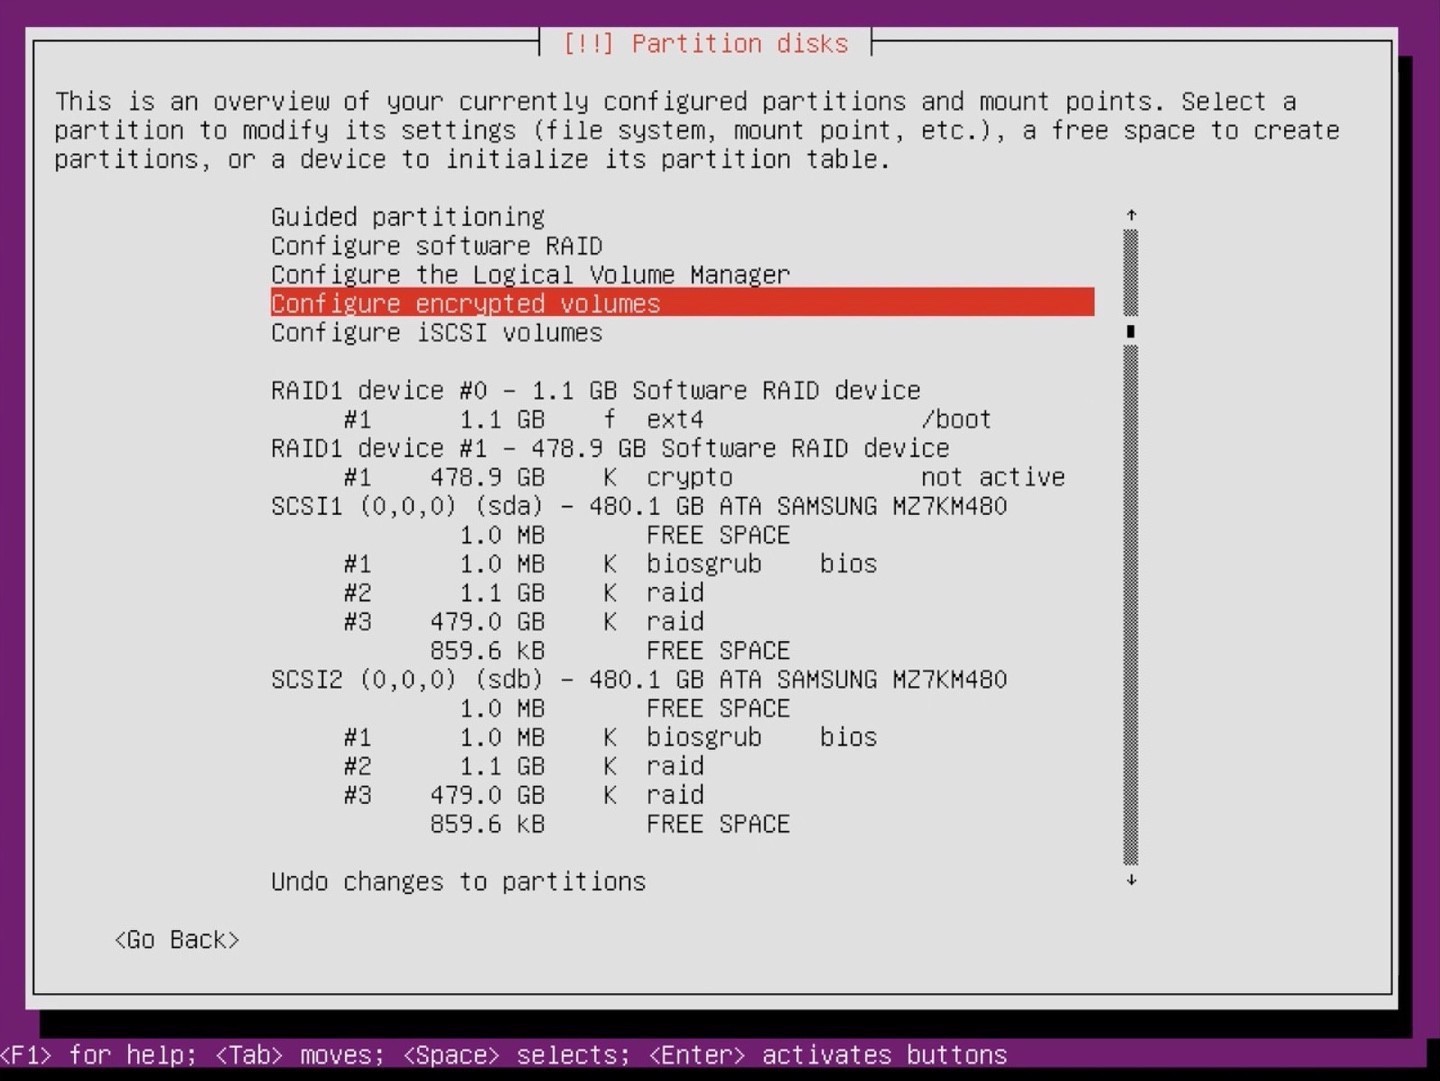
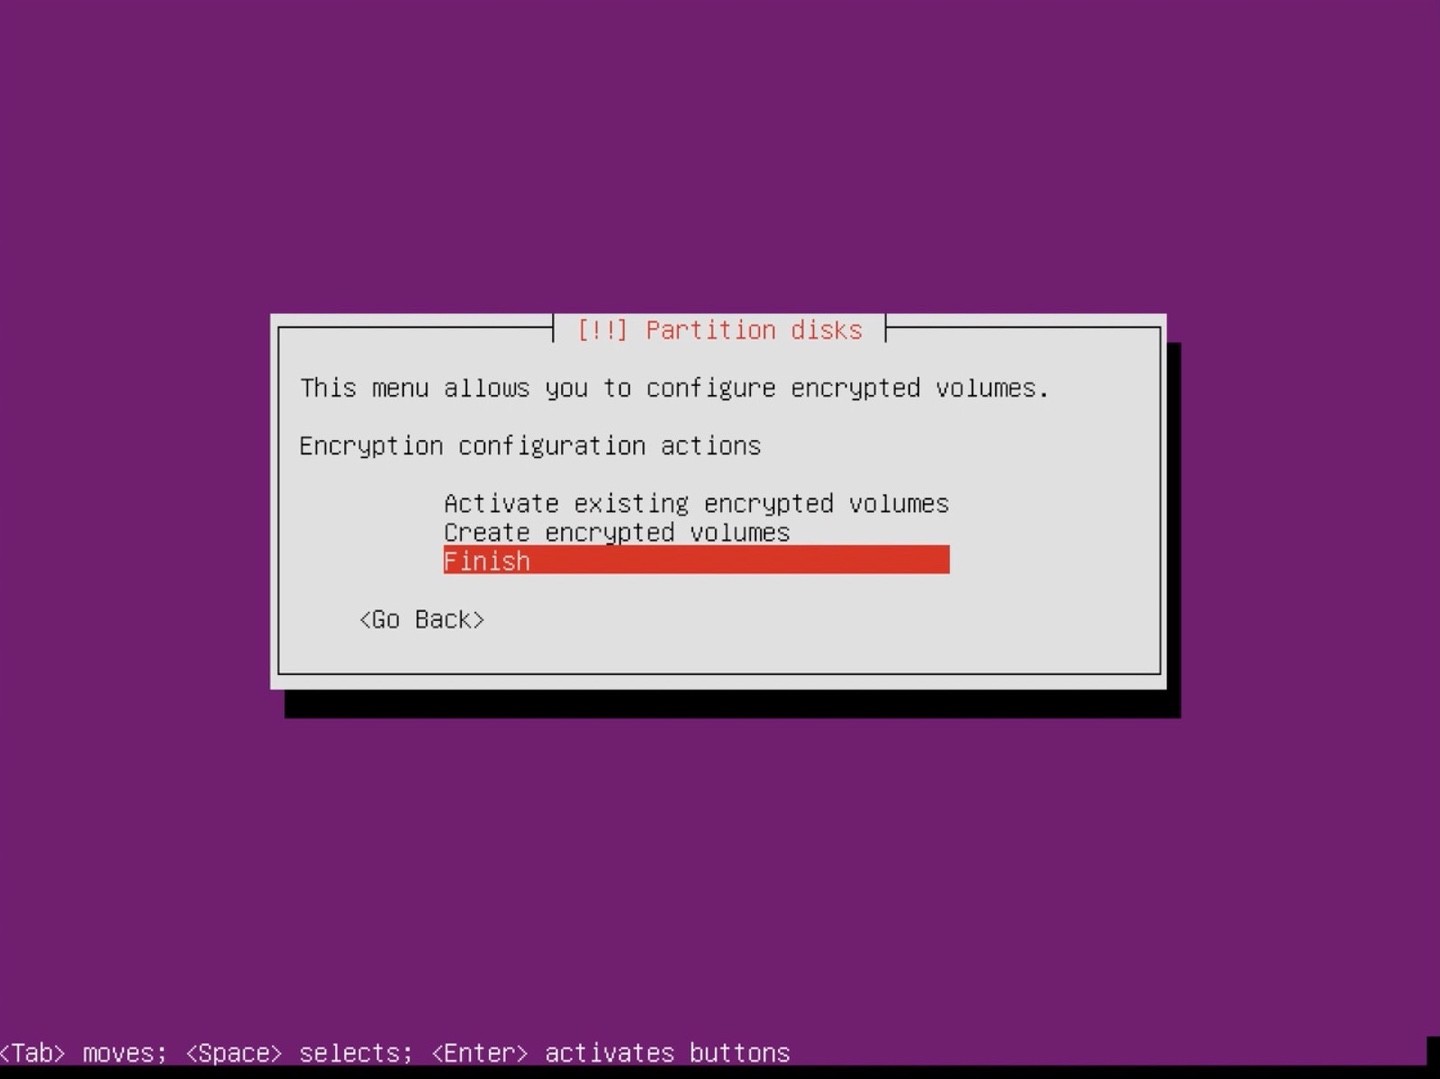
Select “Configure encrypted volumes”:
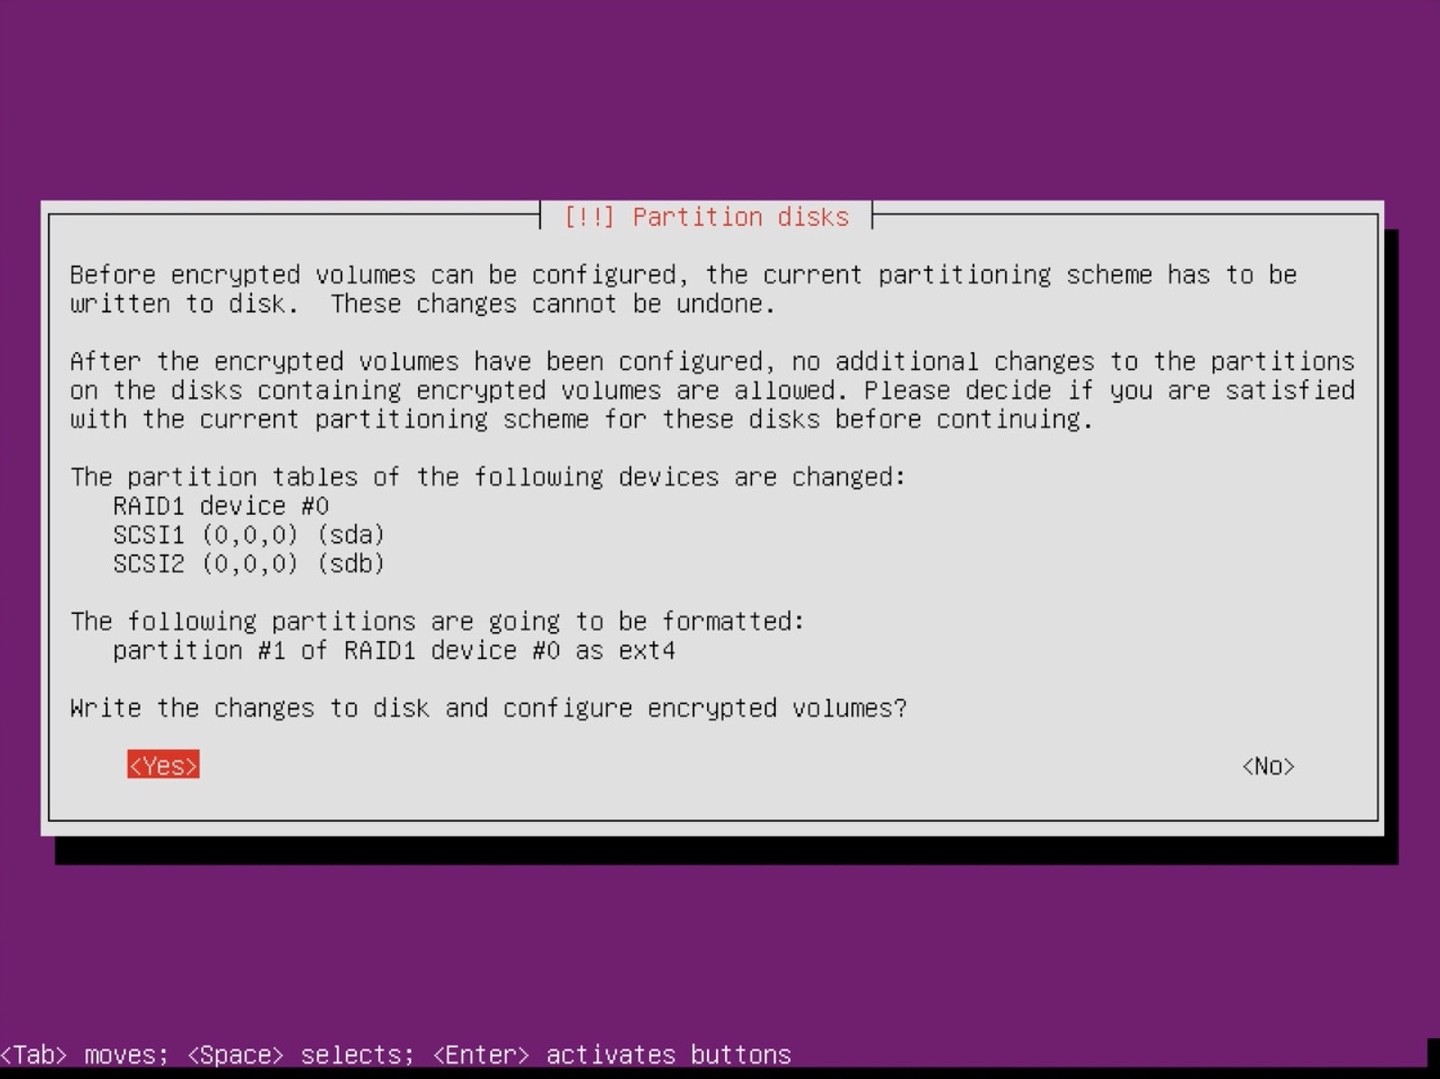
Confirm by selecting “Yes” (this can not be undone, if you need to make changes after you have to restart your installer I believe):
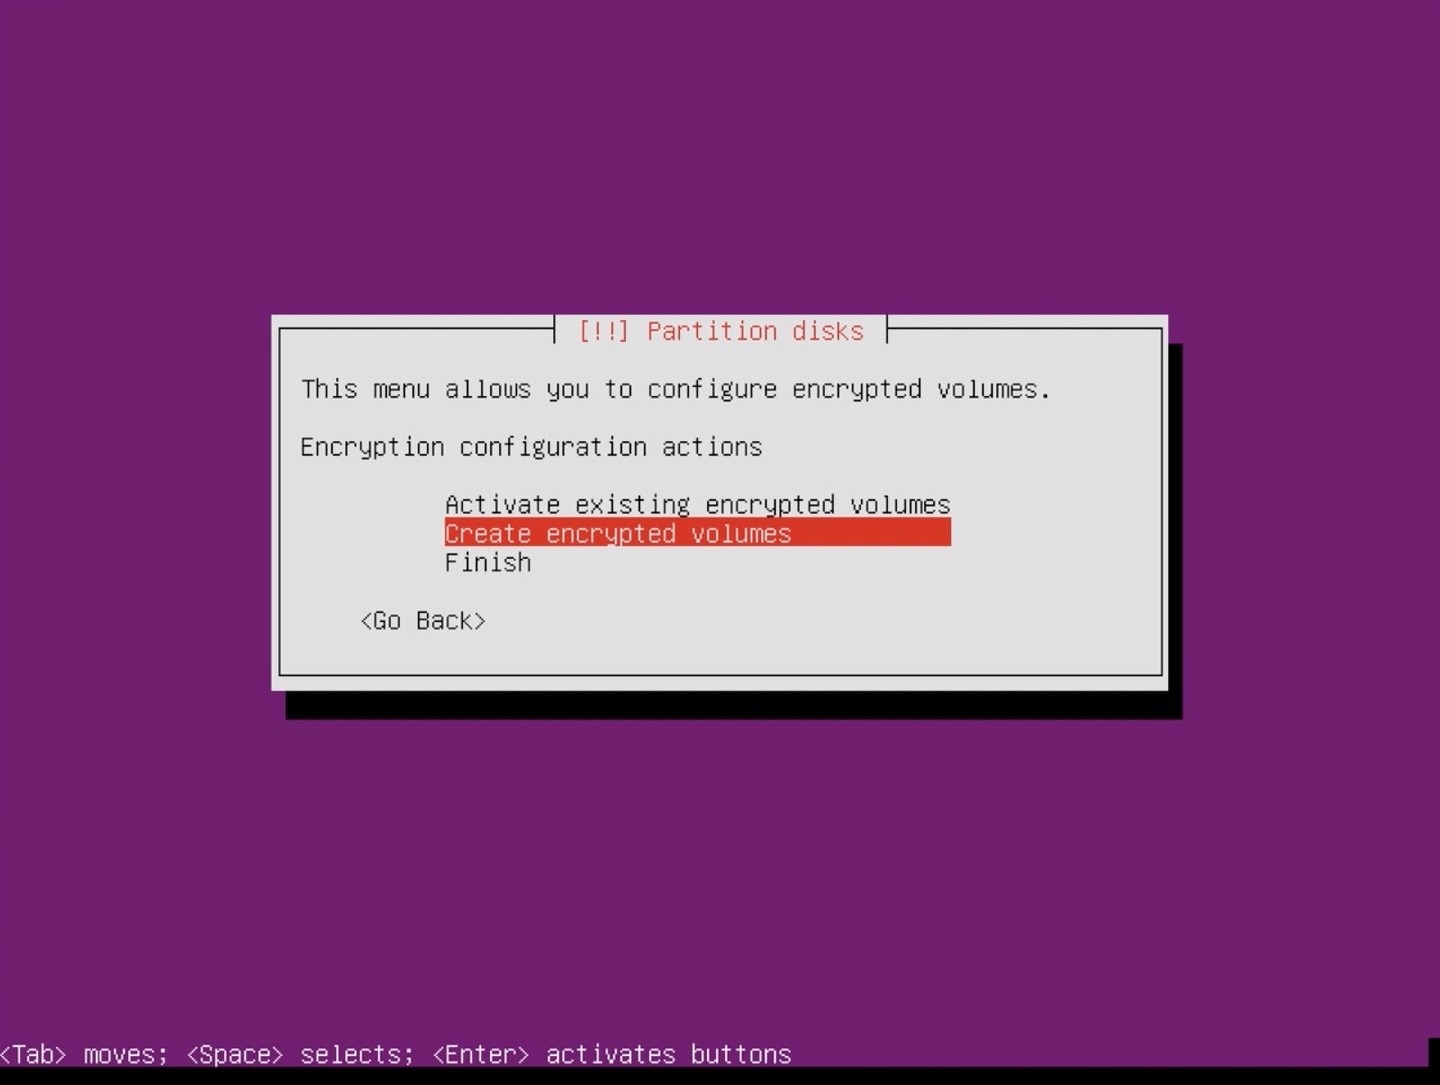
Select “Create encrypted volumes”:
Select the big crypto volume with spacebar and hit Enter:
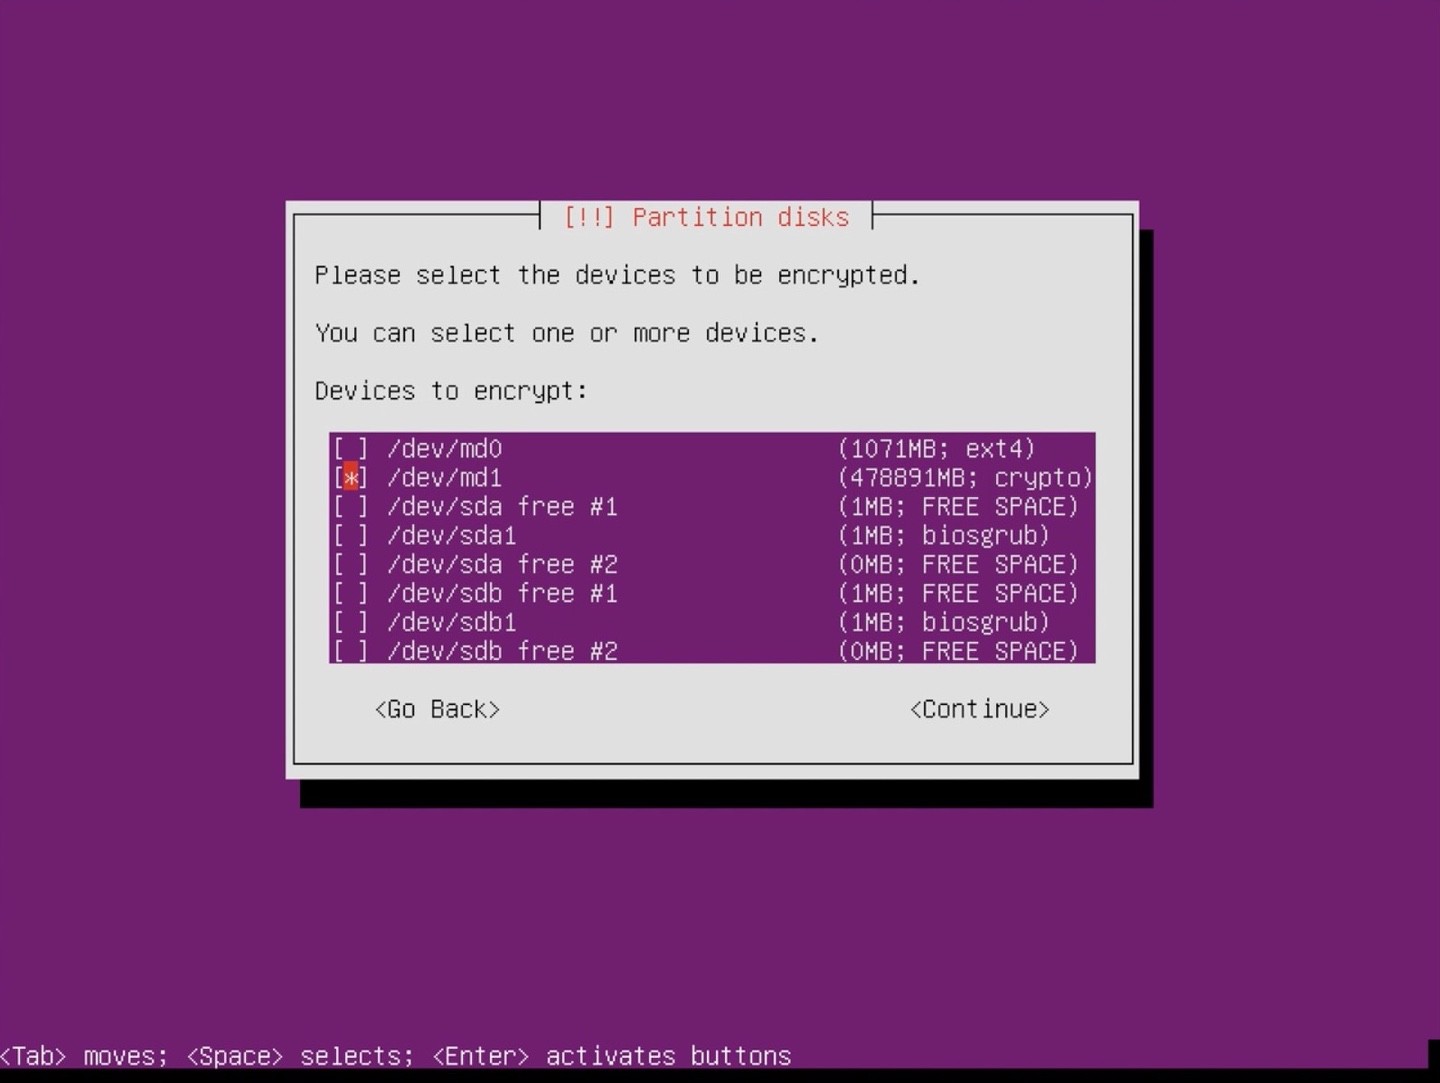
Confirm by selecting “Finish”:
Now type a password for your partition. This password is something you need to type every time your server restarts. You can do this remotely if you install something like Dropbear as a SSH client. If you do not need to enter the key on restart the whole encryption does not make much sense.
Enter a key that is long. You can’t change this key without a clean install so please pick a good long key:
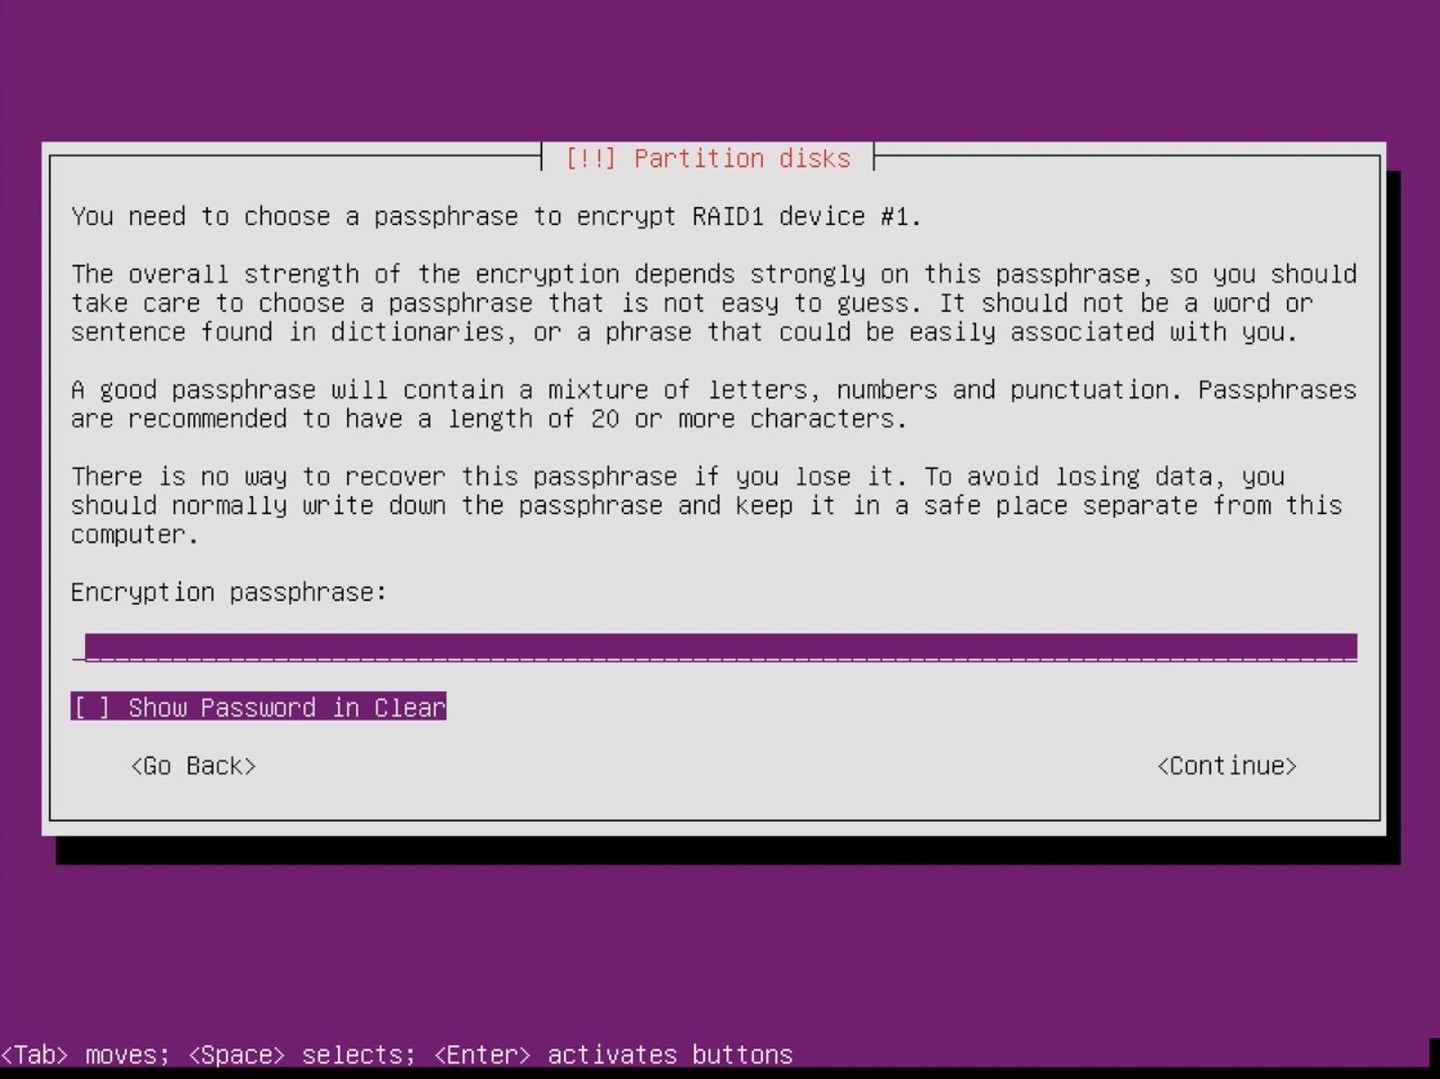
Reenter the key (in this case this is very good UI, you really want to know you typed the correct key twice):

Select the “Encrypted volume” that has been created:
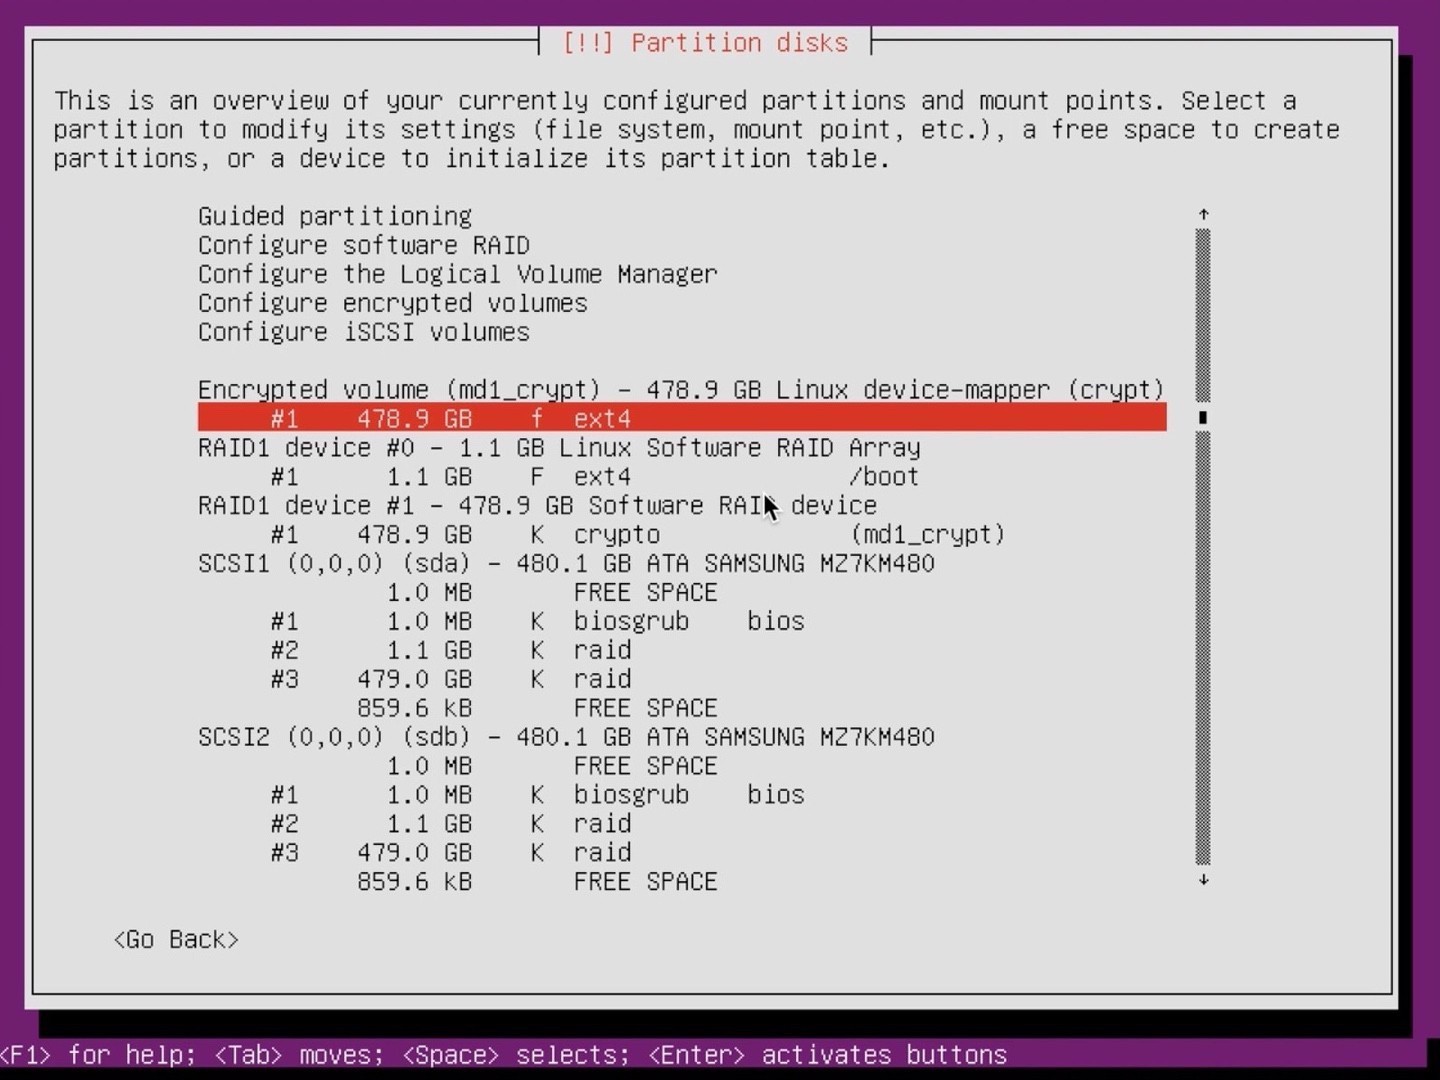
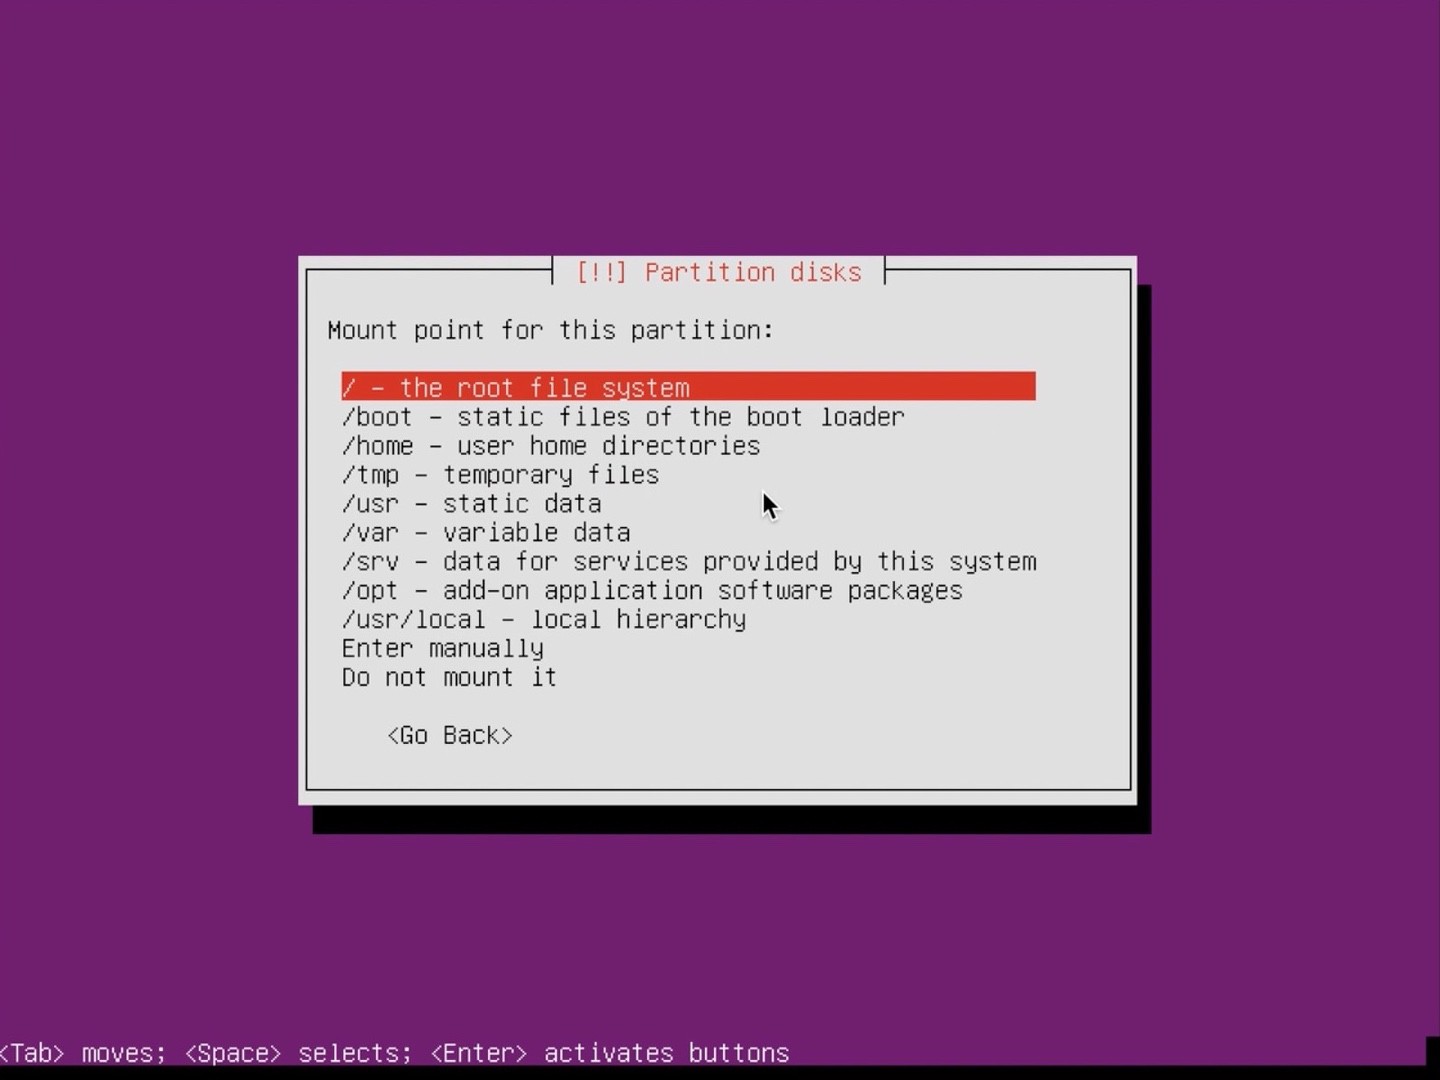
Select “Mount point” again:
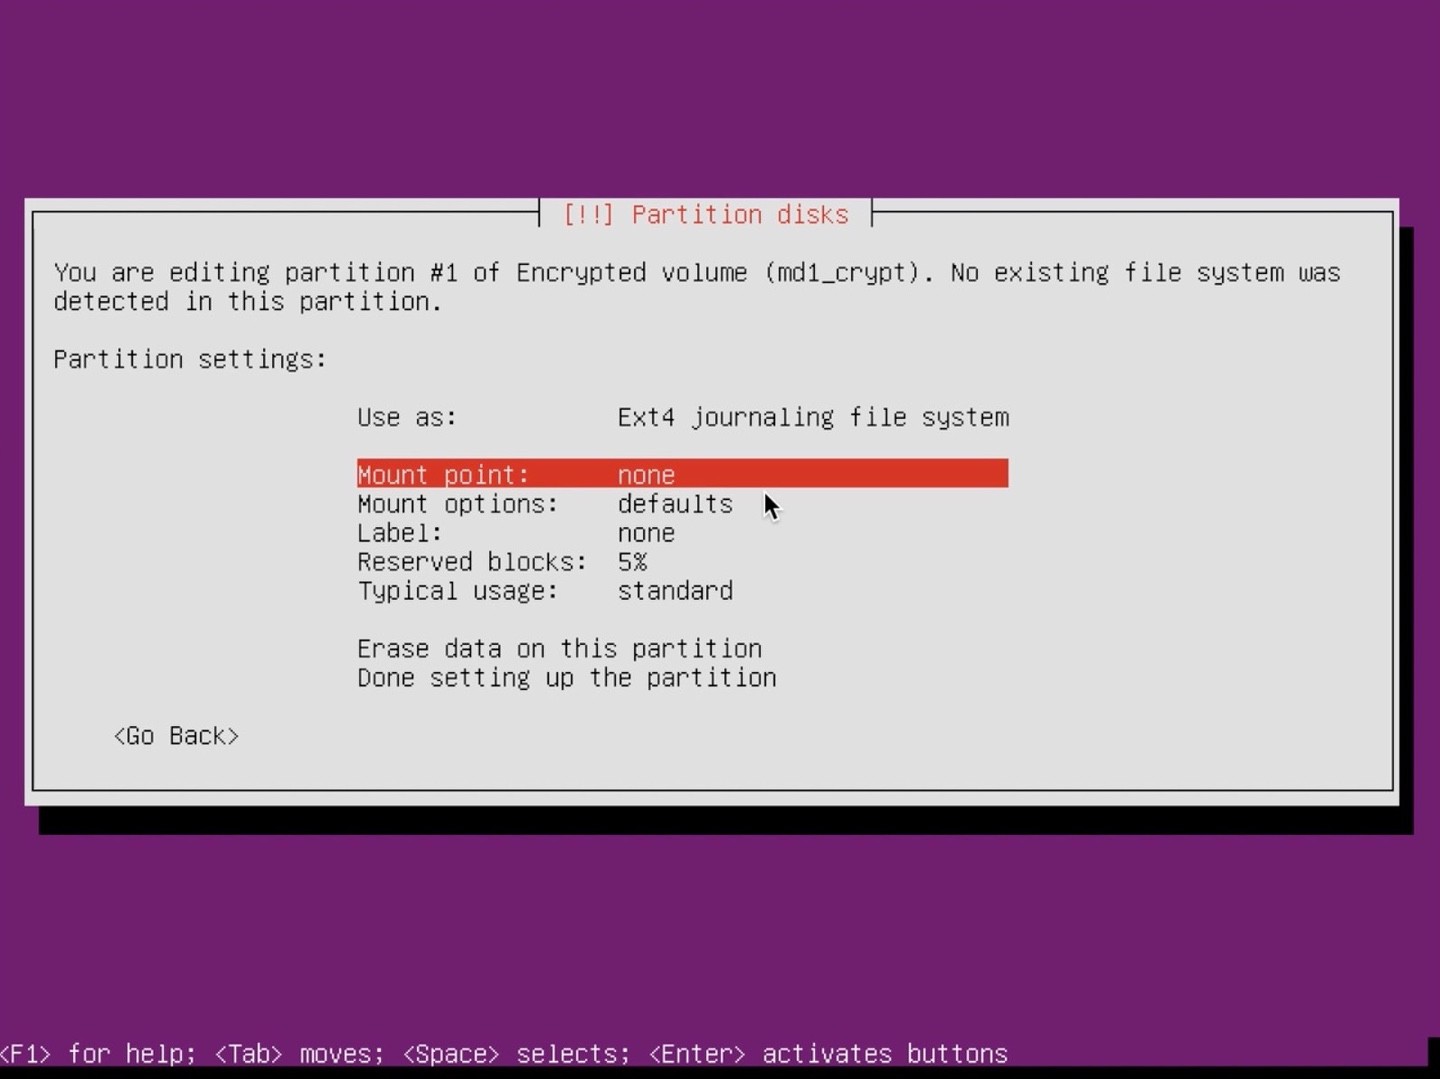
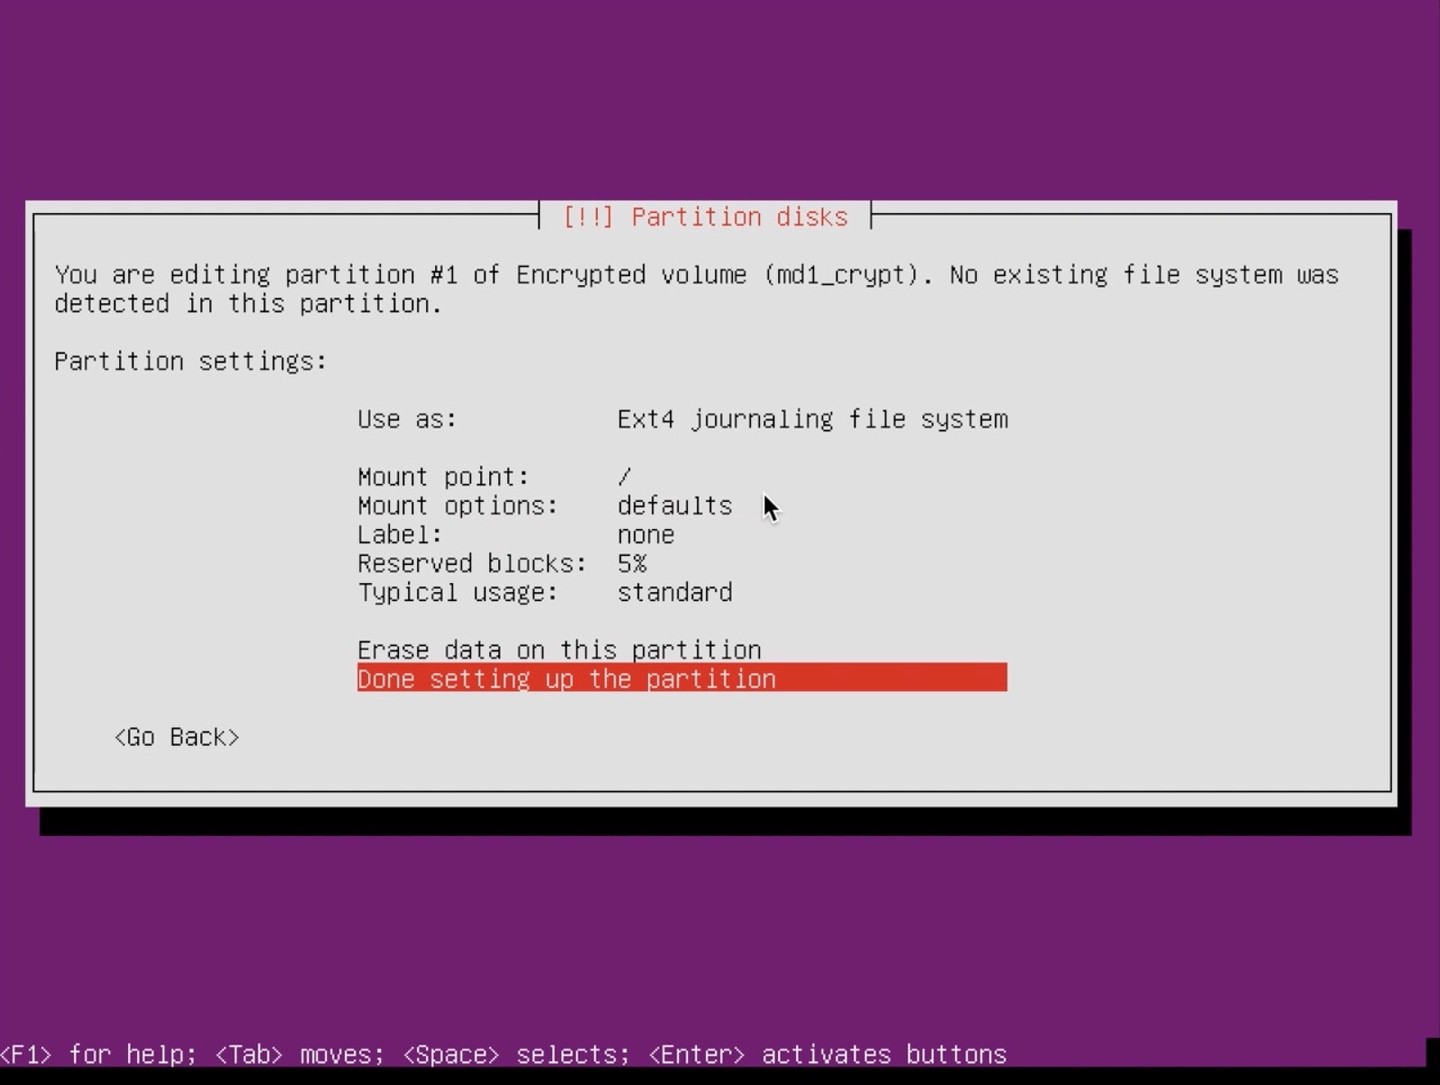
Set the “Mount point” this time to “/ - the root file system” (this is where all your files live):
Select “Done setting up the partition”:
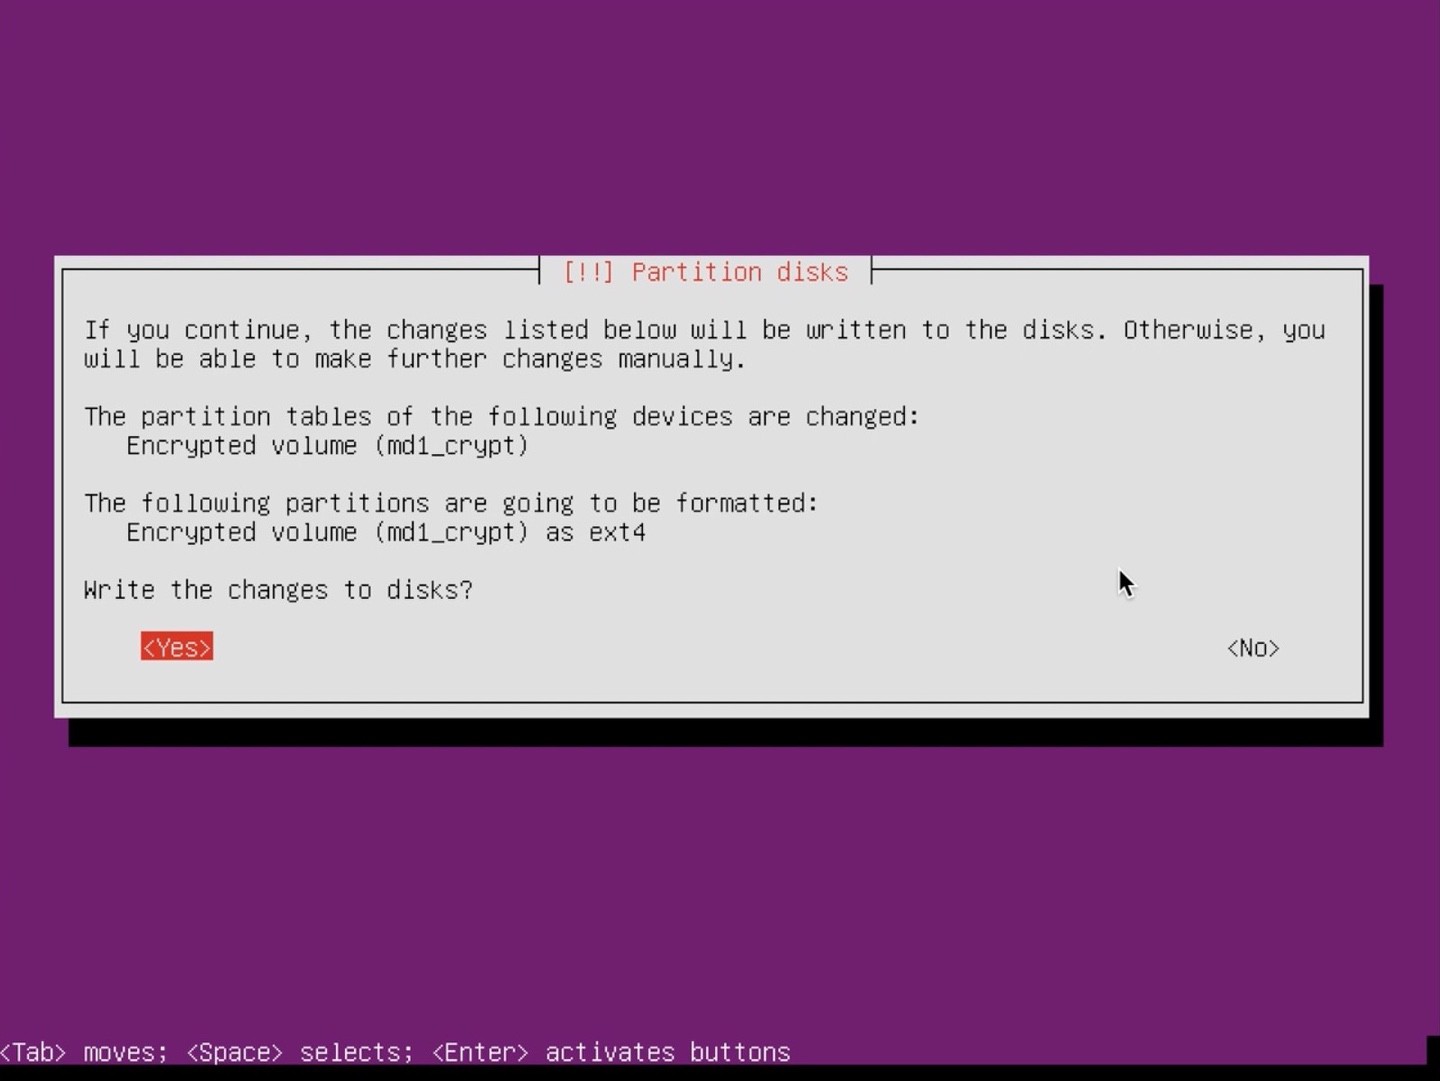
Finish by selecting “Finish partitioning and write changes to disk”:
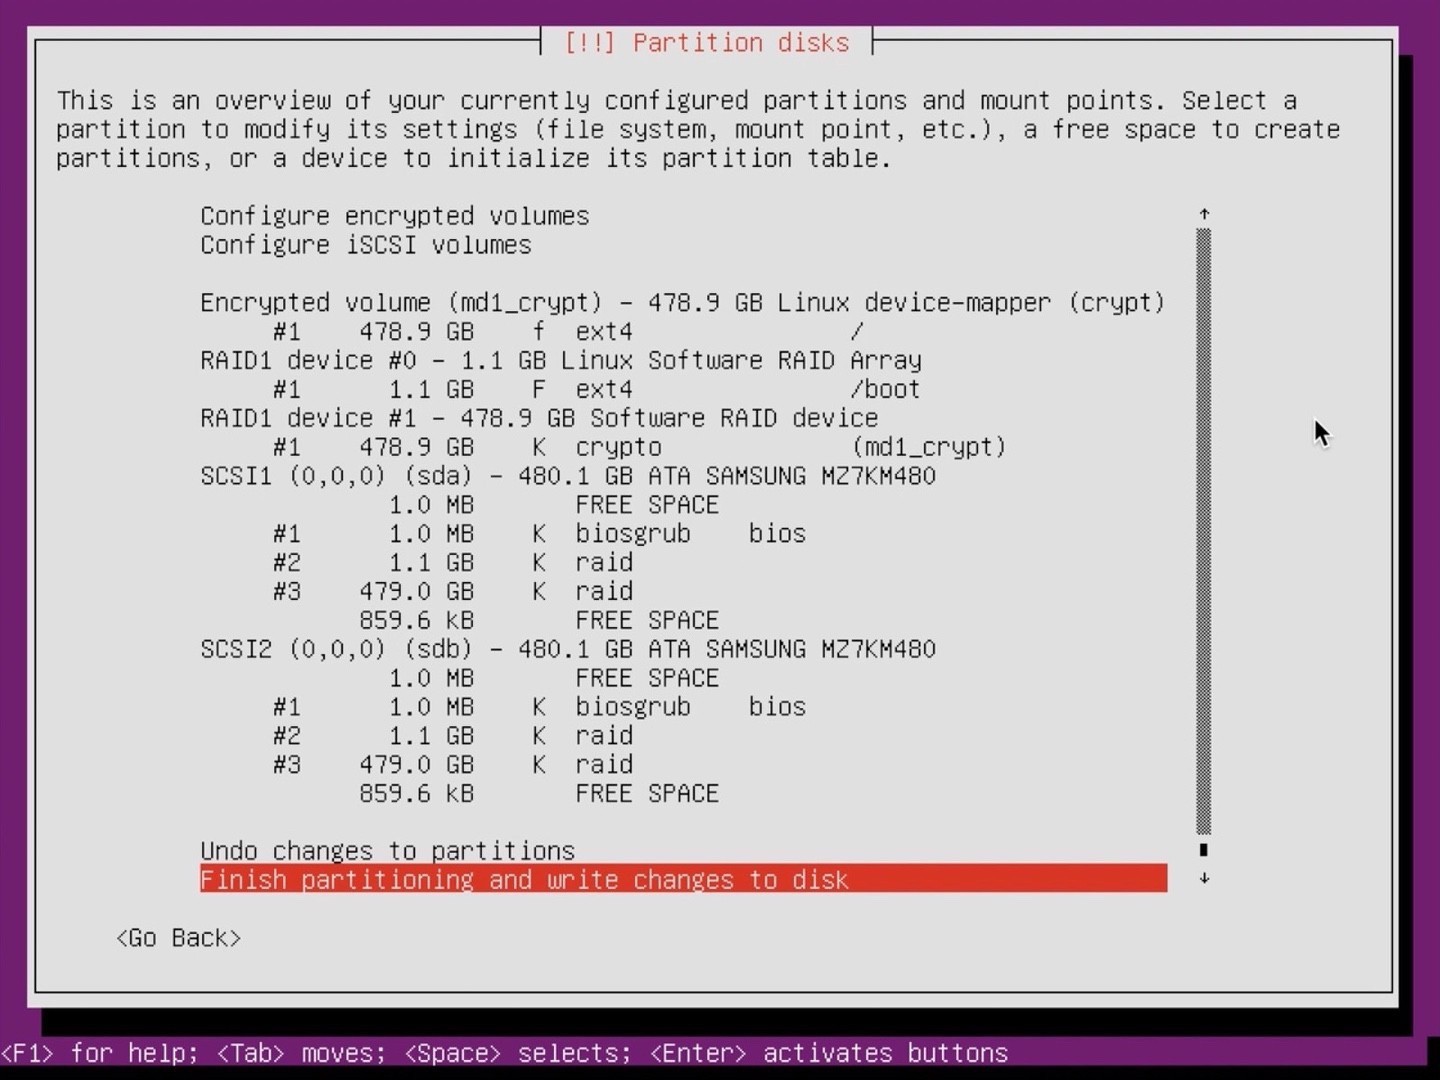
Confirm by selecting “Yes”:
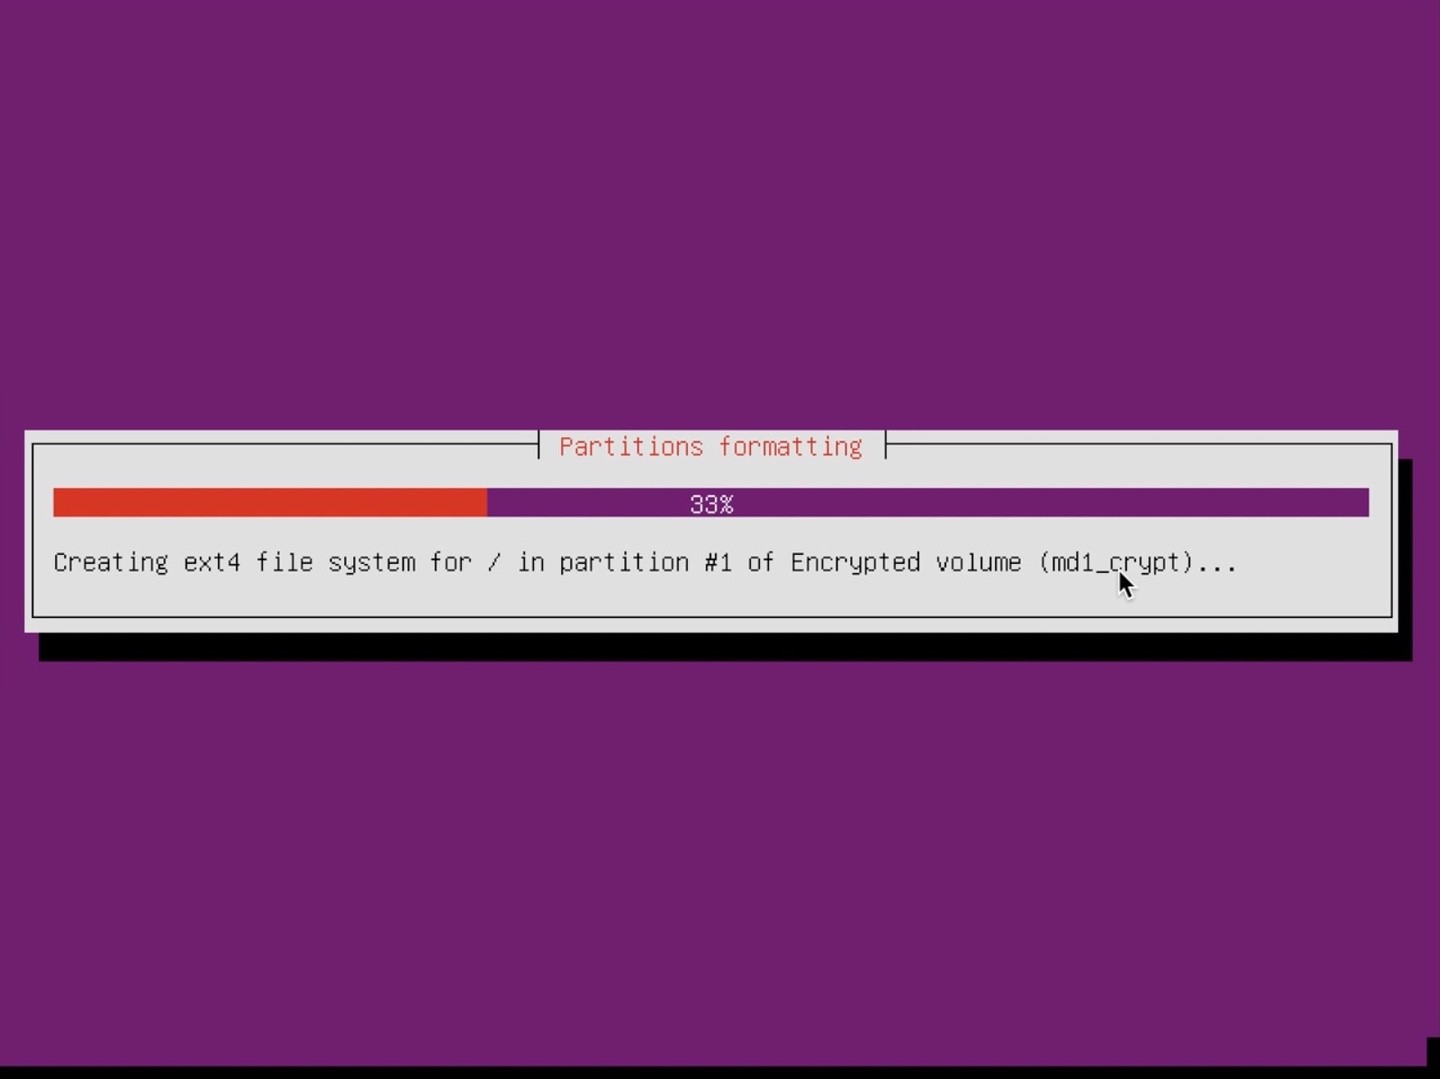
The partitions are created now:
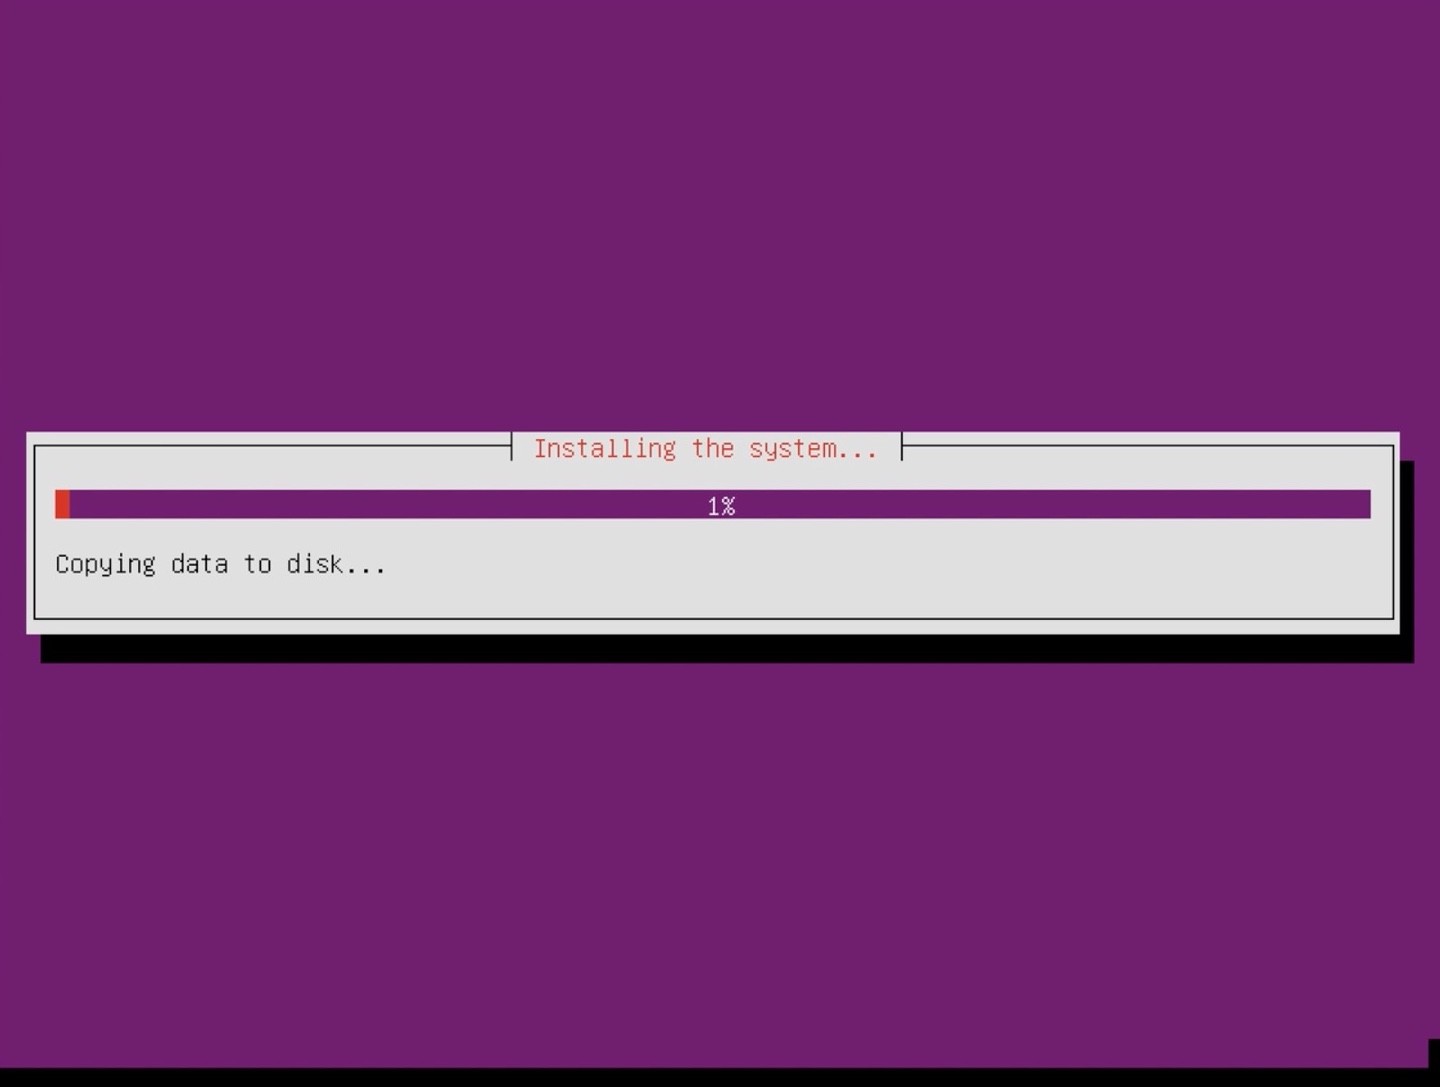
It then will start installing the Ubuntu Server to your machine:
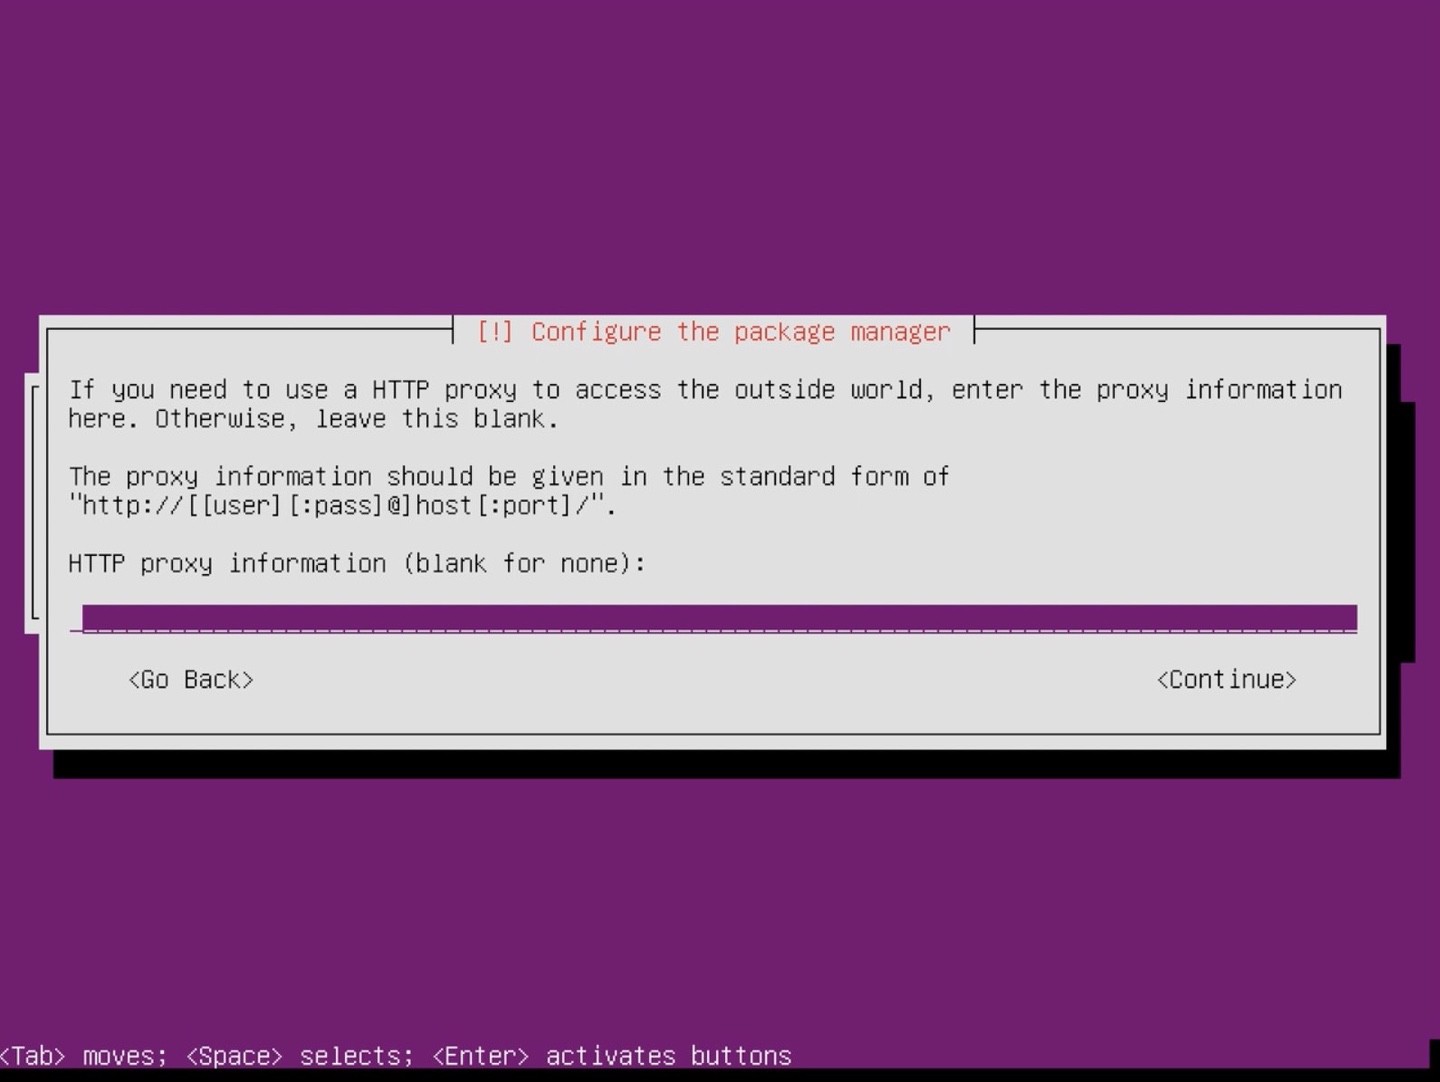
It could ask you for a proxy for the package manager (leave this blank if you have no idea what this is):
It asks you about automated updates. I normally select “Install security updates automatically”:

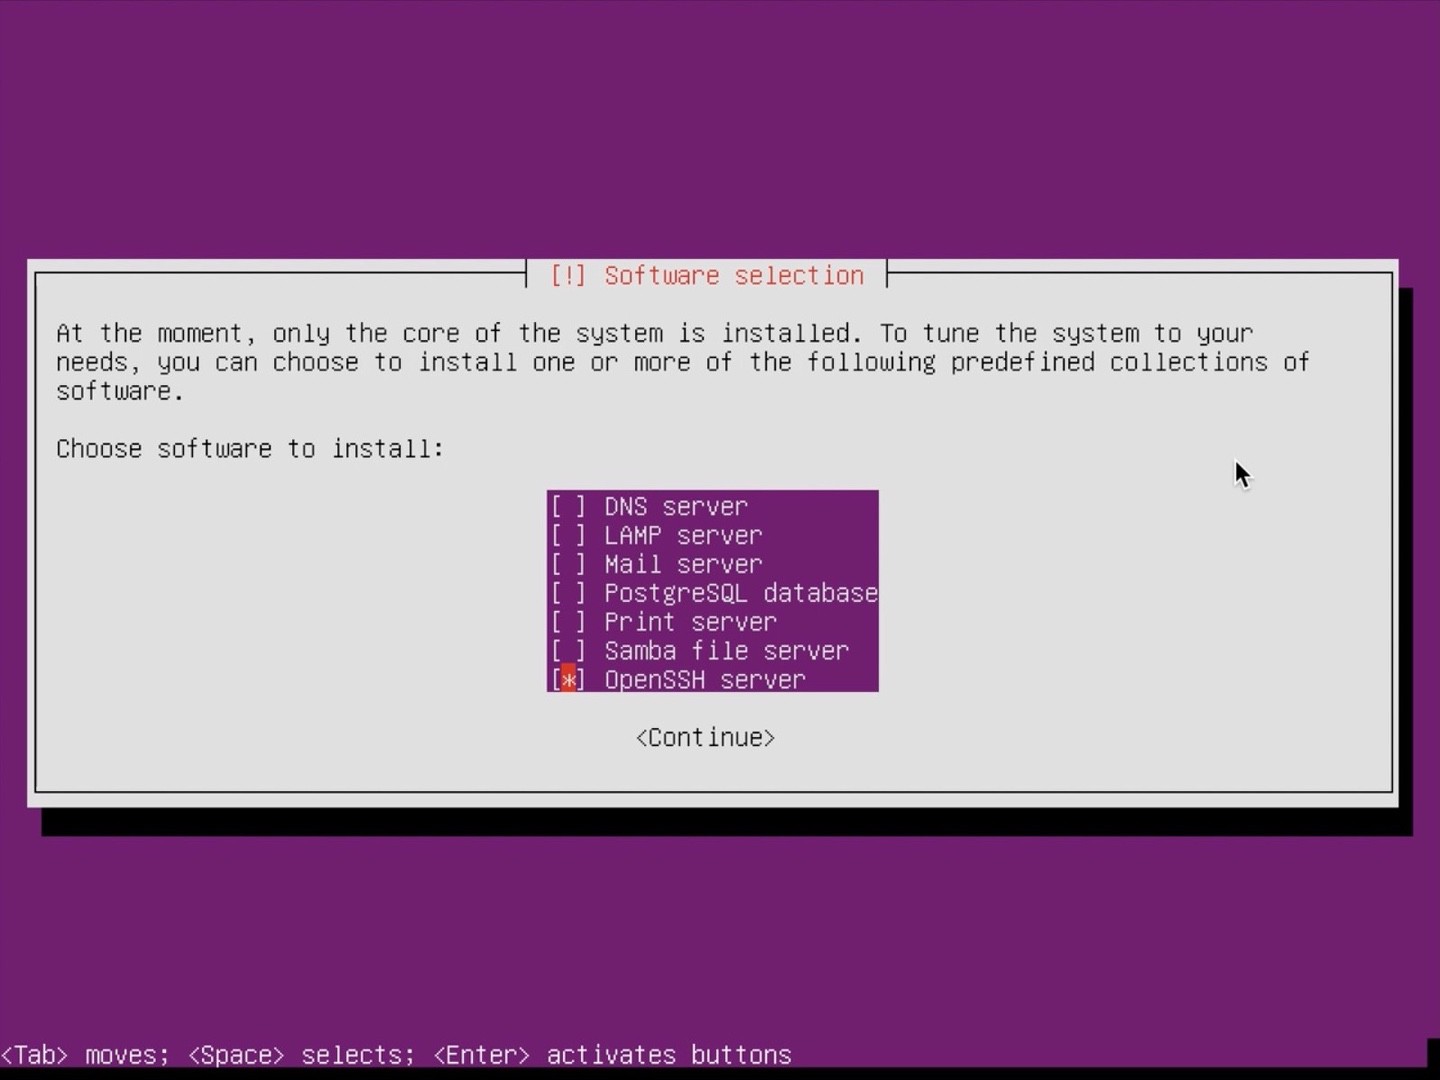
It then asks you about additional software to install. I only select OpenSSH server at this point so I can SSH into the machine once it’s booted. Pick whatever your want there:
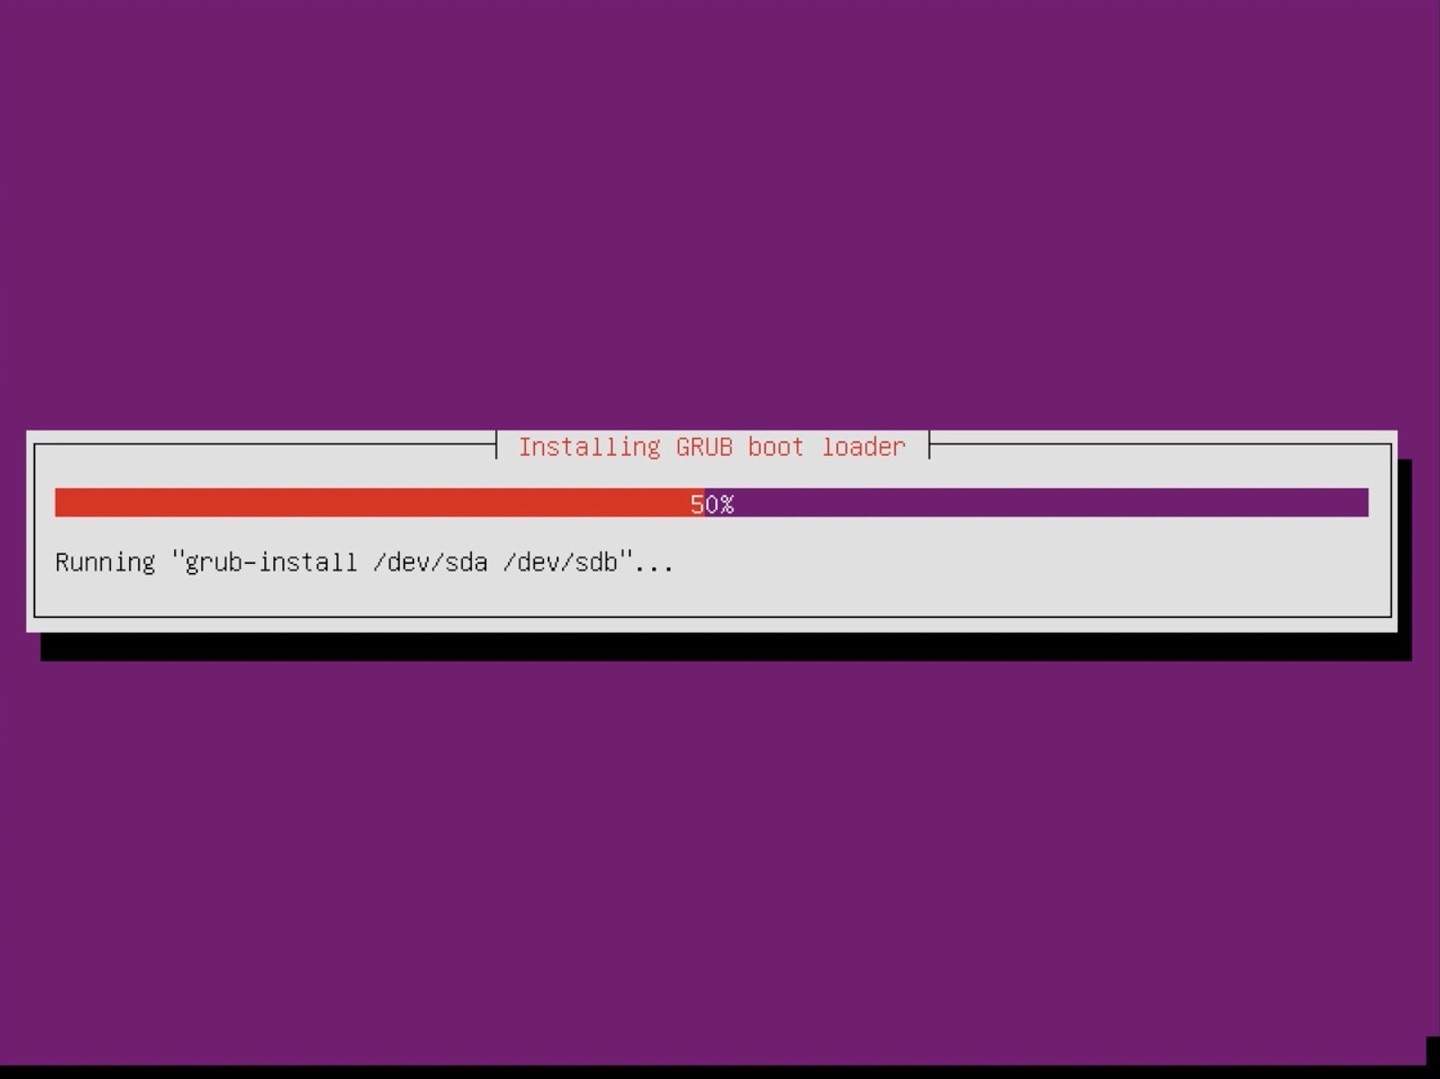
You can see that the GRUB boot loader is being installed on both disks:
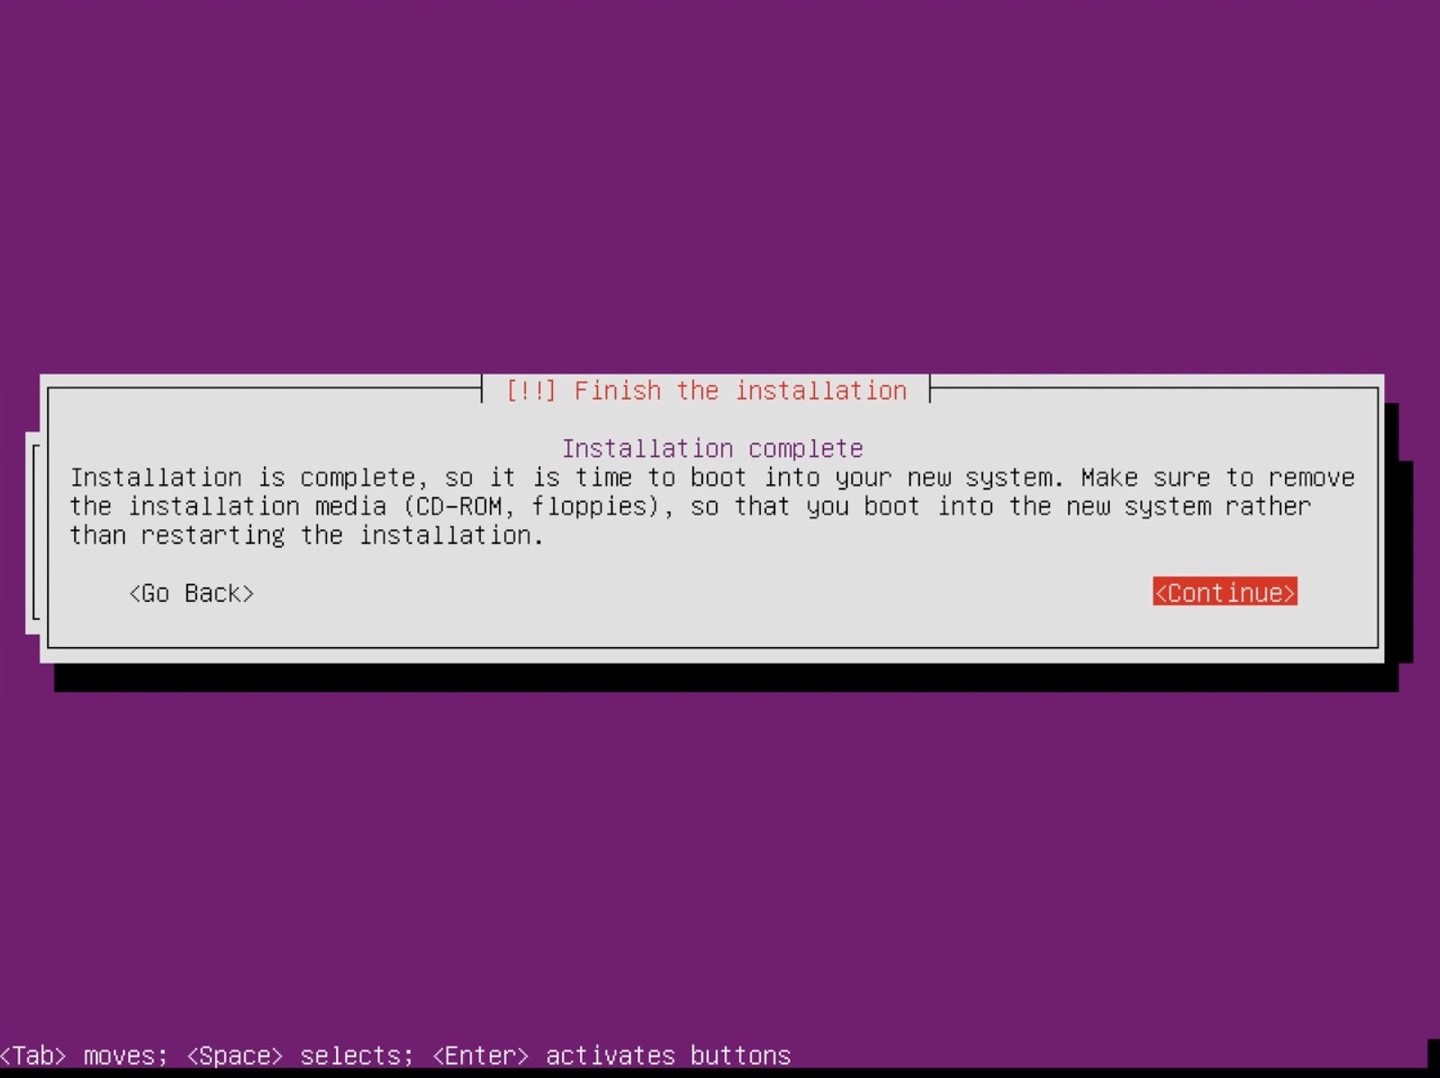
At the end of the installation make sure to remove the ISO image you attached to your server earlier:
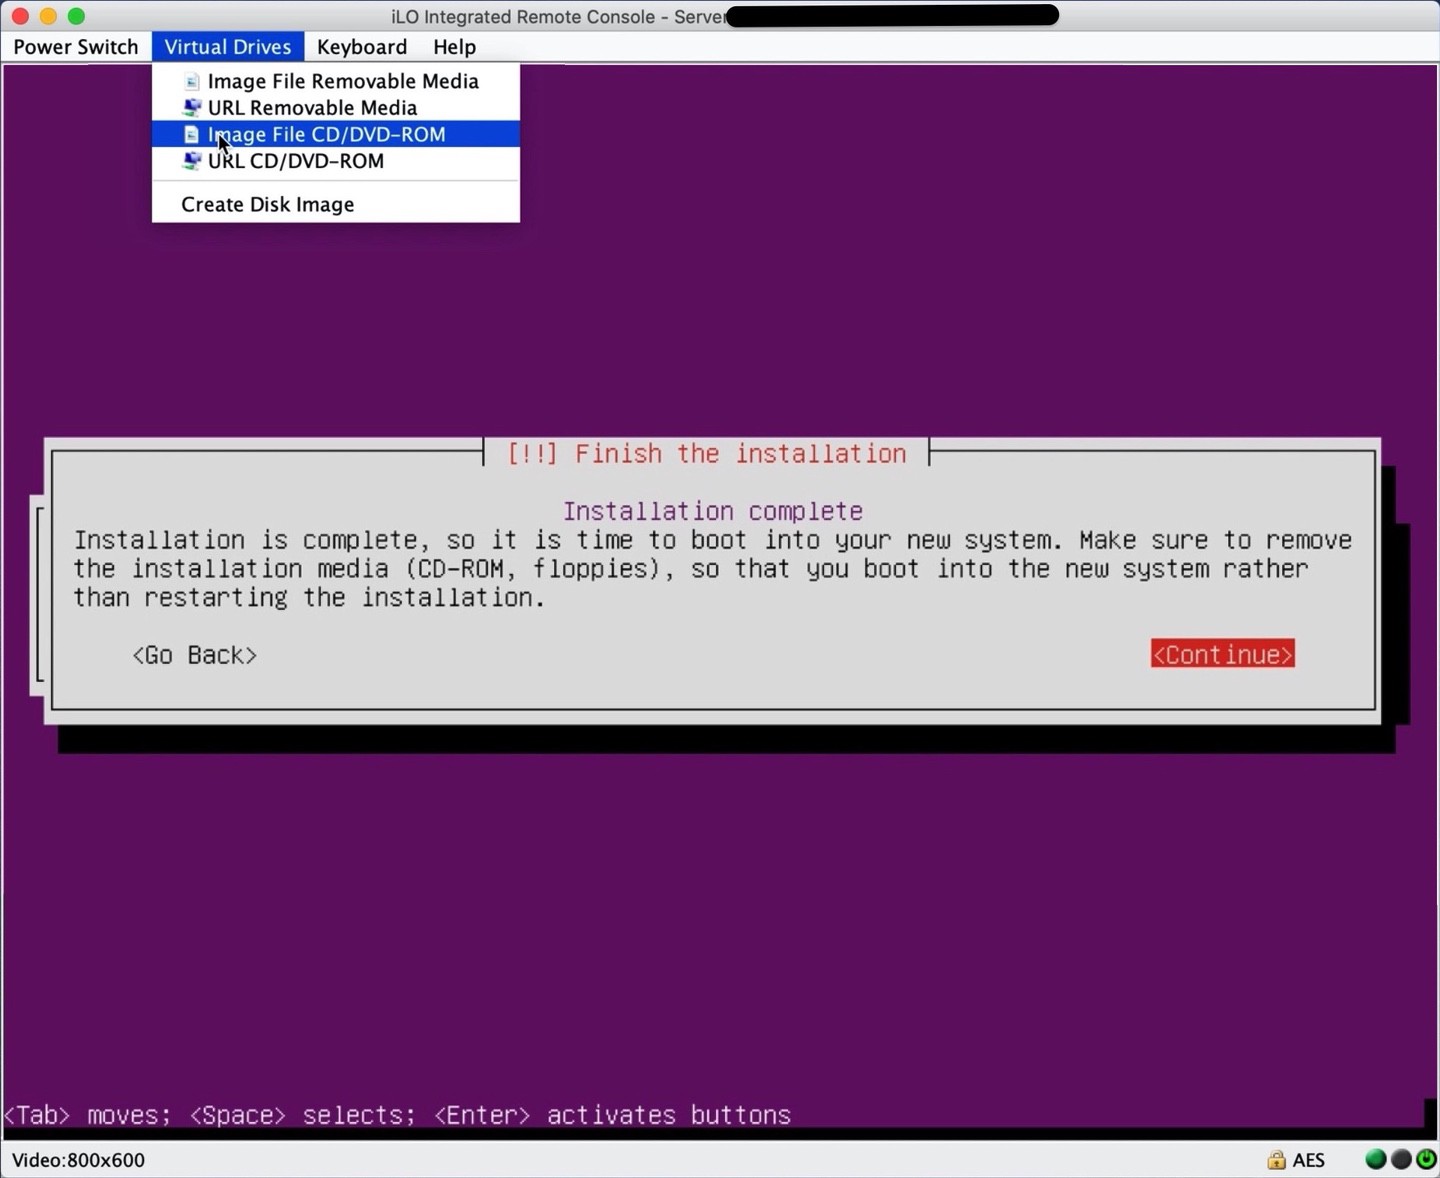
Once your image is unmounted/removed you can select “Continue” to finish the installation and reboot the machine:
It will show a brief message that it’s rebooting (it could look different on your machine):

It’s reset and now starting again:
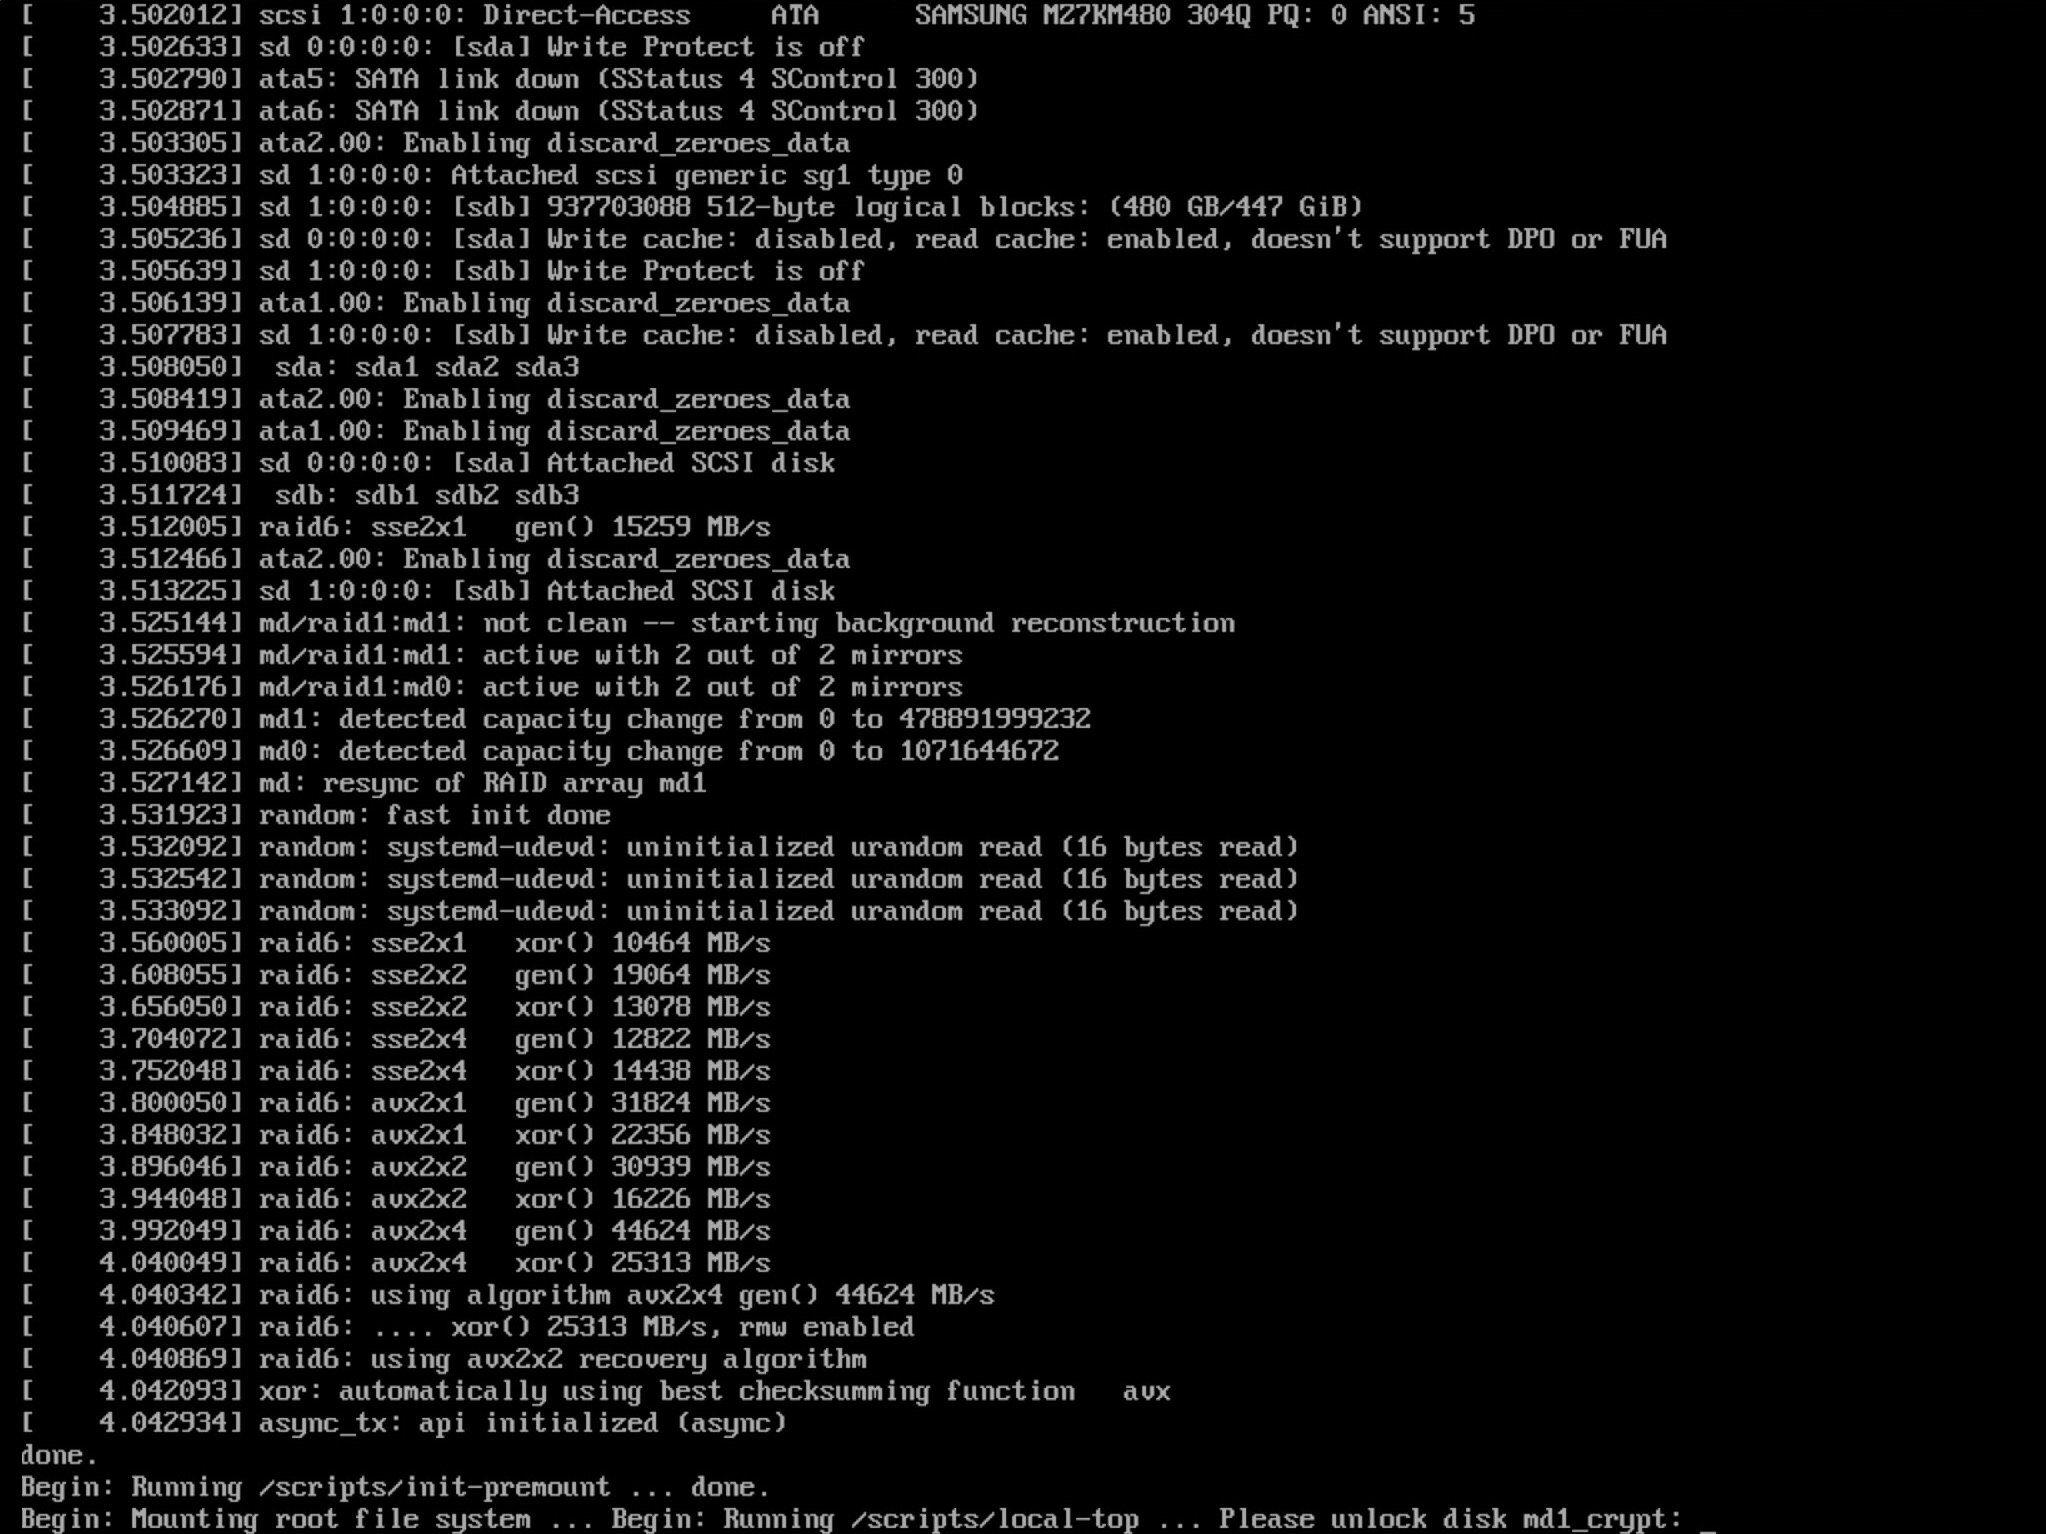
When you see this prompt “Please unlock disk md1_crypt” you can enter your encryption password and finally enter your machine:
Wow, you did it! I bet this was a very long process. I hope everything went well and if you run into issues, please use askubuntu.com to figure out what is going wrong. I also found the search engine on help.ubuntu.com very helpful.
I created this guide by recording my screen while installing the server. When done I took screenshots of every important screen and cropped them to remove the noise around it. It took me almost a full day, but I’m happy to make encryption a bit easier for the world. Let me know if there are errors in this guide, happy to fix those.
Read more
I used the resources below to install my server:
- help.ubuntu.com/…/advanced-installation.html
- askubuntu.com/…/unable-to-install-grub-in-dev-sda-when-installing-grub
- askubuntu.com/…/how-do-i-install-grub-on-a-raid-system-installation
- help.ubuntu.com/search.html
- askubuntu.com/…/grub-install-fails-on-fresh-18-04-alternate-server-raid-1-installation
- askubuntu.com/…/how-do-i-install-grub-on-a-raid-system-installation
- askubuntu.com/…/install-ubuntu-18-04-desktop-with-raid-1-and-lvm-on-machine-with-uefi-bios (UEFI)
- askubuntu.com/…/why-encrypt-the-swap-partition
- askubuntu.com/…/is-swap-area-required-can-we-install-ubuntu-without-a-swap-area
- serverfault.com/…/is-it-possible-and-wise-to-put-the-grub-bios-partition-on-a-software-raid
- unix.stackexchange.com/…/booting-off-raided-2gb-drives-btrfs-handling-bios-boot-partition
- ubuntu.com/server/docs/installation-advanced
- askubuntu.com/…/ubuntu-server-16-04-1-software-raid10-44tb-boot-issues
- askubuntu.com/…/what-filesystem-should-boot-be
- servethehome.com/installing-ubuntu-server-software-raid-1
- smarthomebeginner.com/ubuntu-server-partition-scheme-guide
Thanks for reading, I hope it did help you a bit.
Happy coding! – Found a mistake or a typo? Please submit a PR to my GitHub-repo.